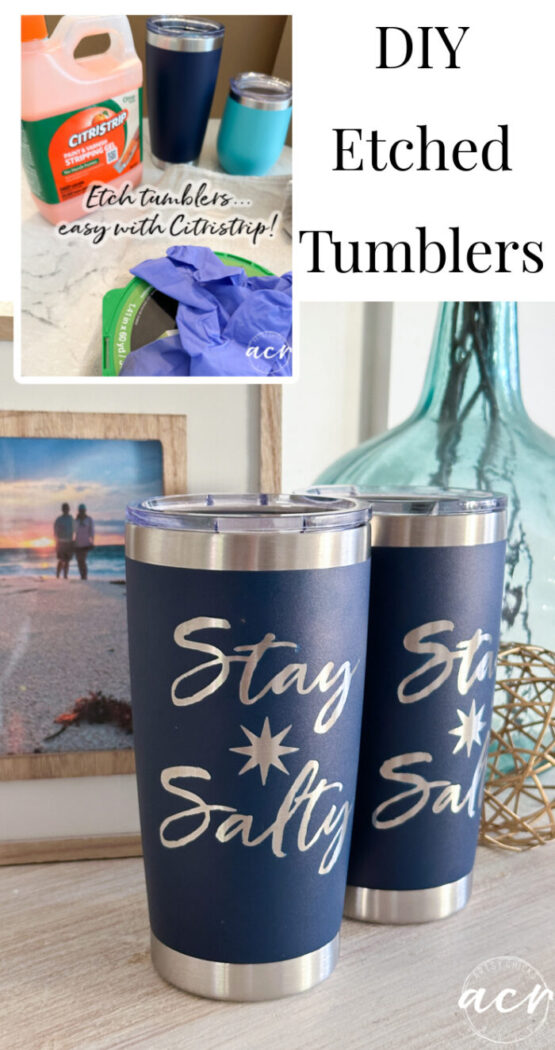
DIY Etched Tumblers with Citristrip
Easy DIY etched tumblers with Citristrip! Create your own personalized tumblers with this simple process!
Hello friends, and happy Friday! It’s almost March, which means changing the clocks (yippee!) and hopefully warmer weather (we’ve had some, yay). March is a weird month though! It could go either way. I’m so ready for spring.
We are still working on a little (big??) refresh of our beach condo so I’ve been working on that. In fact, today’s project is for the condo. I did a simple DIY and thought I’d share it with you all.
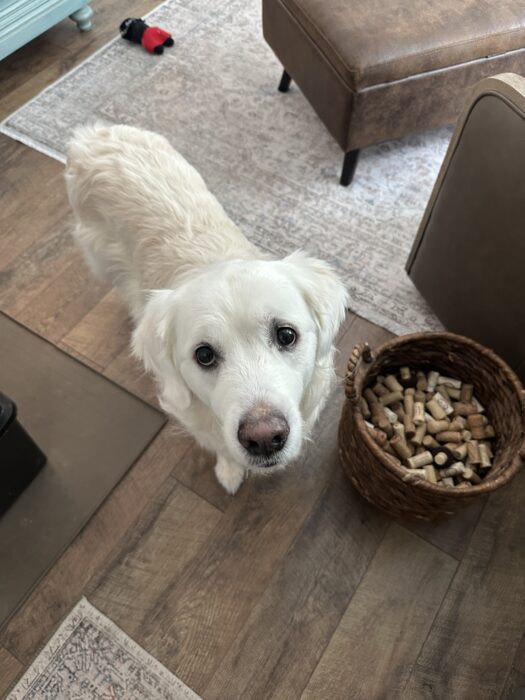
Also, today is our Ryder boy’s birthday! Happy birthday, sweet boy. Nine years old, can you believe it??
DIY Etched Tumblers with Citristrip
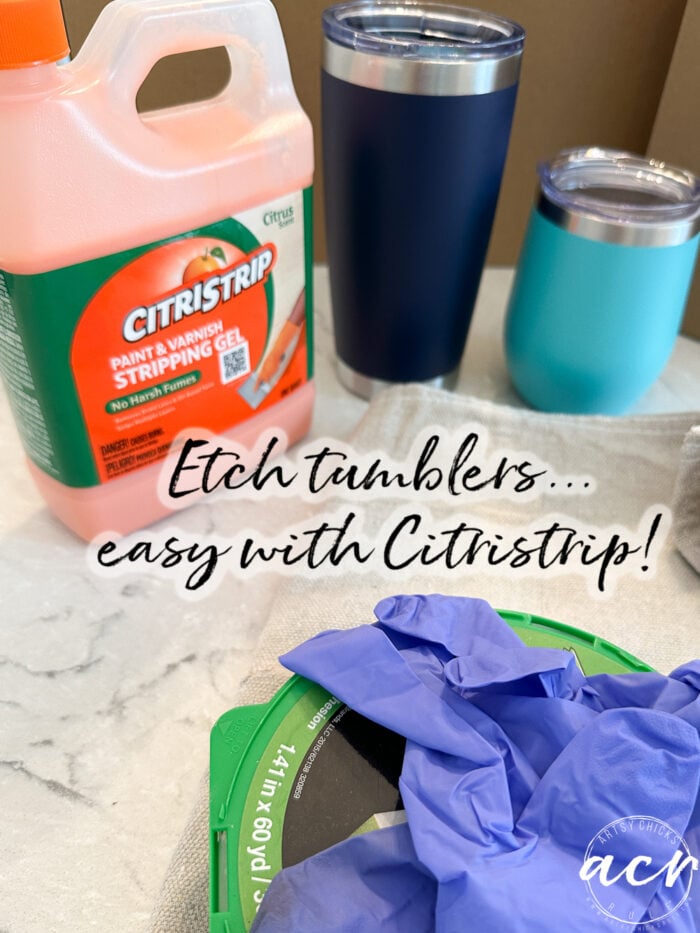
This is what you’ll need.
Gloves, tape, Citristrip, and a flexible sticker stencil. (which I created on my Silhouette) (eye protection is a good idea too)
MATERIALS LIST
- Citristrip
- Gloves
- Tape (Frog Tape is my favorite)
- Safety Glasses
- Silhouette or similar
- Transfer Tape
- Vinyl (this is permanent vinyl, you can use regular too)
Prefer to shop on Etsy? I have an Etsy shop also, here!
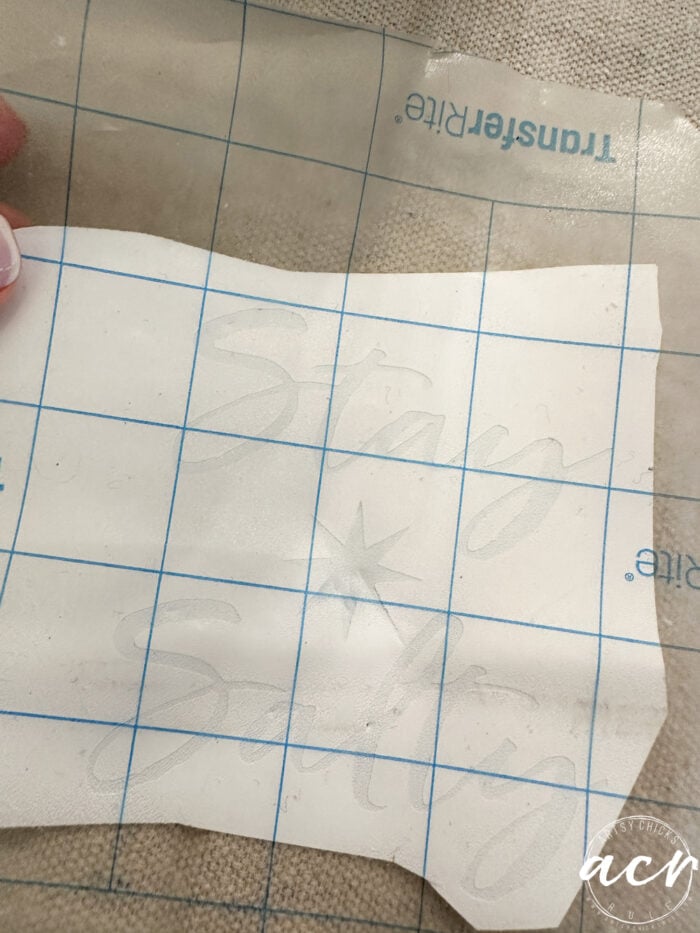
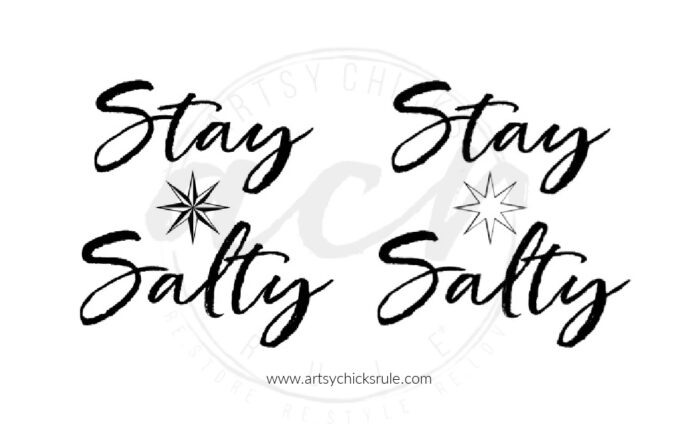
I first designed the “Stay Salty” on my computer and then cut it out on my Silhouette. I have a tutorial for how to cut out your own designs on Silhouette machines here… “How To Import Your Own Designs Into Silhouette”
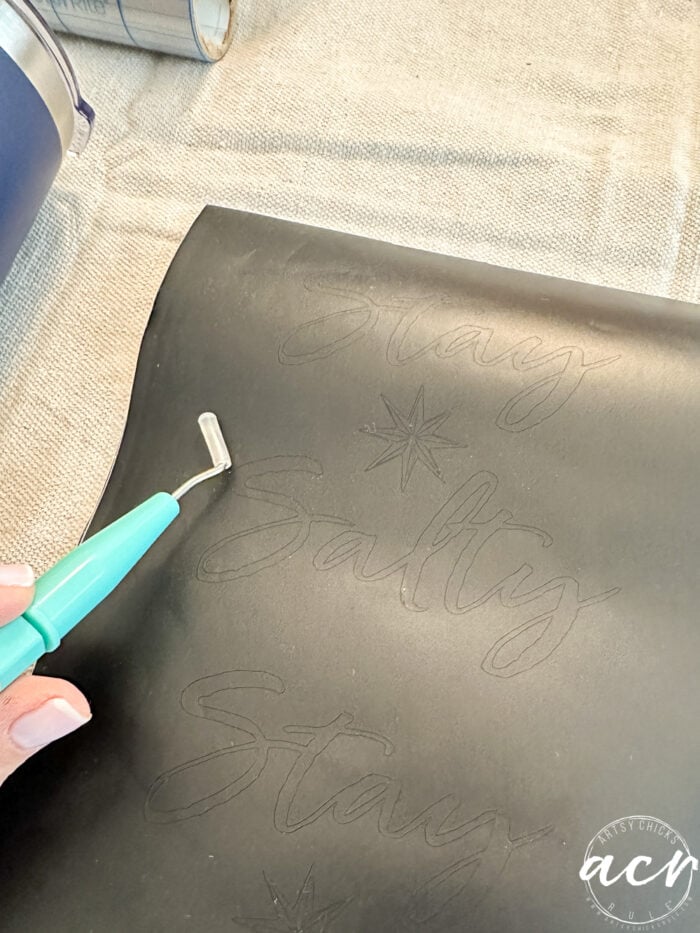
Then I used the pick tool to pull out the cut areas to create a stencil.
The pieces of the compass rose were very small and were being a pain in the you know what! So I just pulled them all out and used the outline only.
Apply the transfer tape and then attach it to the tumbler.
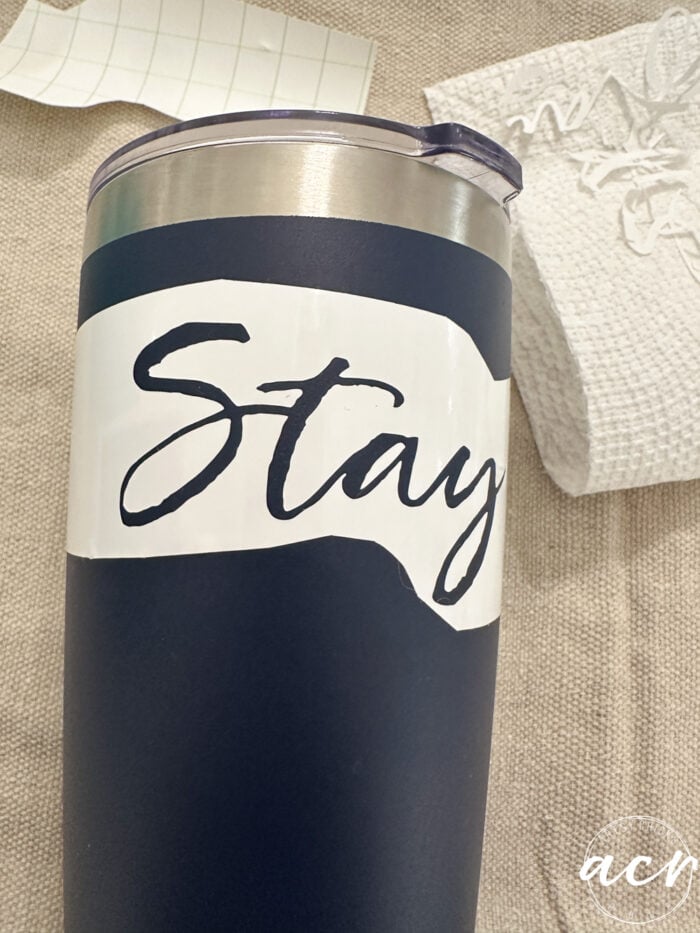
Ha!! Sounds so simple!! But tumblers are round and it kept being “gappy” around the letters. And I need it to not be gappy so the Citristrip won’t seep under the vinyl.
So I ended up cutting it out to make a smaller piece of vinyl making it less likely to gap.
Which then meant I had to tape it all up where I put it back together. But hey, no gaps! Yay!
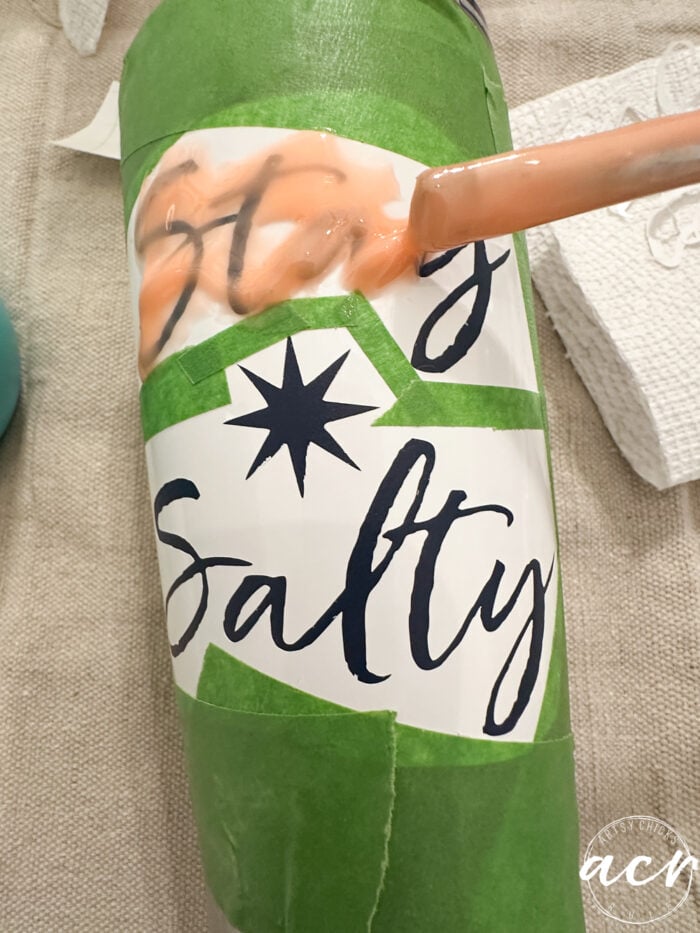
Next, you’ll apply the Citristrip to the stenciled area of the tumbler.
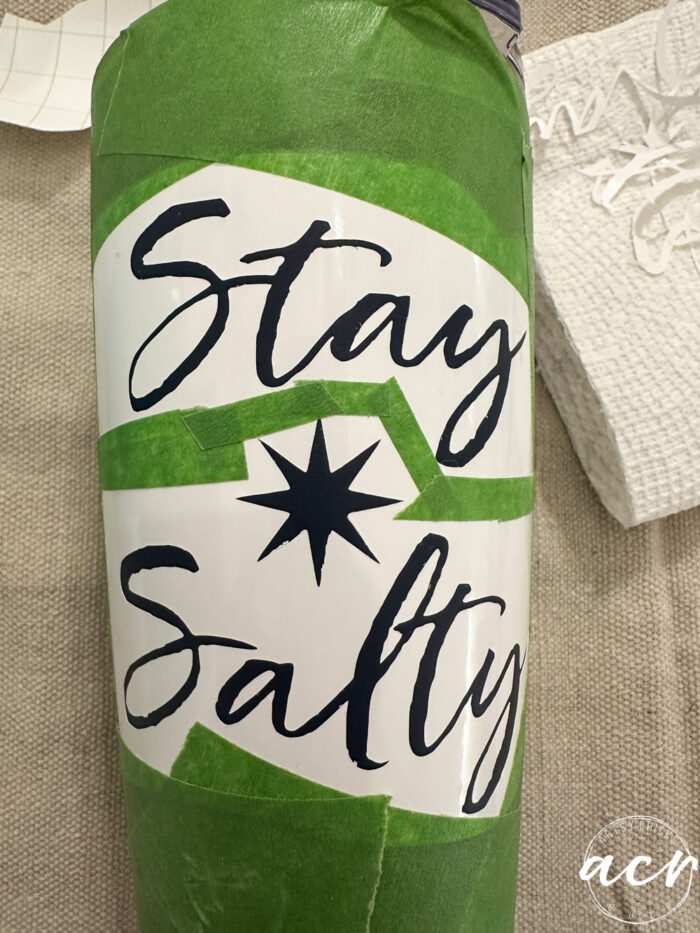
For the second one I did, instead of cutting it apart as I did above, I simply cut closely around the design so there’d be less to “curve” around the tumbler which cut its desire to gap as well.
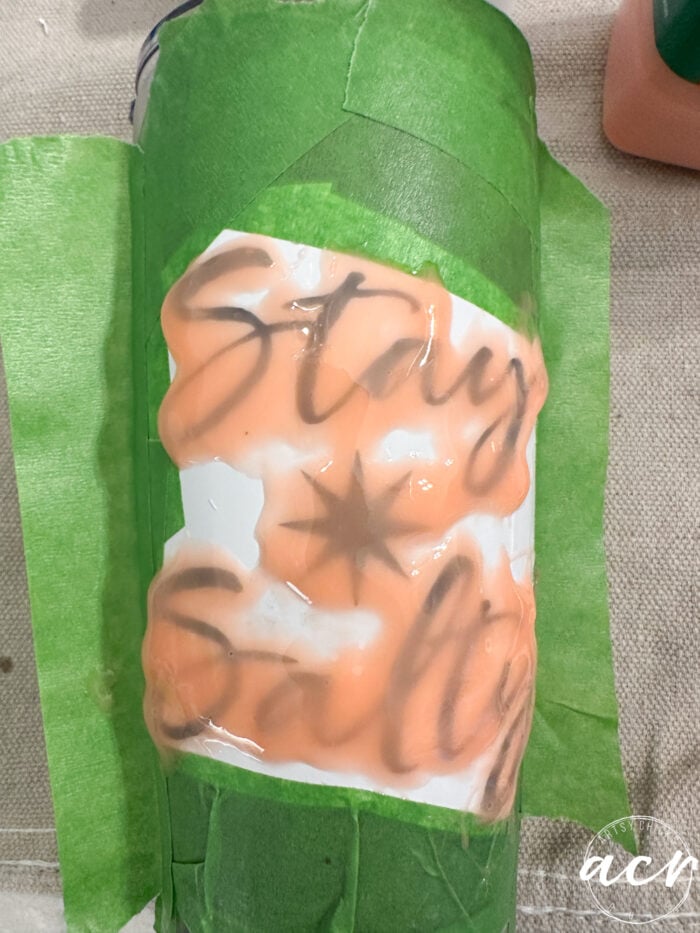
The tape “wings” I did on both tumblers I did. That caught any of the Citristrip running down the sides. I didn’t want to mess up the rest of the tumbler with that so this worked well.
The first time, I let it sit for about an hour. The second one I let sit about 2. They removed about the same. (I tested if it was ready by using the pick tool to see if I could easily scrape to remove the blue color.
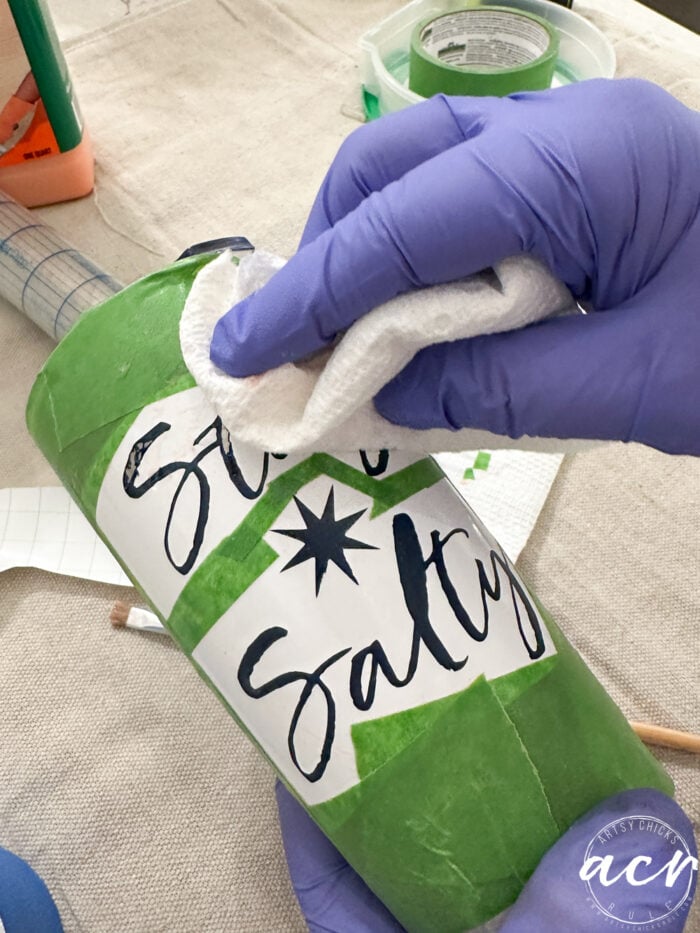
You’ll want to wipe away the excess Citristrip before removing the tape and vinyl.
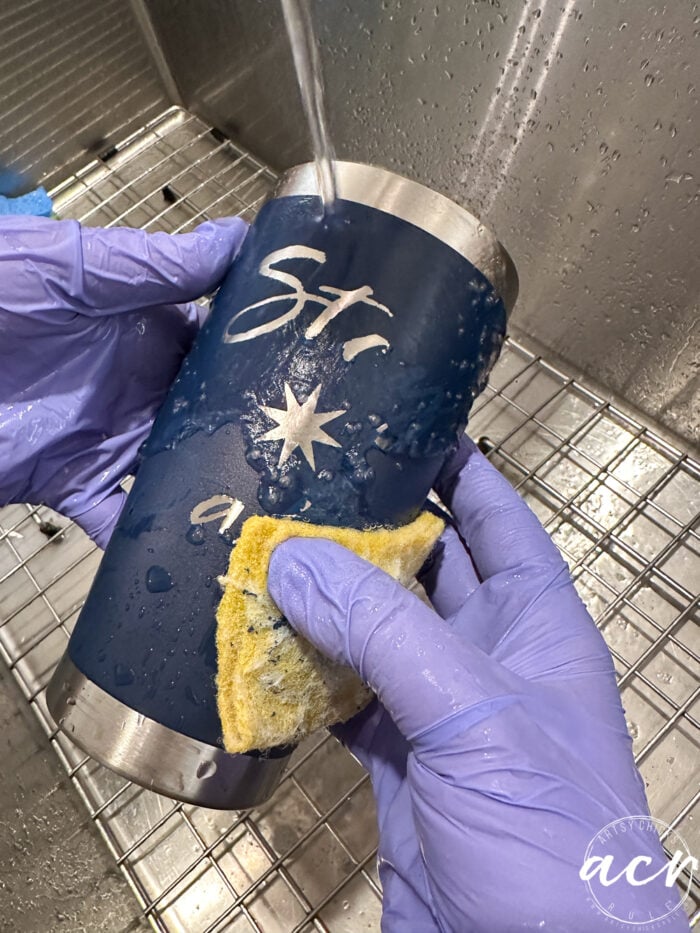
I ran it underwater and used a scrubby (the king that won’t scratch the tumbler) to remove the loose blue areas.
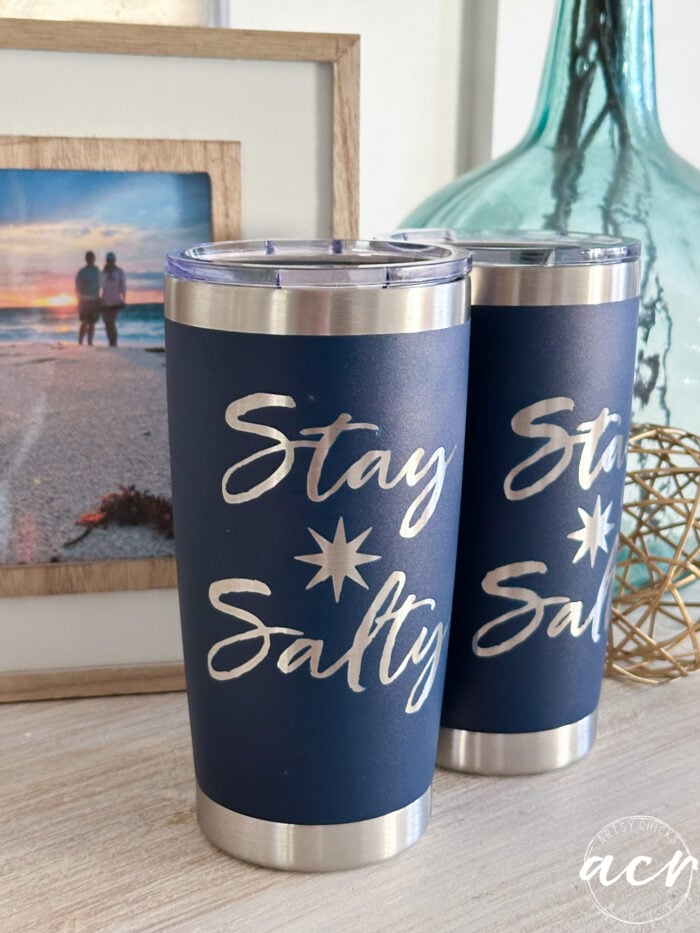
This would be a perfect idea for a personalized gift. I’m using them for guests in our beach condo.
I’ll also be making coffee mugs too but doing a completely different DIY on those.
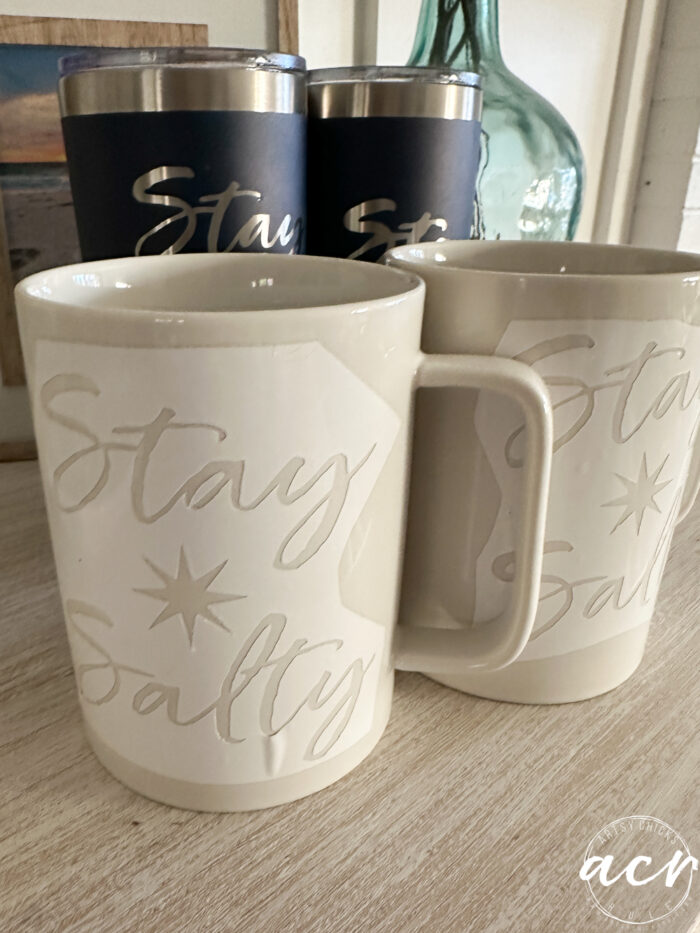
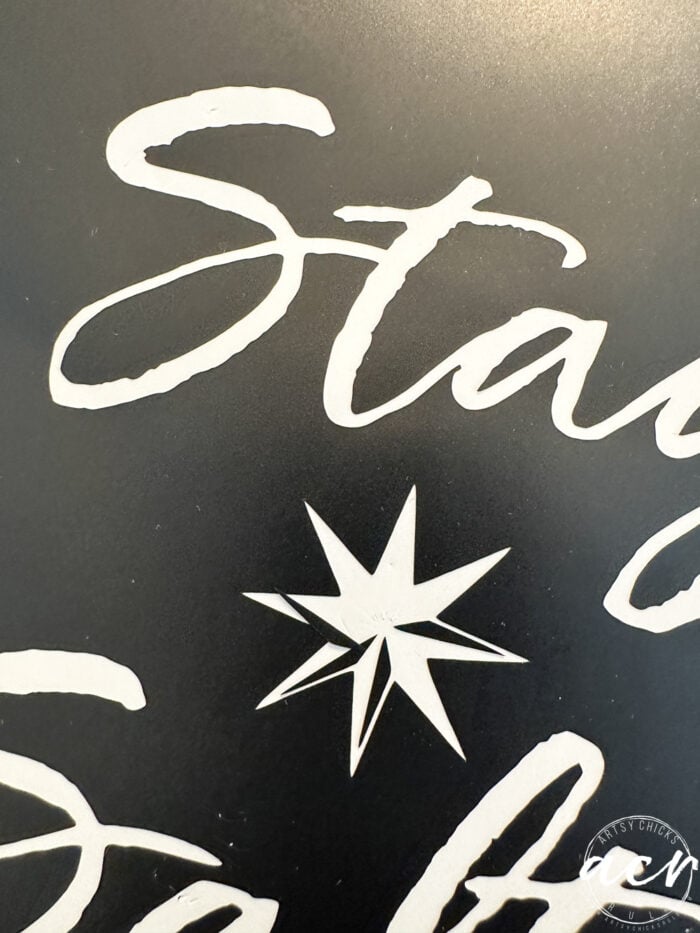
I will share that too once I’ve done them. (oh, and see the “t” in “salty” above? That’s the gappy I’m referring to) I’ll probably cut a little closer around the lettering to relieve that gap.
Like the graphic? You can find it in my Printables Library.
I actually uploaded both of these so you can use whichever you like!

All of my graphics are free to my subscribers. Not a subscriber yet? No worries, you can become one right here. >> Welcome!
Then hop on over here to download! >> Download printables
So, this is a fairly simple DIY! Yes, you’ll need either a Cricut or Silhouette machine or a friend with one. Or you could possibly purchase designs that are ready to use. But once you have those, all you need is a little Citristrip and you’ve got a customized tumbler!
Have a wonderful weekend, friends!
xoxo


")
")


Happy Birthday, Ryder! A round of doggie biscuits for everyone! 🎂
PS Cute project!
Yes!! :) Thank you so much, Gayle! xo
Thanks for the great idea. And very happy birthday to Ryder. Hope he and Piper get to celebrate in his favorite way!
Looks great! I had no idea you could do that!
Thanks, Cyndi! I know, works well, right?!
Love it! Happy Birthday to Ryder, such a beautiful pup. Hope he is doing well to, cherish every minute with your fur babies!!
Thank you so much! He’s doing great and yes, absolutely! :) xo
Happy Birthday Ryder; such a handsome boy! I hope you get lots of presents from mom & dad & share some with your buddy Piper! Wishing you many more healthy years! Thank you Nancy for the cute idea! I cannot wait to try it!
Thank you, Linda! He might have gotten a little spoiled! ;) Happy weekend to you! xoxo
Happy Birthday sweet Ryder! My Gracie is 9 also.
Thank you, Cheryl!! Happy Birthday to Gracie! xoxo
That really looks great on the tumblers, great job and what a nice thing to do for guests.
Thank you, Mary! :) xo
Oh that is so clever. And happy bday, sweet Ryder!
Thanks, Michele!! :) xo