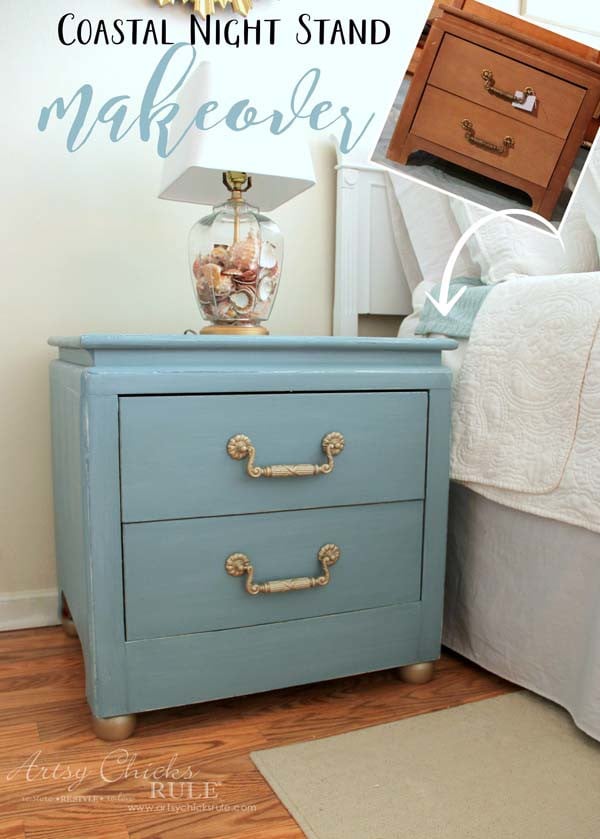
Today I’m sharing (finally, I painted them in Oct!) my Coastal Turquoise Night Stands I gave a makeover to.
The night stands that I previously gave a makeover to.
These actually……
Do you remember them??
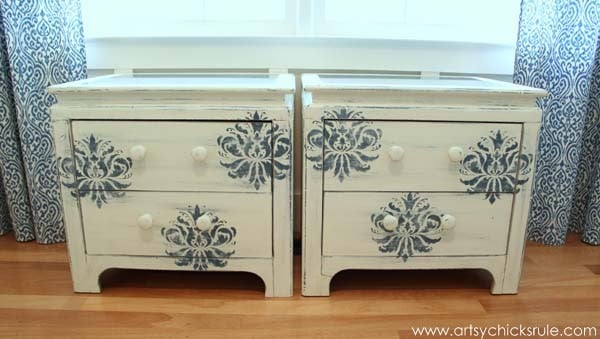
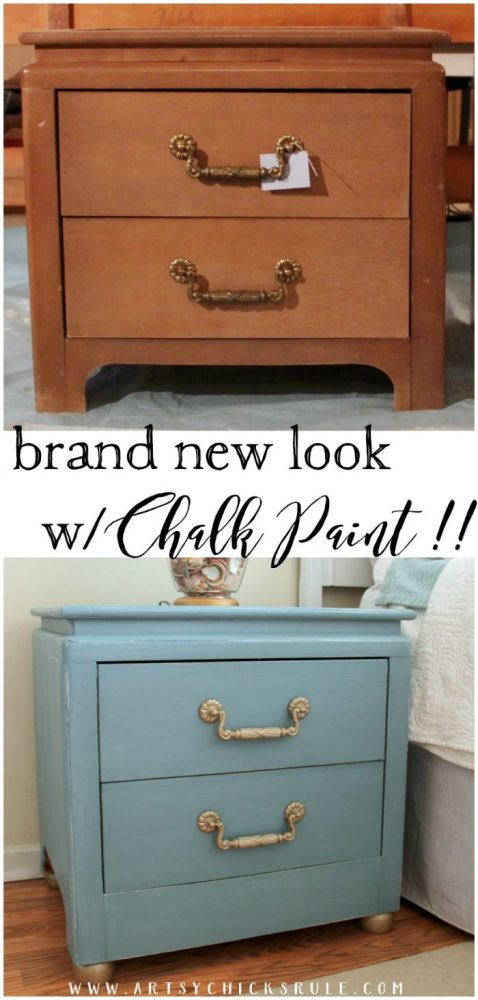
Here is the first rendition….
Cute but didn’t really match what I had going on in my master bedroom.
So I painted them… again! Yep. Because Turquoise Night Stands would match. ;)
I know y’all have already caught a glimpse of them in this post here… DIY Beach Painting.
But I’m sharing all the details today. :) I’ll be sharing affiliate links to some of the products I used for your convenience. Full disclosure details are here.
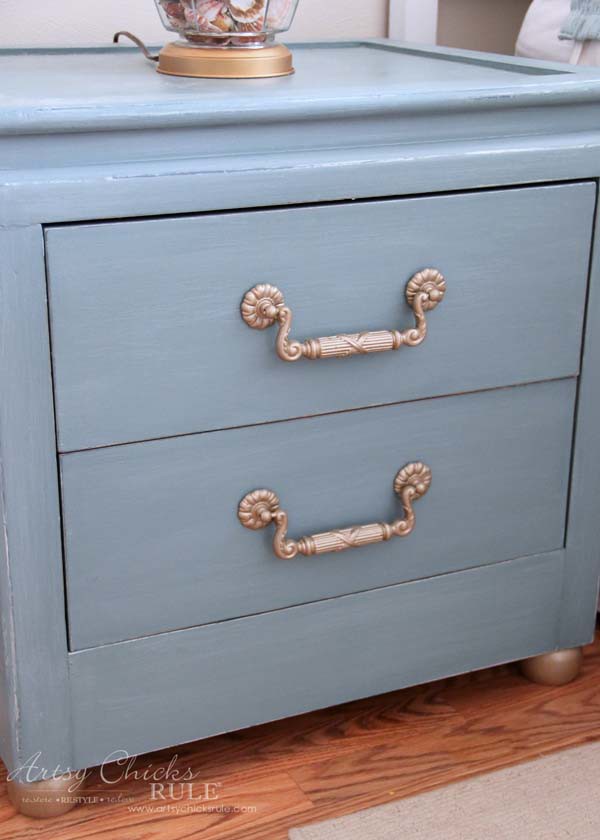
I used Chalk Paint® by Annie Sloan.
I can’t give you exact measurements but I used Aubusson Blue, Pure White and Duck Egg to come up with this pretty, soft turquoise color.
I already had it mixed up and just added to it.
BUT I am confident you could take those three colors and mix something very similar.
Now, one of the main reasons I gave these another makeover is this….
….absolutely no luck whatsoever finding another set I liked. (or another set at all!)
It’s slim pickings out there these days! So many people are redoing furniture, either the prices are way too high OR there is just nothing to choose from.
So…I figured I’d use what I already had.
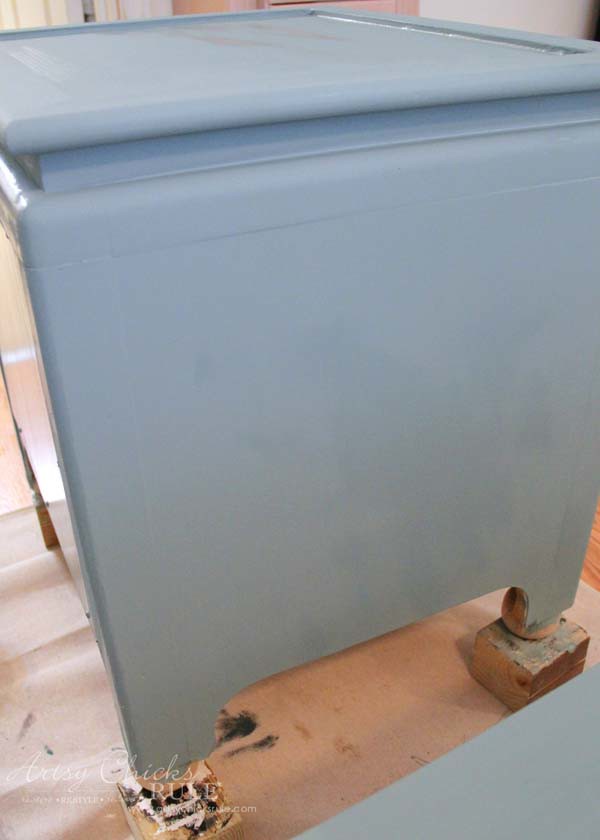
I popped out that bottom curved piece of wood and had my husband cut a straight board to fit.
I wanted to move away from that original look.
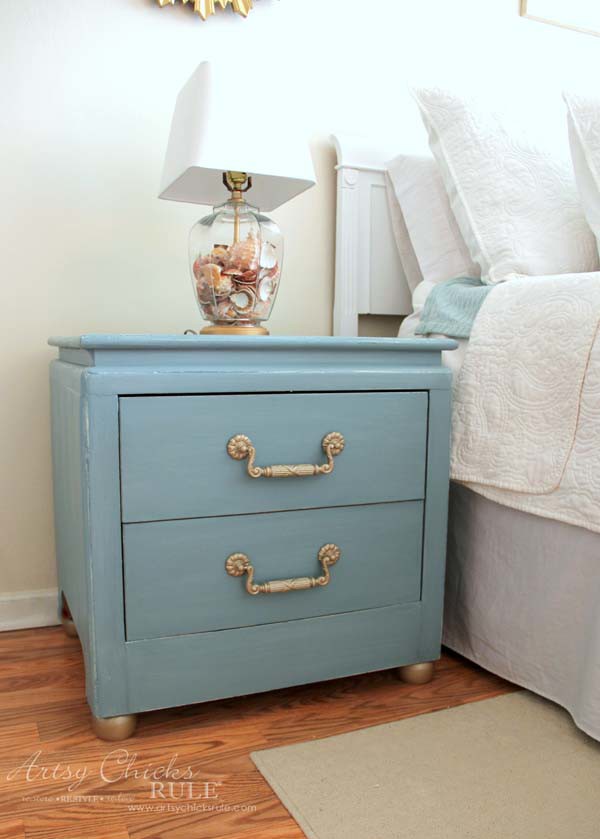
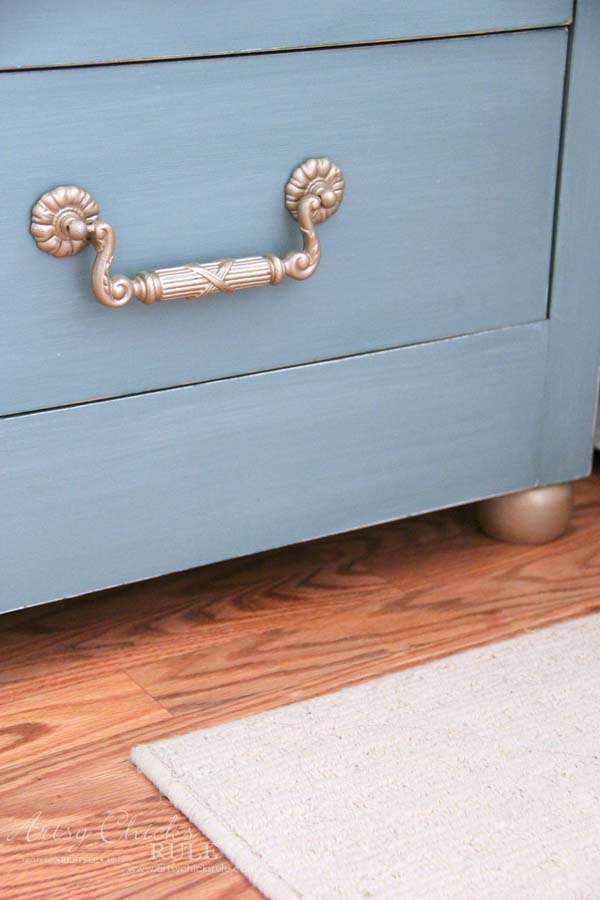
I also wanted them a bit taller so I added ball feet….
How fun! :)
What a difference those 2 very simple things made, right??
I think it changed the look of them completely.
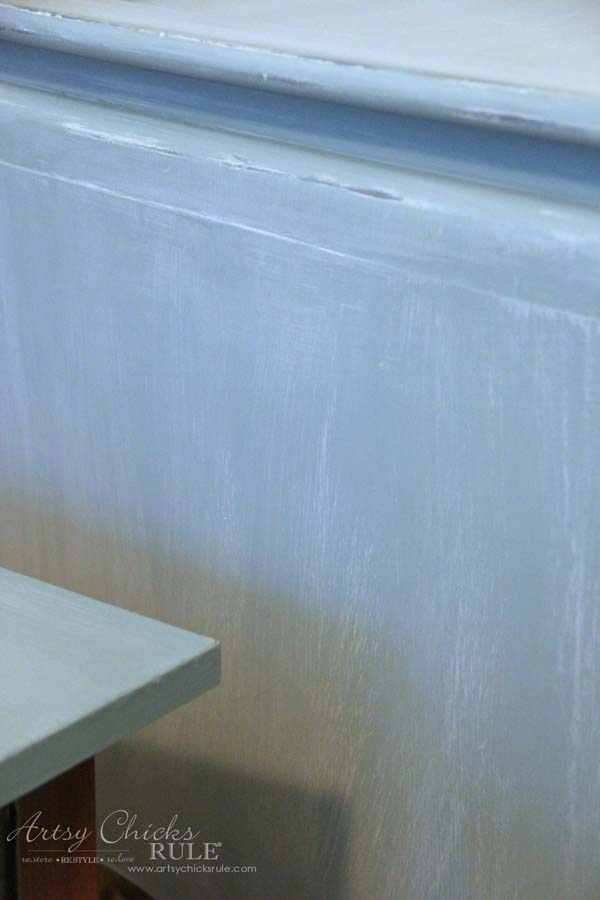
So, I got to repainting….
…which is always a breeze with Chalk Paint.
Once they were painted and dry, I sealed them with the GF top coat.
Once that was dry, I gave them a quick “dry brush” with the GF glaze.
It gave them the “coastal look” I was after.
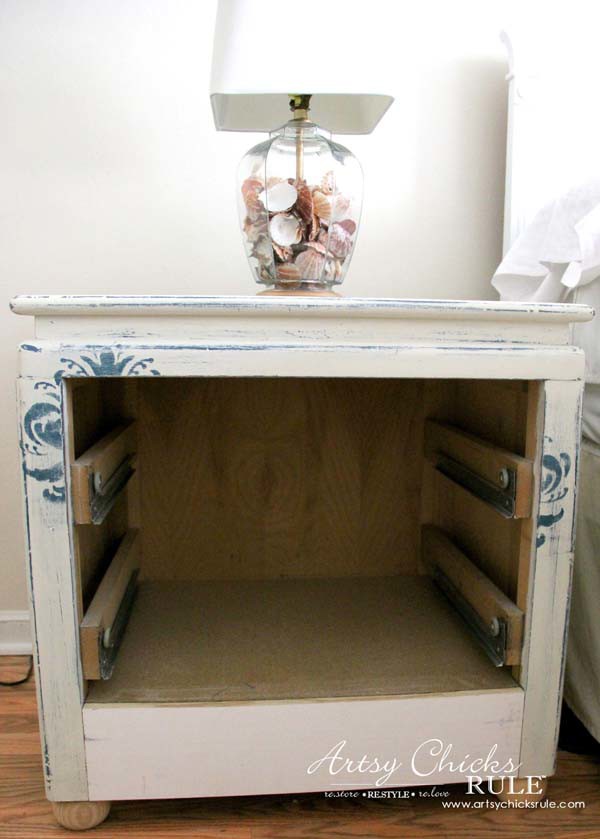
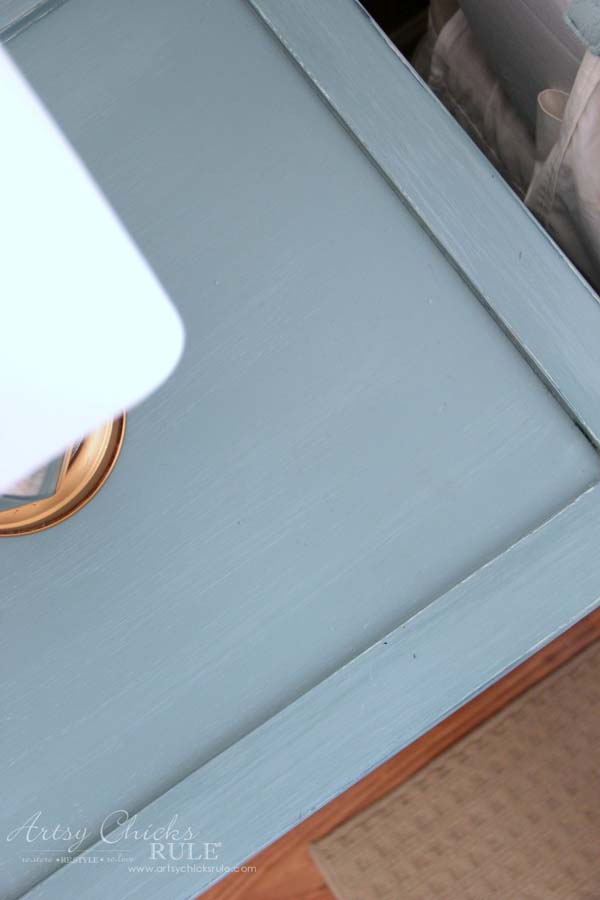
And if you’ll remember, the tops previously had a glass insert.
I actually sort of hated that insert!
So I decided to just leave them out.
I had considered adding some decoupage or something but in the end, just decided to keep it simple.
I also gave all the edges a slight distress.
This gave me the more relaxed feel I was after.
Plus I just love seeing the dark Aubusson Blue and the Pure White peeking through from the first paint job.
On the first rendition, I decided to use different knobs.
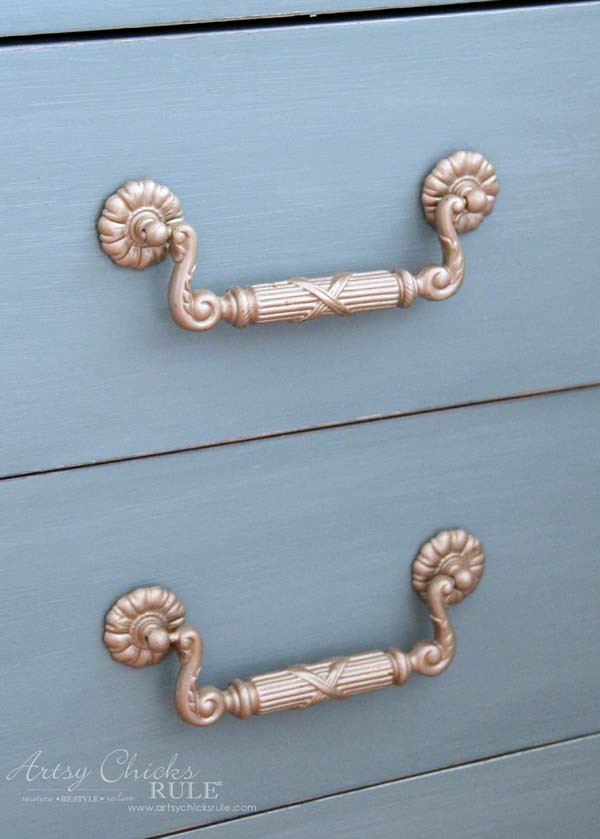
For this go round, I decided to use the original hardware…painted.
I keep everything so I had those stashed away since the previous makeover.
I used Rustoleum Champagne Mist. It’s a lovely, soft gold color.
Sorry I don’t have a link for that one but you should be able to find it at the big box stores.
Isn’t it pretty?
I used it on those ball feet too.
See that tiny bit of color popping through where I distressed?
Love that.
I’m soooo happy with these now!
I’m actually really glad I didn’t get rid of them.
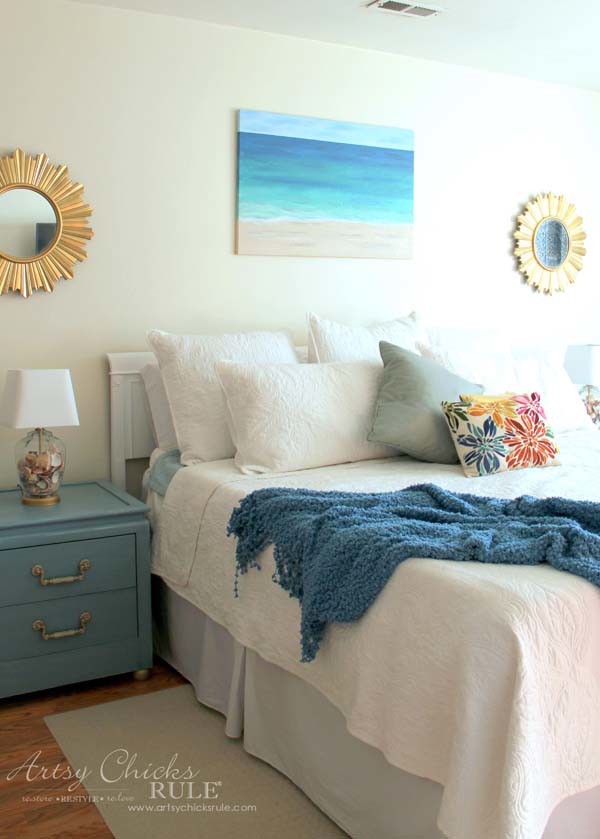
I just love these turquoise night stands!
They look perfect in the room.
You can see details on the thrifty lamps (pictured above) I gave a makeover too here…. Thrifty Coastal Lamp Makeover.
And we are still trying to decide what to do about the headboard.
We may build a super simple one but….it’s one more project added to our already long list.
So we’ll have to see how that plays out! ;)
Alright y’all….
My “take away” message for today is this…..
It doesn’t matter if you’ve already given something a makeover, if it’s not working for you, give it another one!
Paint, paint, paint, modify, whatever! ;)
It’s always the thriftier way, anyway! And that’s always a good thing when trying to decorate on a budget.
PIN these Turquoise Night Stands for later!
Happy painting and decorating friends!! Be on the lookout for our DIY Tutorial for the Bookcase wall!
It’s coming soon. :)
But first, stay tuned later this week for this little pretty! :)
A few years ago my neighbor painted an end section of her kitchen cabinet with black chalk paint and used it for a grocery shopping reminder. Now I see that chalk paint comes in a lot of colors. Will you
please tell me the reasons for using this type paint versus others? I love different crafts and
remodeling, presently trying my hand at fairly gardens but, seeing all the beautiful results of chalk paint
has me interest
Oh yes, chalkboard paint. The is Chalk Paint. It’s not the exact same as chalkboard paint but has similar properties. I’m guessing that’s why it’s named as such.
No prep, or little prep is one reason a lot of people like to use it. It’s easy to use and creates a nice finish too. (a bit different than latex paint)
Give it a try!! :)
xo
Nancy
These are really pretty..love the color.
Why not just slipcover the headboard until you have time to do what you’d really like? it would be relaxed if you used informal fabric – drop cloth? Paint and fabric…they always work wonders. A really great video on youtube is “Christopher Lowell…city studio apartment makeover”…he does a terrific headboard slipcover with faux ties down the side. Good luck on whatever you decide!
“Oh no!” I mean “Oh yes!” I see another makeover in my future! Those ball feet are just what I need on my nightstands! And those handles are great! Thanks again Nancy for another inspirational nudge.
They look so nice in your bedroom. I really like how you changed out the piece of wood in the front of each nightstand and also how you added the bun feet. The original handles painted are perfect. Love!
They look gorgeous Nancy! Love the color but the ball feet and hardware painted in that pretty champagne color are perfect? Adding the spray paint to my shopping list.
Thanks so much for the very nice compliment! :) I’ve linked to it directly in the post (under Materials List). So if you click the link, it will take you directly to each product listed. :)
Nancy
Thanks! The ball feet came from Lowe’s or The Home Depot, I don’t remember which one. (but it was definitely one of them)
They are screwed in quite tightly. You could also apply a little glue before screwing them in.
Nancy
Want to be inspired, learn new skills, discover all the tricks to furniture makeovers, creating new out of the old and more? You'll also receive my FREE ebook "Creating Fabulous Finishes" PLUS access to my private Printables Resource Library, too!
Sign up to get the Weekly Newsletter! Our emails include an unsubscribe link and you may opt-out at any time. Your information will *never* be shared or sold to a 3rd party.


")

")
")
")

")
")
")

oh so pretty! Great job!
thank you Shawnna! :)
Hi Nancy~
The color brings out all the blues in your room.
Beautiful ~
Happy Easter
Rose
Thank you Rose! I really do love the color of them now!! :)
Happy Easter to you!
xoxo
Nancy
So pretty!
Thank you so much! :)
Nancy
This looks so dreamy, thanks you great instructions.xxx
Thank you! :) They feel dreamy to me now!!
xo
Nancy
A few years ago my neighbor painted an end section of her kitchen cabinet with black chalk paint and used it for a grocery shopping reminder. Now I see that chalk paint comes in a lot of colors. Will you
please tell me the reasons for using this type paint versus others? I love different crafts and
remodeling, presently trying my hand at fairly gardens but, seeing all the beautiful results of chalk paint
has me interest
Oh yes, chalkboard paint. The is Chalk Paint. It’s not the exact same as chalkboard paint but has similar properties. I’m guessing that’s why it’s named as such.
No prep, or little prep is one reason a lot of people like to use it. It’s easy to use and creates a nice finish too. (a bit different than latex paint)
Give it a try!! :)
xo
Nancy
Oh yes now they are perfect in your bedroom! I love the feet and the original hardware is gorgeous in that color! XO
Thank you !! These suit me and my bedroom much better than the first makeover!! :)
xo
Nancy
These are really pretty..love the color.
Why not just slipcover the headboard until you have time to do what you’d really like? it would be relaxed if you used informal fabric – drop cloth? Paint and fabric…they always work wonders. A really great video on youtube is “Christopher Lowell…city studio apartment makeover”…he does a terrific headboard slipcover with faux ties down the side. Good luck on whatever you decide!
Thanks Karen! This is one of my favorite colors. :)
That’s a neat idea about the headboard, I’ll take a look!!
xo
Nancy
“Oh no!” I mean “Oh yes!” I see another makeover in my future! Those ball feet are just what I need on my nightstands! And those handles are great! Thanks again Nancy for another inspirational nudge.
Haha!! Yay!! :)
Yes, do it!! Go right on over to The Home Depot (or was it Lowe’s?) grab some of those feet and do it!
Have fun!!
xo
Nancy
I really like your latest makeover. And the original knobs look great. They really pop against the new color. Great job!
Thank you! I’m so glad I kept those handles. They really do look great again with it! Back where they belong.
xo
Nancy
I love the second edition!!!!
Thanks Linda!! Me too!! :)
xo
Nancy
They look so nice in your bedroom. I really like how you changed out the piece of wood in the front of each nightstand and also how you added the bun feet. The original handles painted are perfect. Love!
Thank you Paula! I’m so very happy with them now! And I didn’t have to spend for new ones, even better! ;)
xo
Nancy
They look gorgeous Nancy! Love the color but the ball feet and hardware painted in that pretty champagne color are perfect? Adding the spray paint to my shopping list.
Thank you Marie! :)
xo
Nancy
Love it! Your site is the best. Where can I purchase the GF glaze? Thanks.
Hi Ellie,
Thanks so much for the very nice compliment! :) I’ve linked to it directly in the post (under Materials List). So if you click the link, it will take you directly to each product listed. :)
Nancy
Very nice. Where did you find the ball feet? Are they glued on or screwed in?
Thanks! The ball feet came from Lowe’s or The Home Depot, I don’t remember which one. (but it was definitely one of them)
They are screwed in quite tightly. You could also apply a little glue before screwing them in.
Nancy
I love them even more now! Love that soft gold with the turquoise…it looks perfect. :)
-andi
Thanks Andi!! :)
Nancy