Simple, Inexpensive & Easy DIY Beaded Mirrors
I have been a mirror making fool!
I have made ummm….4.
Like this DIY Beaded Mirror below…

Ok, well that’s not that many but I did make them all in a few days time.
I love mirrors. But darn, they are so expensive!
I have found two cool ways to make my own.
One is with a super cool spray called “Looking Glass”….
I found this really cute little frame and thought it would be an adorable mirror. I’m doing a gallery picture wall in my Family Room and want to mix in a mirror or two. This will be perfect.
Except it was glass, not a mirror.
So I sprayed the back of the glass with Looking Glass spray paint.
It takes several coats.
This spray paint does give it a mirror-like finish but not like a commercial one.
It is more of an antique looking mirror which I kinda like!
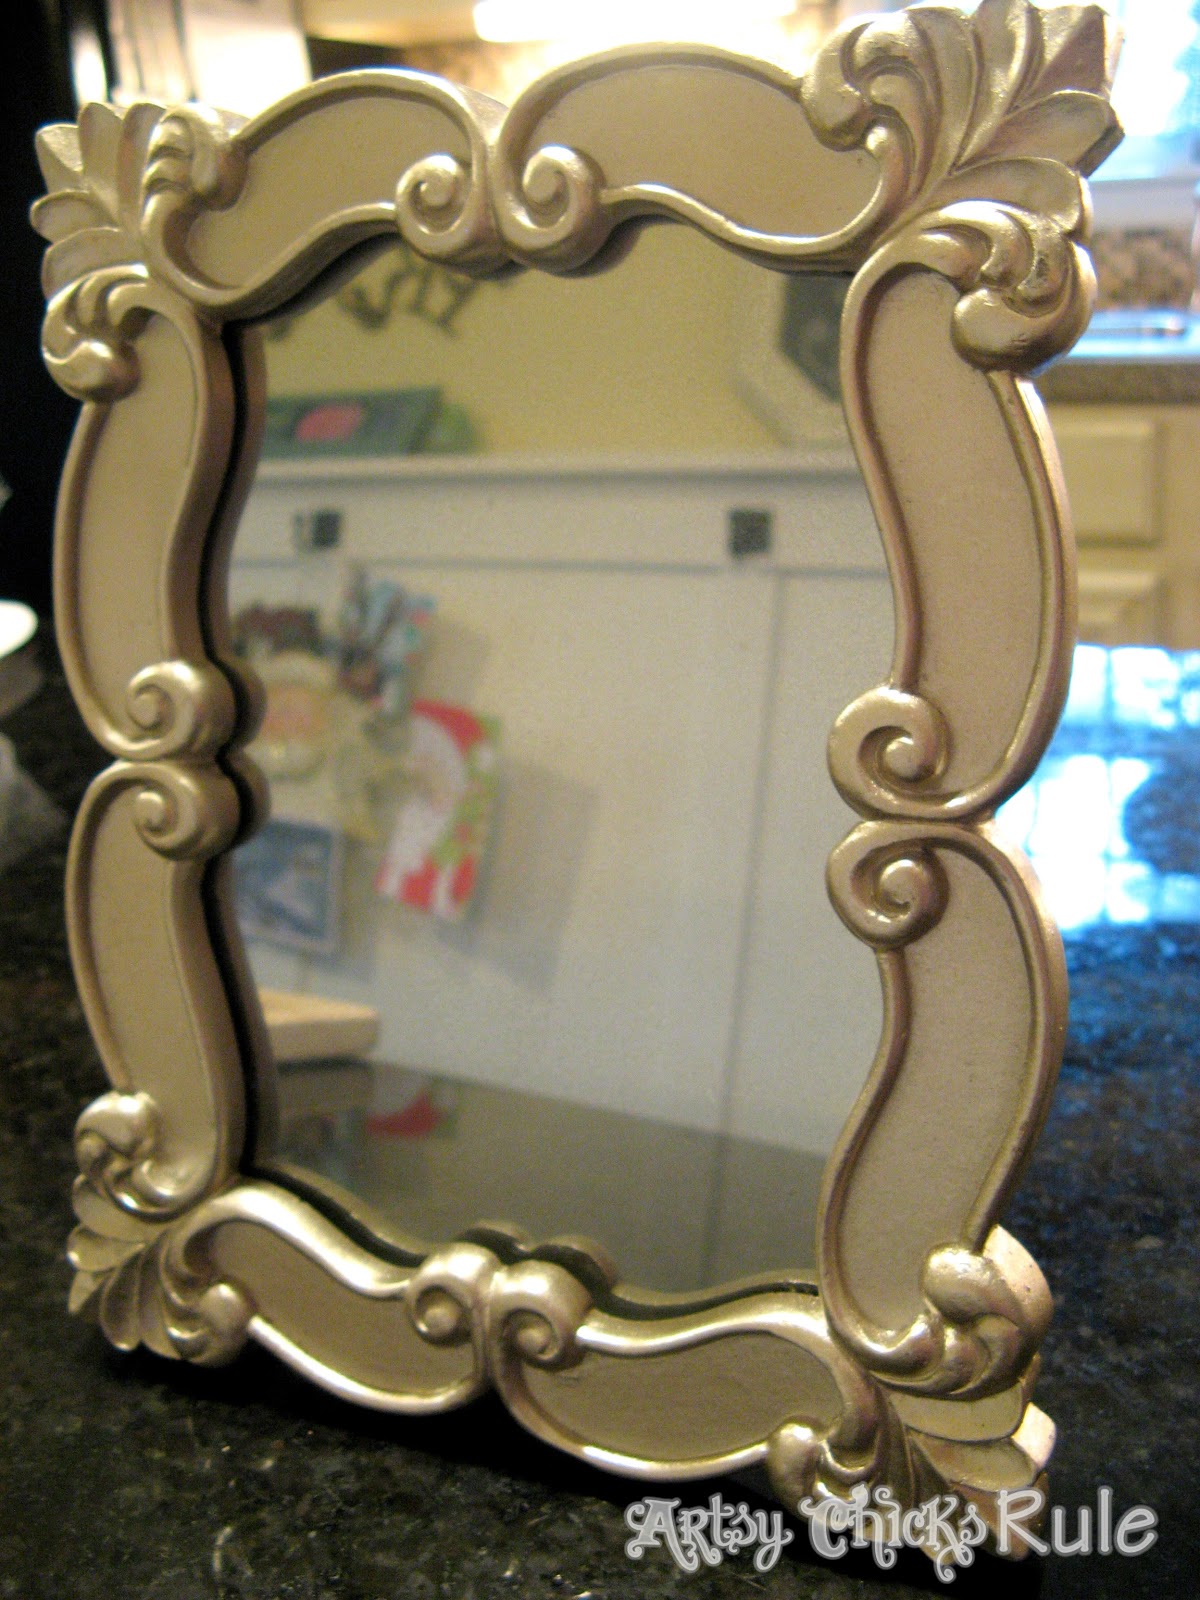
Isn’t it cool? I just love the effect.
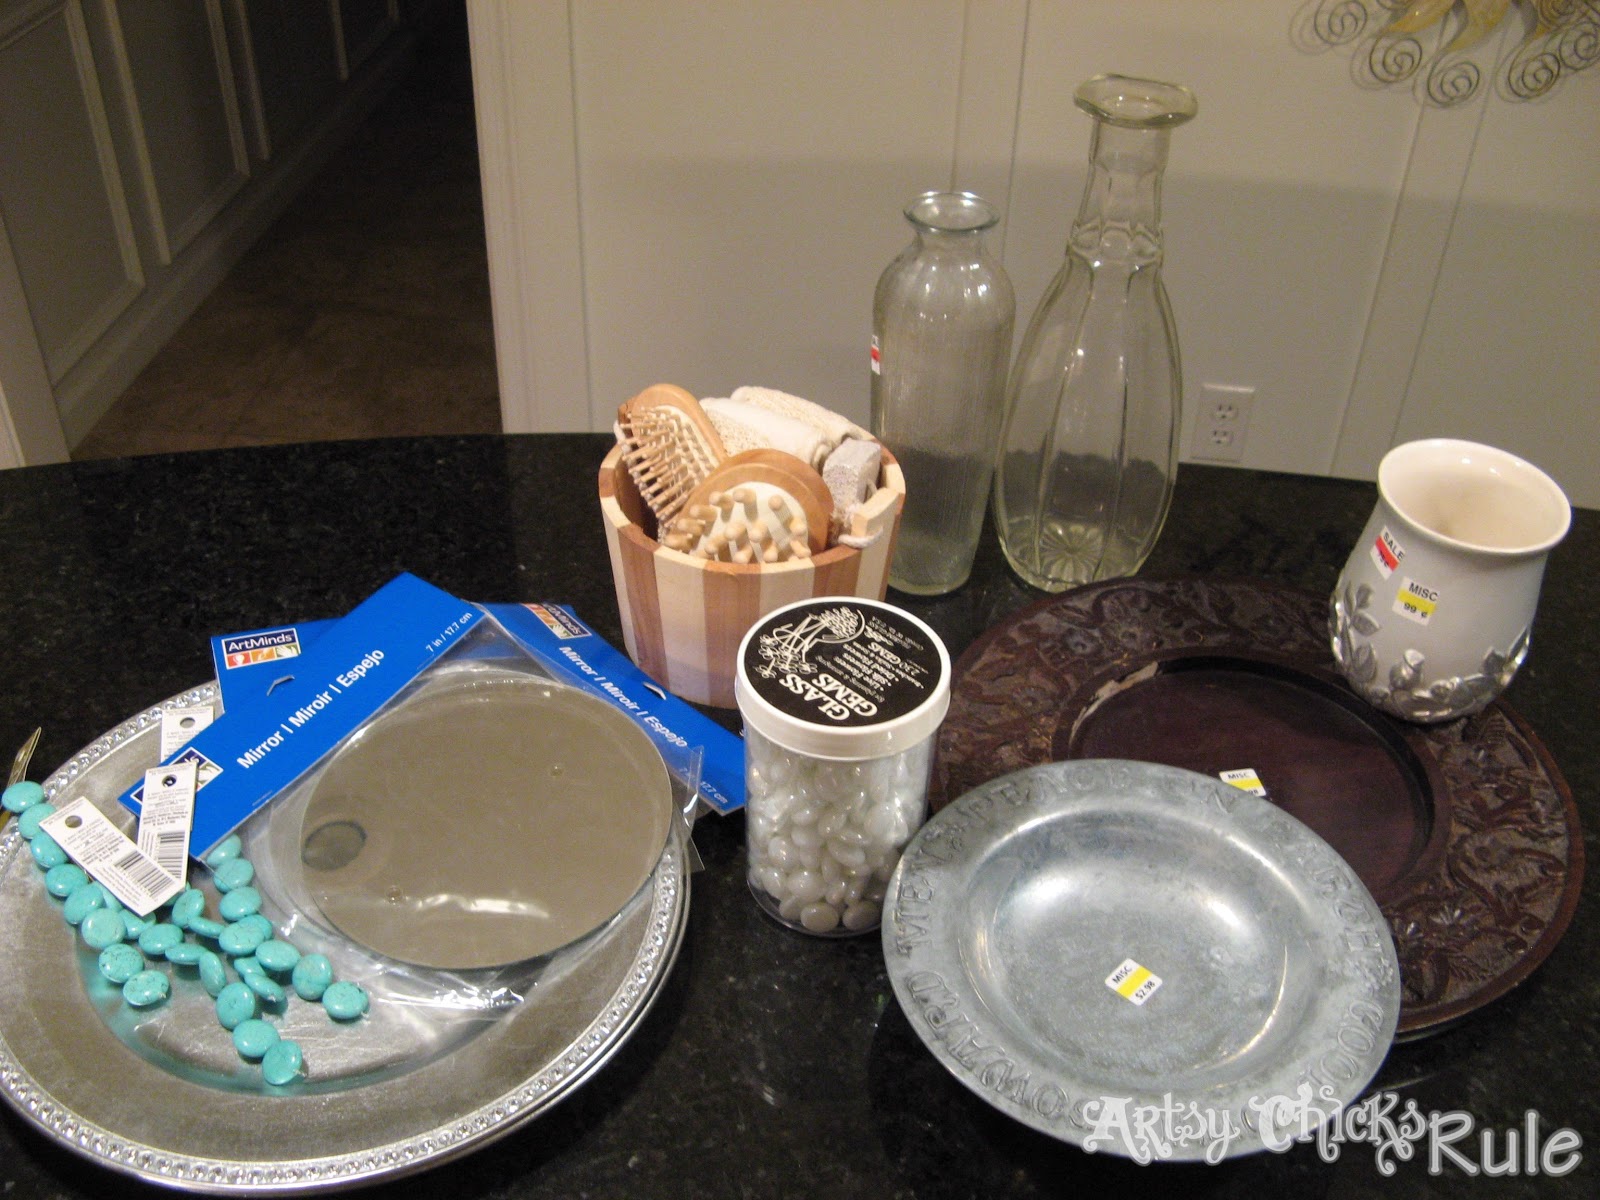
The other way is one I saw at Sand & Sisal using charger plates.
You can find those everywhere! They’re fairly inexpensive at most places.
And I find one at the thrift store almost every time I go.
The round mirror blanks can be found at Michael’s or any other craft type store most likely.
I found some recently at Michael’s for 50% off (they are only like $5.00 full price, so that’s cheap!)
The silver ones came from Michael’s, the brown one from the thrift store.
And there’s that ugly metal bowl I transformed so beautifully here.
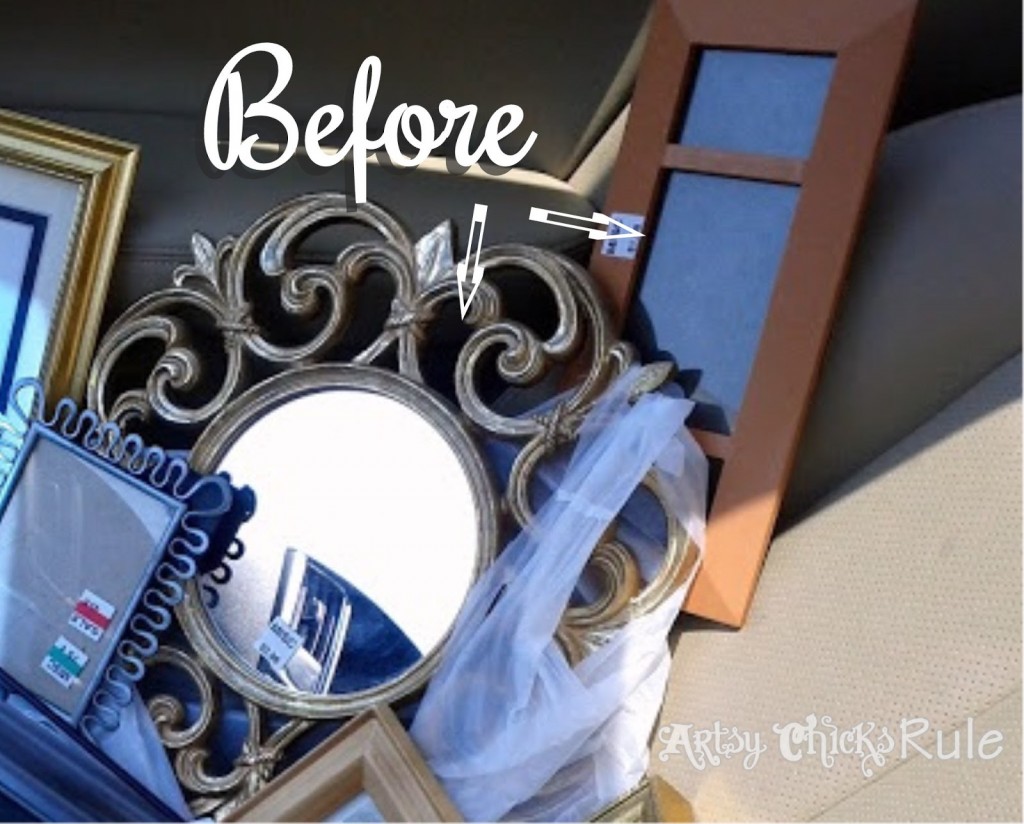
 The first one I made came from Pier One.
It was on sale though!
I’m guessing I didn’t take a before picture…thought I did but I cannot find it!
Oh well, it was black. Plain ole black.
 (I sprayed it with another shade of blue I had first to get in all the nooks and crannies good)
And then I painted it blue. Love these little sample pots of paint….

Since the paint is a matte finish, I sprayed a coat of Minwax Satin Polycrylic over it before I glued the mirror in.
Then I used my hot glue gun to glue the mirror into place.

 All painted and done….but it needed a little pizzazz! So I chose to glue some glass beads on.
You can do anything here…any color, any type, etc!
I chose some clear ones with an iridescent coating.
How gorgeous is that!

And here is what you hang all of these up with….

Command Strips. I LOVE this stuff! Works great! And no nails, hammers or holes!!
How much easier could that be??
So, I pulled out my stash of beads for the two silver charger plates I got from Michael’s.
I glued the mirrors in and then played with the beads a bit until I came up with a design I liked.
For this one I chose white iridescent glass beads,
turquoise-y blue and pink natural beads.
I got the white beads from the thrift store, super cheap,
and the others I had in my old jewelry making stash.


And for this one I chose a more teal turquoise and the white beads….


The last one I did came from the thrift store.
I just sprayed it with my beloved Oil Rubbed Bronze spray paint.
 After that was dry I rubbed a bit of gold over the edges with my fingers, just lightly.
 Glued the mirror in and I was done!

Sooooo easy!!!
And the beaded ones are just so much fun to do!
The possibilities are endless.
You could even cover the whole thing in the glass beads!
How gorgeous and unique would that be?
I might have to try that!
These make fantastic DIY Christmas gifts too!!
Simple, Inexpensive & Easy!
As a matter of fact, a couple of these ARE Christmas gifts.
Do you make homemade Christmas gifts for your loved ones?
I have for many years and it’s somewhat expected at this point!
Be sure to stop in later to see how I created the most budget friendly gallery wall with all this!
UPDATE!! See it now, here!!

(affiliate links, see disclosure here)
Follow along! –> Instagram ~ Facebook ~ Pinterest ~ Bloglovin
")


")
")
")


Thanks! I love those colors together, silver and turquoise.
How clever! I love your mirrors! I would have never thought that they were made out of chargers! So clever! Thank you so much for sharing at the “make it” party!
Jaime from crafty scrappy happy
Thanks so much!
and
Thanks for hosting!
xo
Nancy
Funny. I’m doing a whole wall of thrift store, dollar store, and designed by me mirrors. I’m putting up the final three this week-end and will be posting next week. It’s taken me almost two years but they’re almost done. I’ve used Dollar Tree silver trays, and even a plastic plate. I’ve also used the flat marbles. I’ve loved hunting for them and am going to miss the “hunt”.
Hi Rebecca! I know what you mean about missing the “hunt”! I don’t go as often but I still love to go searching for treasures!
Nancy
You are too good!!!!! I love it! My creative juices are overflowing when I see things like this!!!! How did your family wall work out btw? All I have put up so far is a vinyl quote, and then put a frame around it (funny, it was a frame that had a mirror in it!) – we spray painted it black because I want to do frames on the wall black (spray painting all the ones I had – and boy did we have a lot!!!! ). If you have pics on the site, I’d love to see!
:D Lilli
Hi Lilli!! Ha, thanks so much!! I am going to share that wall soon! (I have a bit before but not in full yet ;)) I have the other gallery wall up my stairs that I did the same exact thing (spray painted all frames to match, oil rubbed bronze) https://www.artsychicksrule.com/2013/01/a-gallery-wallthe-thrifty-way.html
Hope you have a great weekend friend!! xo
Nancy
I’ll be painting this weekend (I hope!). And I really think it’s time I at least get some pics picked out!! But seriously, i’d love to see yours when it’s done. I bought a wood S and am going to paint that (how, I don’t know! lol) And like you, a small mirror etc. You have a wonderful weekend too – i’m sure you’ve been getting the same gorgeous weather we’re having here on Long Island! <3
Hey Lilli!
I was away in Charleston SC all weekend! It was great (although the weather could have been a bit better!)
Hope you had a great one!
Nancy