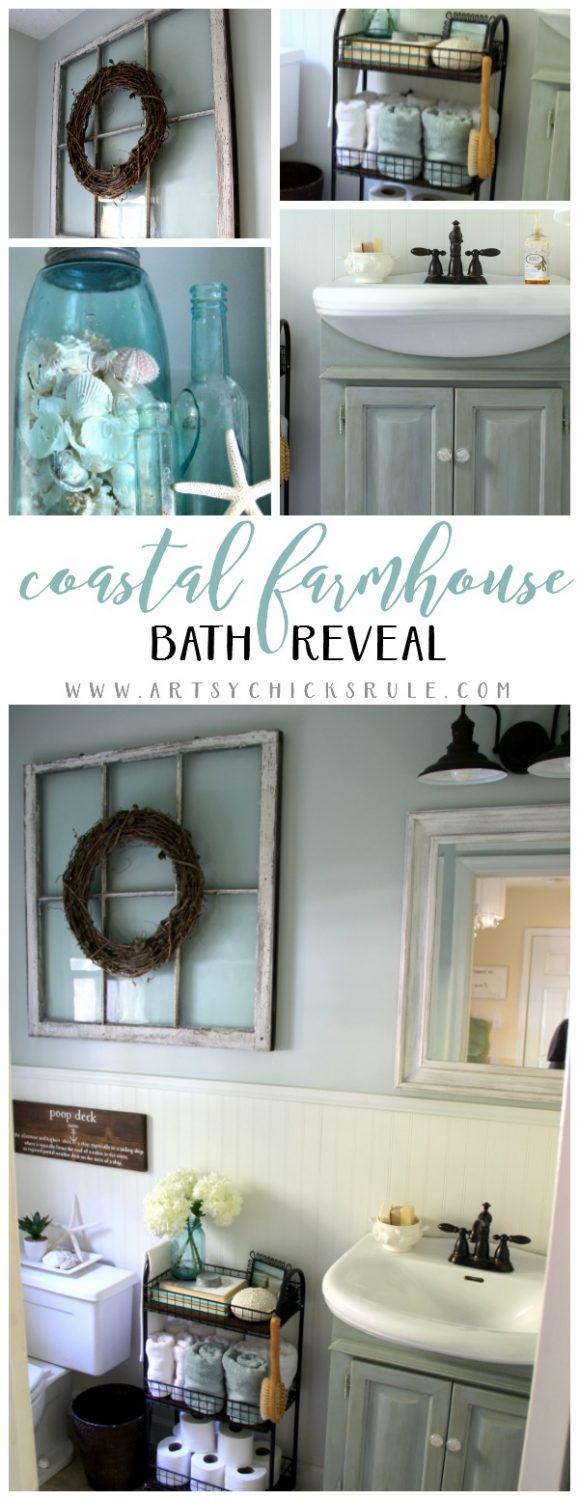
Coastal Farmhouse Bath Reveal (all the makeover details!)
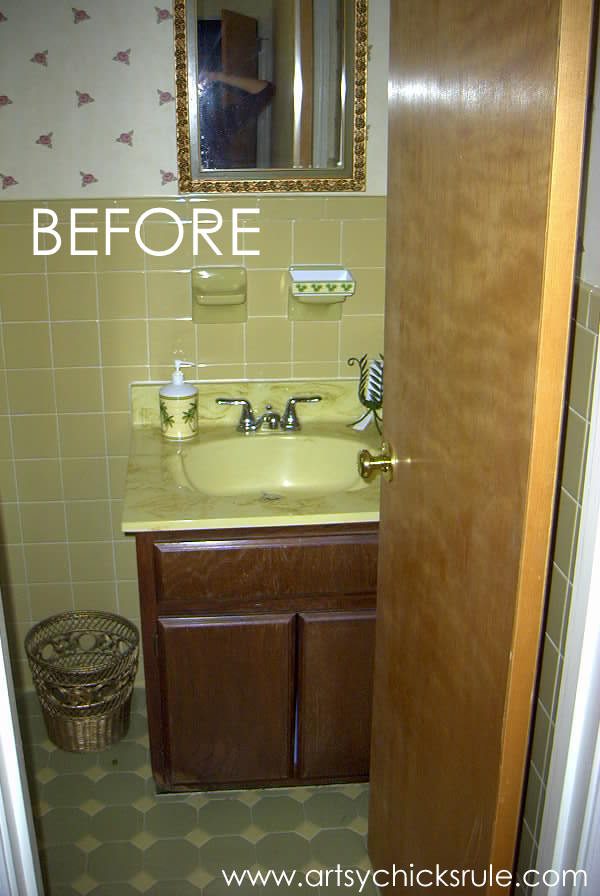
So excited to be sharing our coastal farmhouse bath reveal today….and happy it no longer looks like this! ;)
Hey Friends!
I hope you all had a wonderful Thanksgiving.
I had a great one in Florida for the very first time. :)
My family and some of our extended family met down there to spend the holiday.
If you follow along on Instagram you might have seen bit of it. ;)
I know Christmas and holiday decor is now in full swing but I’ve got to get this Coastal Farmhouse Bath Reveal out of the way first! ;)
I’ve already got this little bath (and my home) all decorated for the holidays.
And again, if you follow along on Instagram, you might have seen a snippet or two of my Christmas decor.
I’ll be sharing the full home tour on the blog next week so stay tuned.
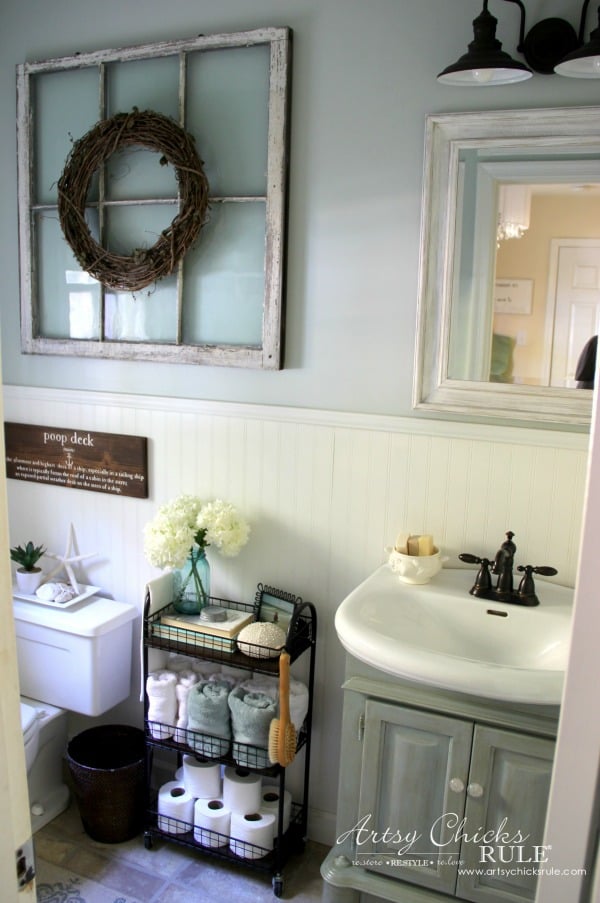
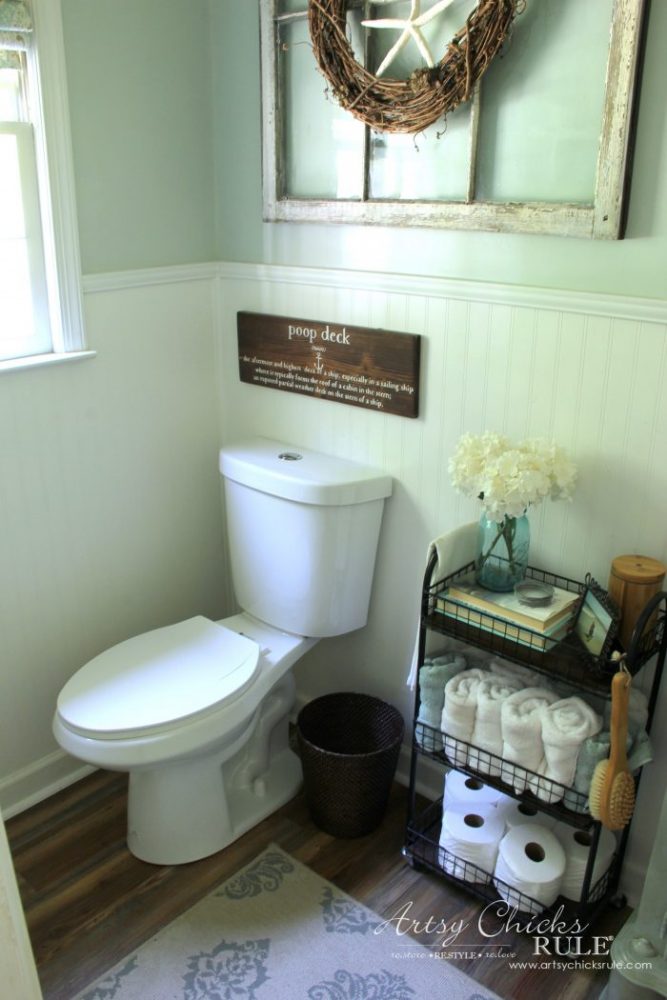
But first, let’s take a look at the full and completely made over …. Coastal Farmhouse Bath.
Here’s a little refresher for ya…
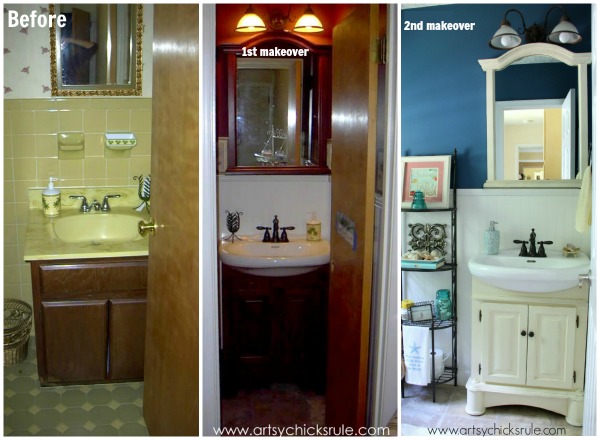
What it looked like when we bought the house, the first makeover and the second makeover.
The second makeover is actually here on the blog. You can find it here >>> Guest Bath Makeover on a Budget
Yep, that was only 2 years ago. What can I say?
I like change.
And, my changes aren’t pricey so why not?
So…quite the differences in all of them, right?
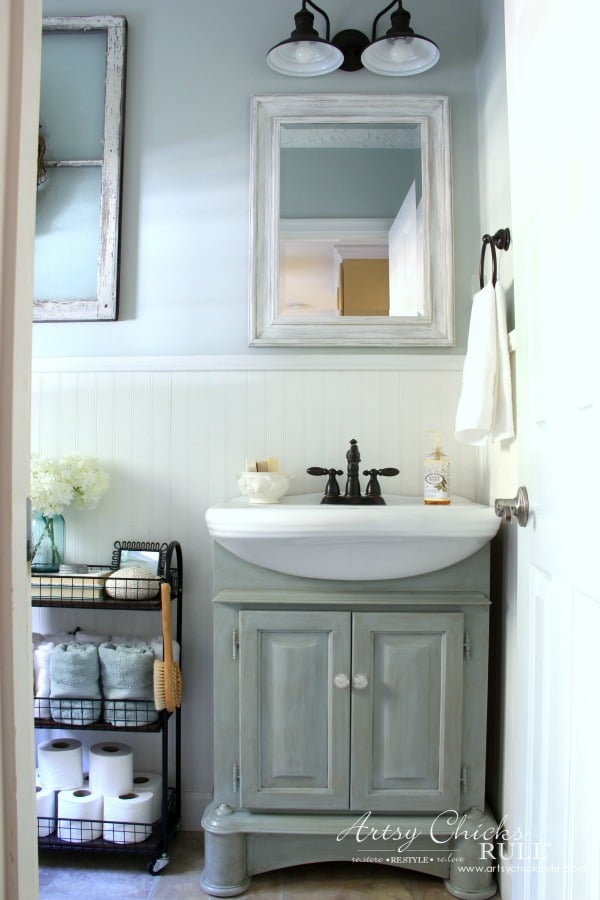
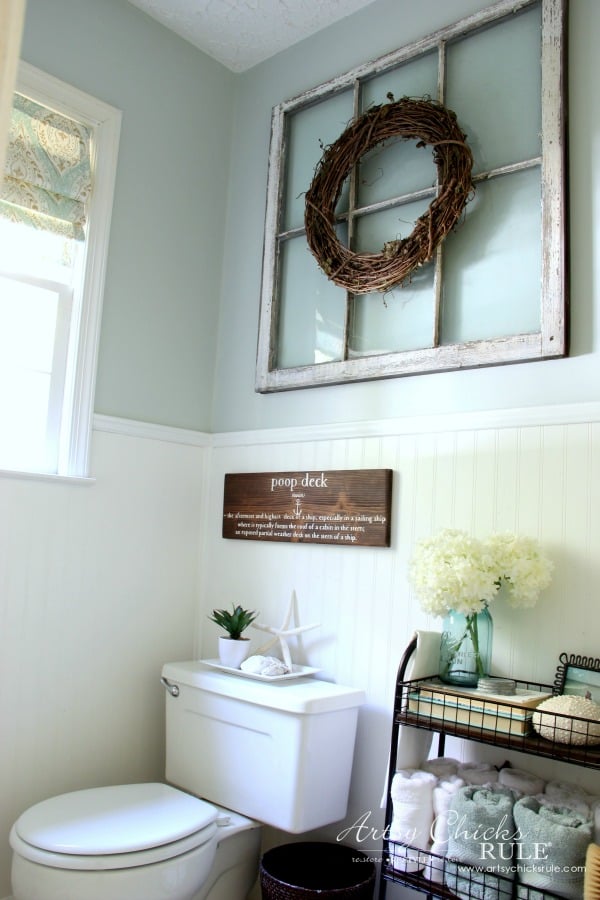
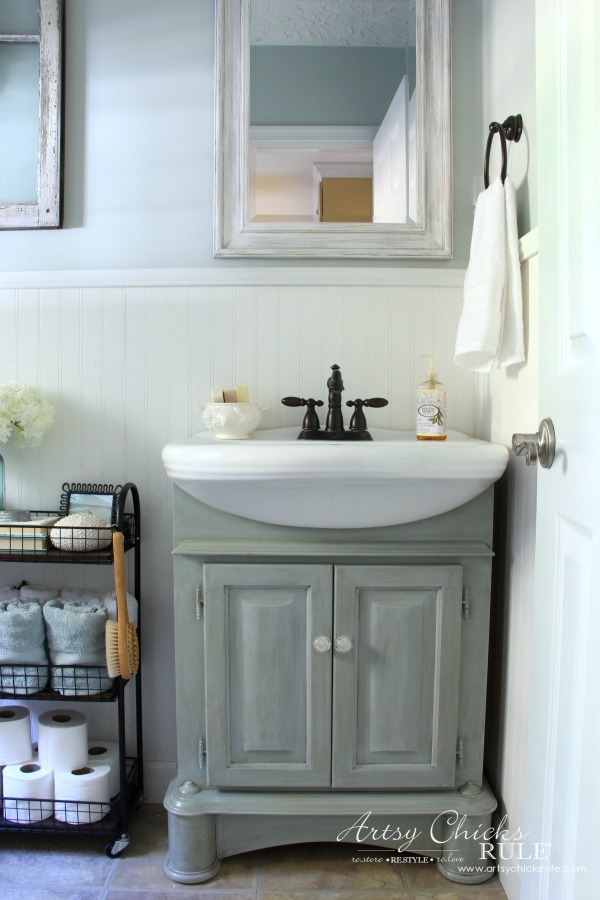
I was ready to open up that small space with a much lighter paint color, Sea Salt by Sherwin Williams.
I love it.
Next, I wanted to give it a more streamlined, casual feel. Less color, more neutral and spa~like.
I think I achieved that. :)
I’m so excited with how it turned out.
It feels so much bigger too. (that’s saying a lot, it’s a tiny room as you’ll see! ;) )
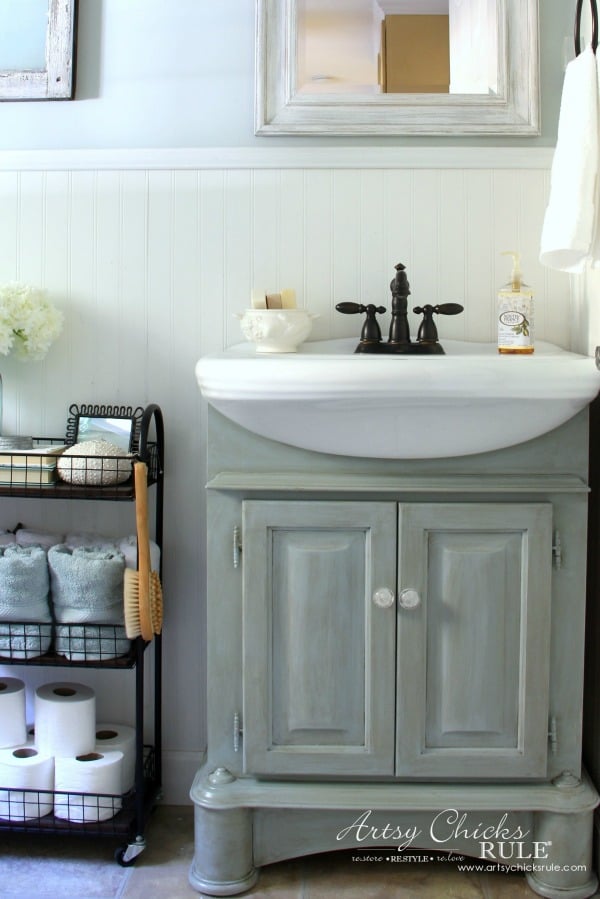
Here’s a close up of the new paint….
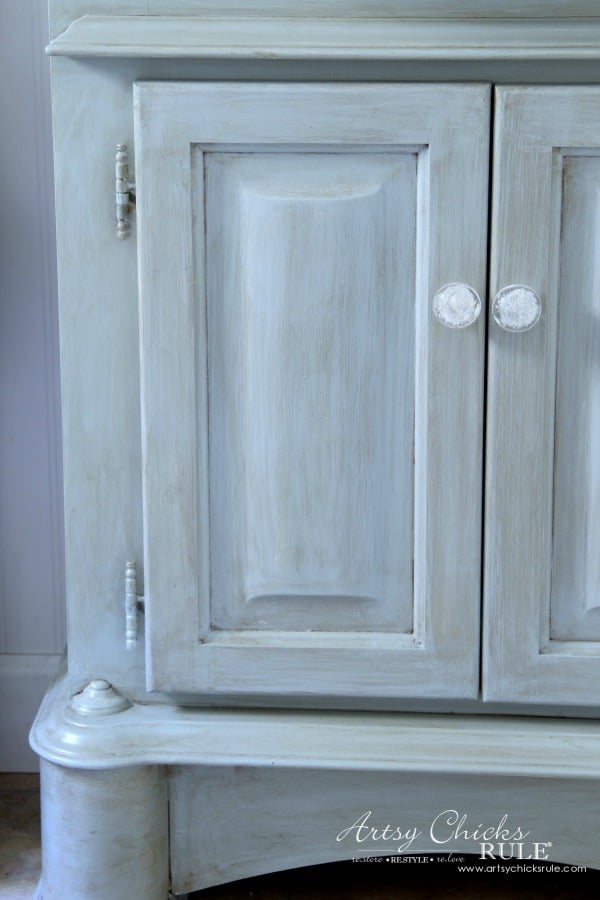
You can read all about the cabinet makeover to blue here >>> Bath Cabinet Makeover
I also knew that it was time to let go of the other shelf stand I had in here.
I originally bought it for the home we built back in 1999/2000. You can see that house here >>> Our Home
It started out white with gold accents and then was sprayed with Oil Rubbed Bronze spray paint.
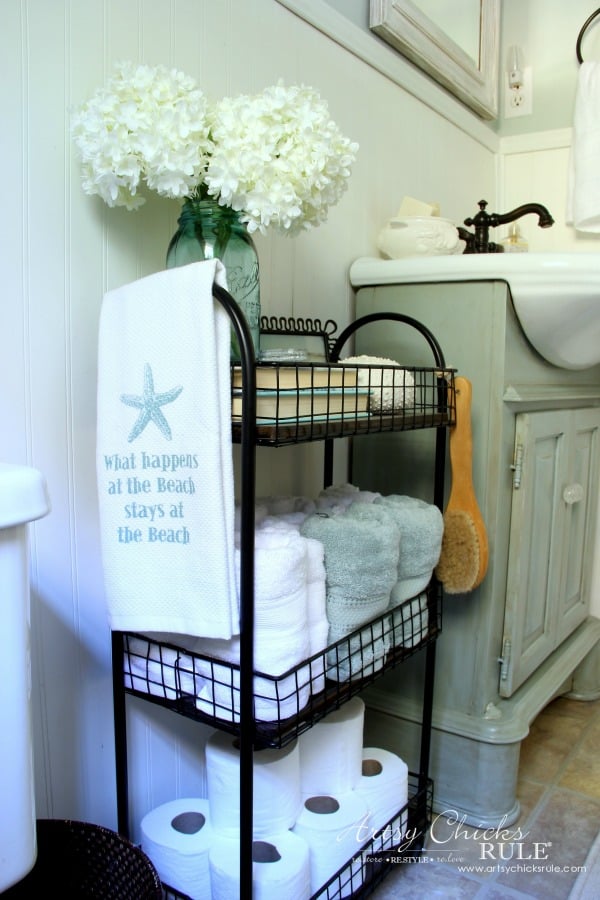
I found this little cart below at TJ Maxx.
TJ Maxx is great for finding unique things like this. However, you never know what you’ll find and you may never find the same thing again! ;)

It has dark walnut wood stained shelves and is black metal with wheels.
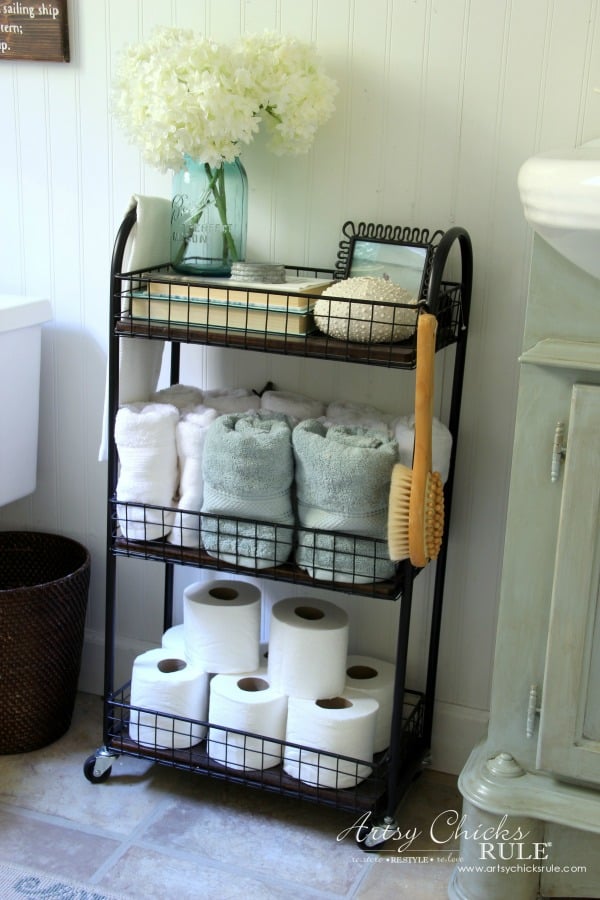
Perfect for the look I was going for in here.
And also perfect for storing towels and toilet paper.
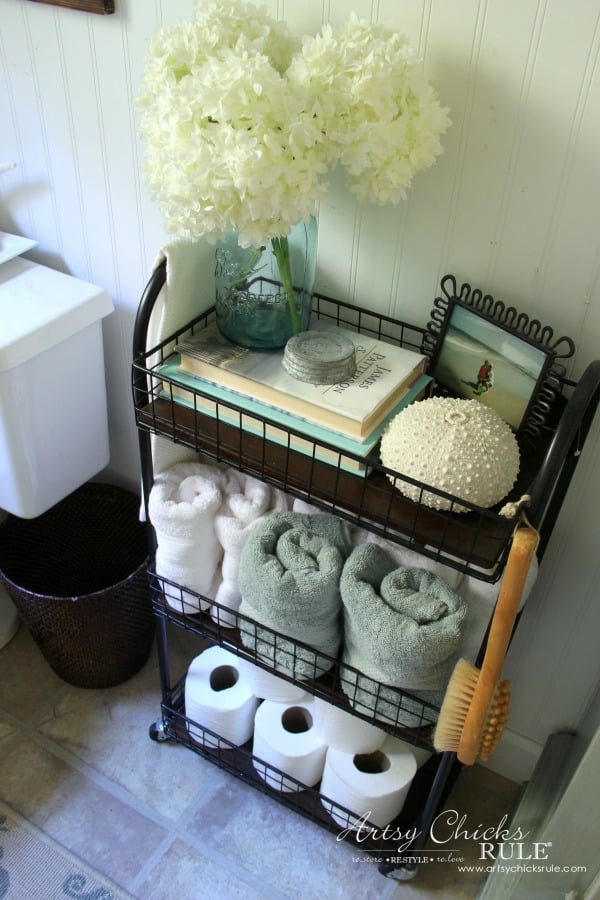
And maybe some flowers, photos and books.
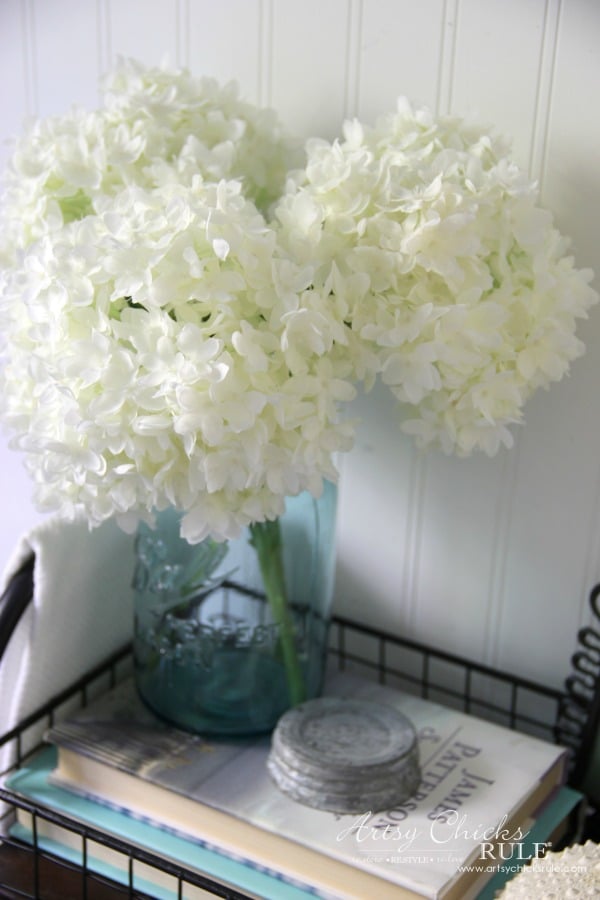
I also had to throw this towel back in here somewhere! ;)
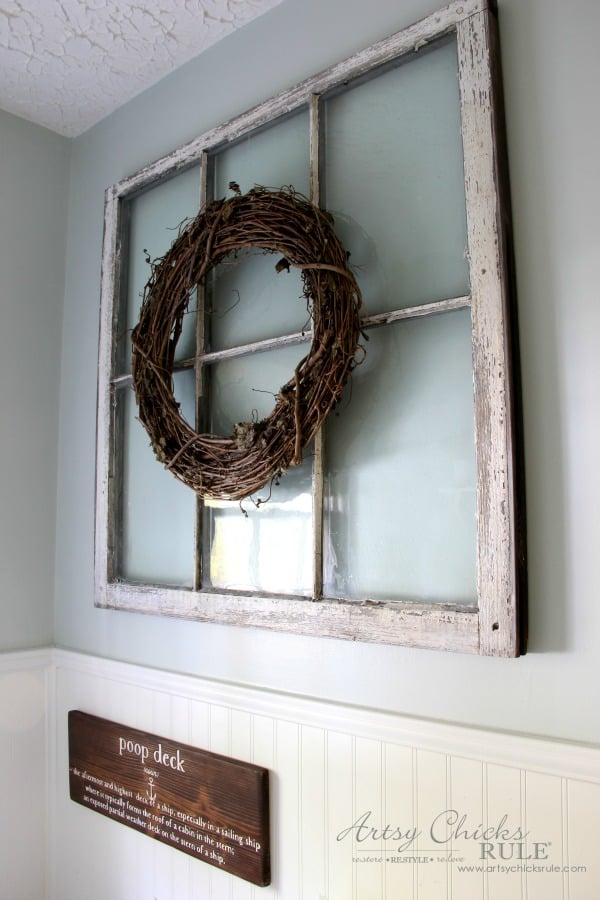
I bought this very old window a couple years ago but had nowhere to put it.
My walls were filled.
So when I decided to give this bath a makeover, I ended up having a blank wall perfect for it!
I had considered a few wood stained shelves here but wanted to keep the “open” feel.
I still have 2-3 more windows. (bought them all for $35) I’ll find somewhere to put them someday. ;)
Here it is up close….
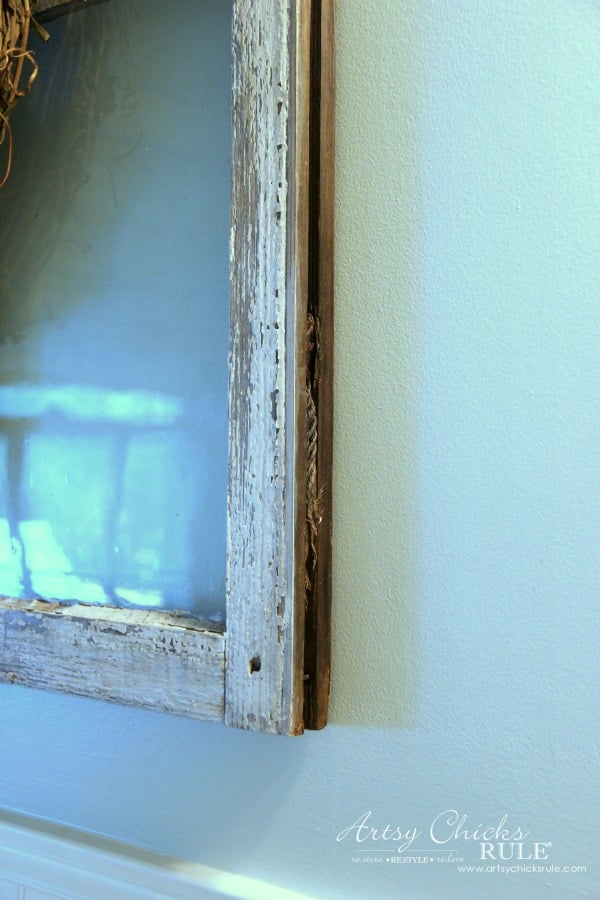
You can see the rope still inside.
Perfectly chippy paint that was carefully cleaned of any loose paint and sealed with 3 coats of poly.
The glass has bubbles and wavy glass all over but I could not get it to show up in photographs. :(
I really wanted to show you all that but it just wouldn’t translate.
Here’s another side shot.
I just love this old window!
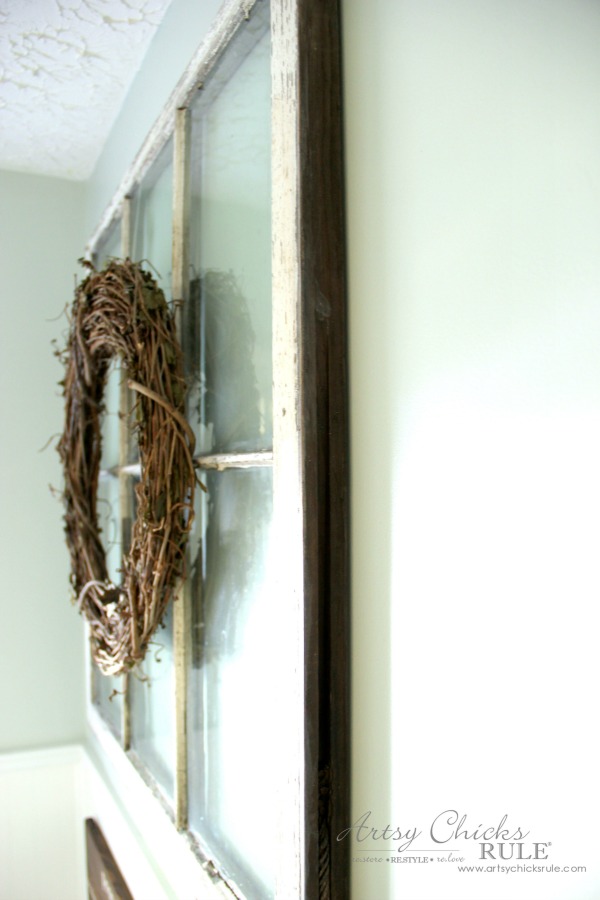
I knew I wanted a wreath hanging on it so I bought this grapevine wreath with the thought I’d make one.
I ended up liking it exactly as~is instead.
Simple.
No surprise as simple usually is a winner.
And you can see here why I wasn’t loving the glossy white “plastic~y” looking mirror frame.
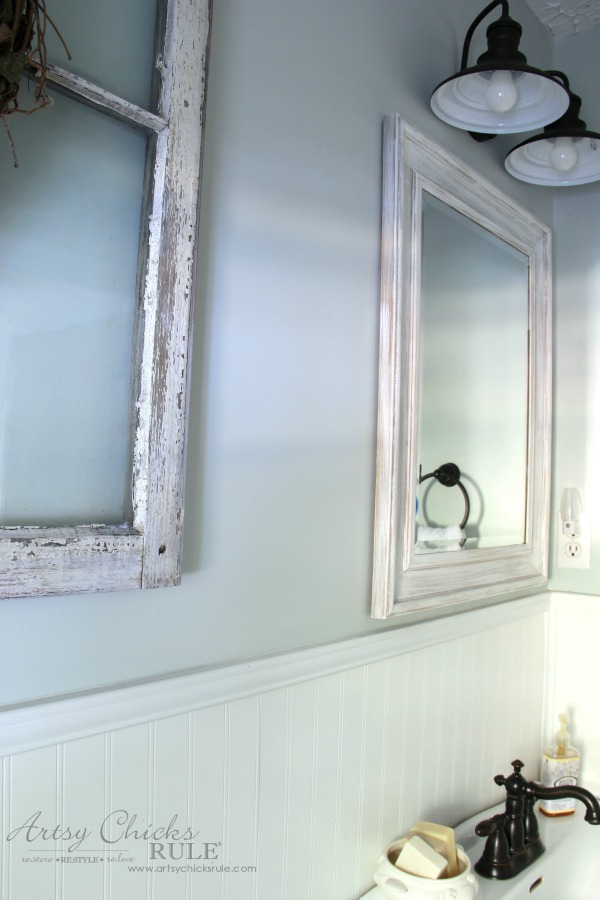
It just did not look right next to that old window.
You can see how I did the “weathered wood” paint technique here >>> DIY Weathered Wood Look With Paint
The “Poop Deck” sign you see can be found here >>> DIY Nautical Bathroom Sign
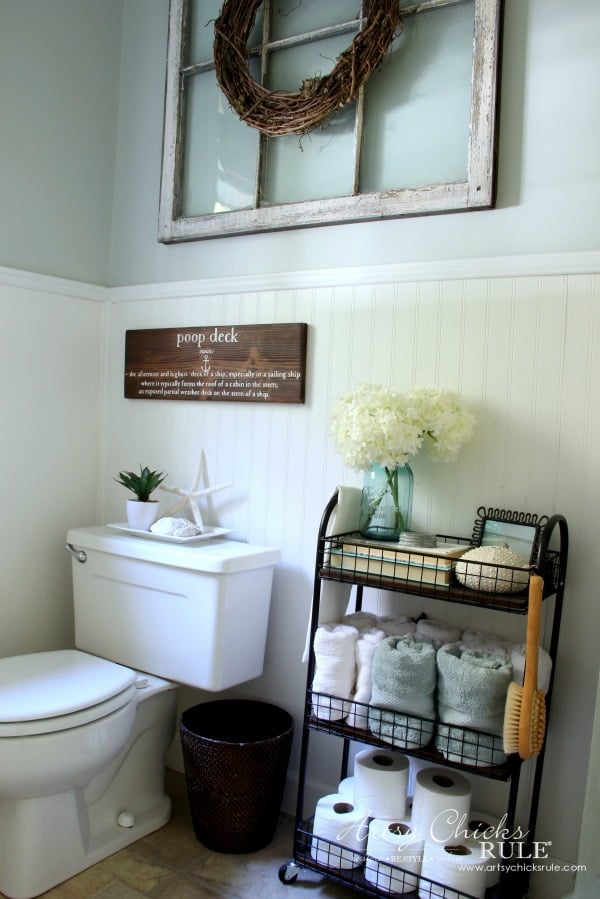
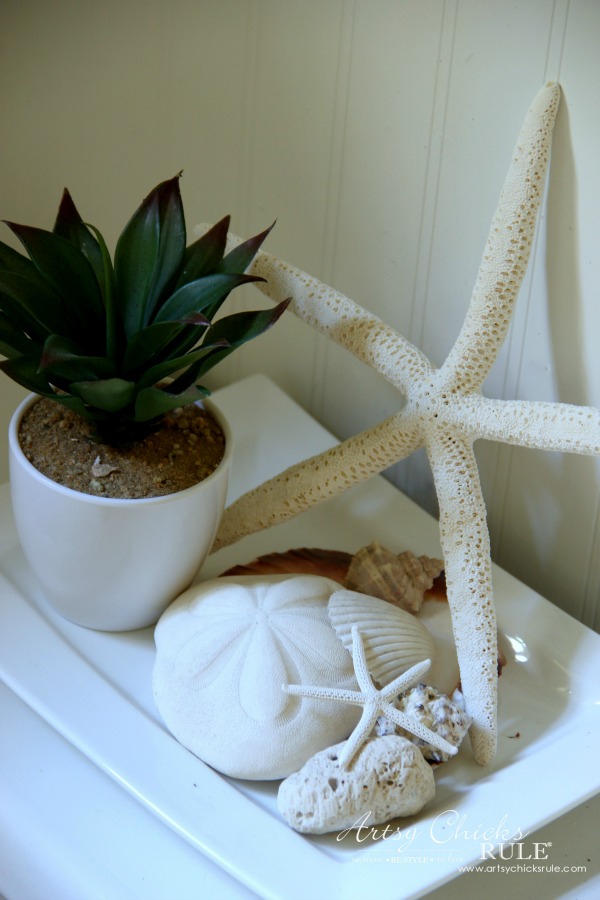
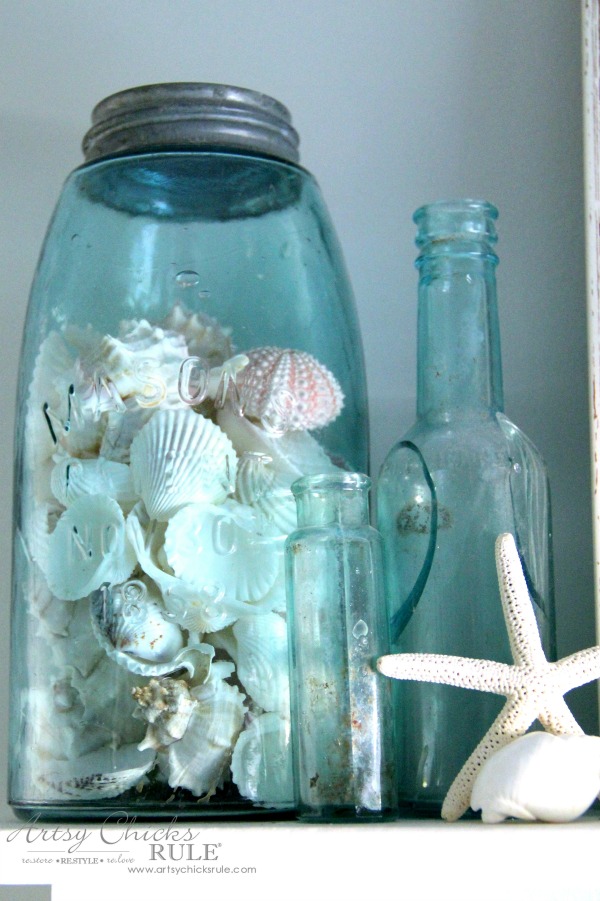
A few simple coastal touches on the back of the toilet….
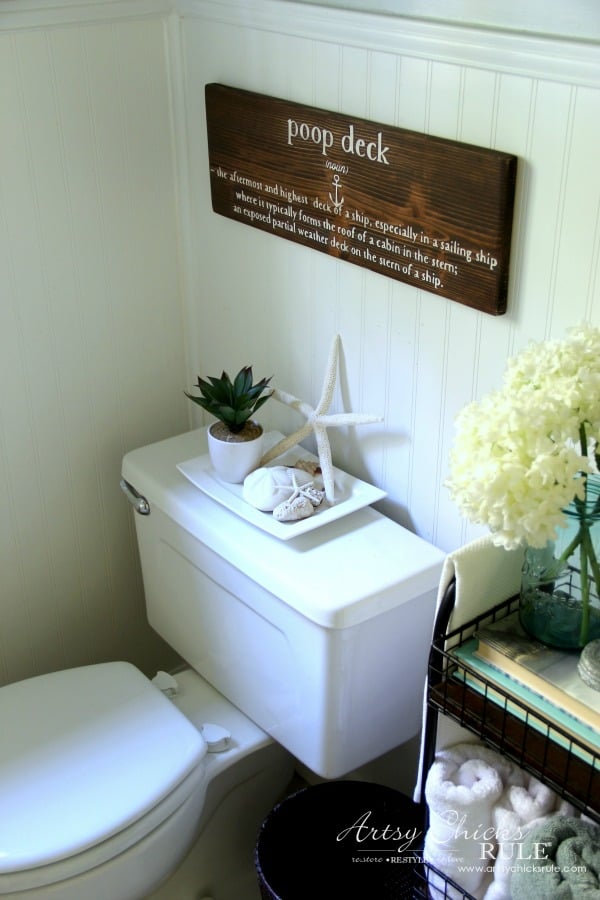
Which by the way, are made of things I already had on hand.
Looking to the other side of the bath…..
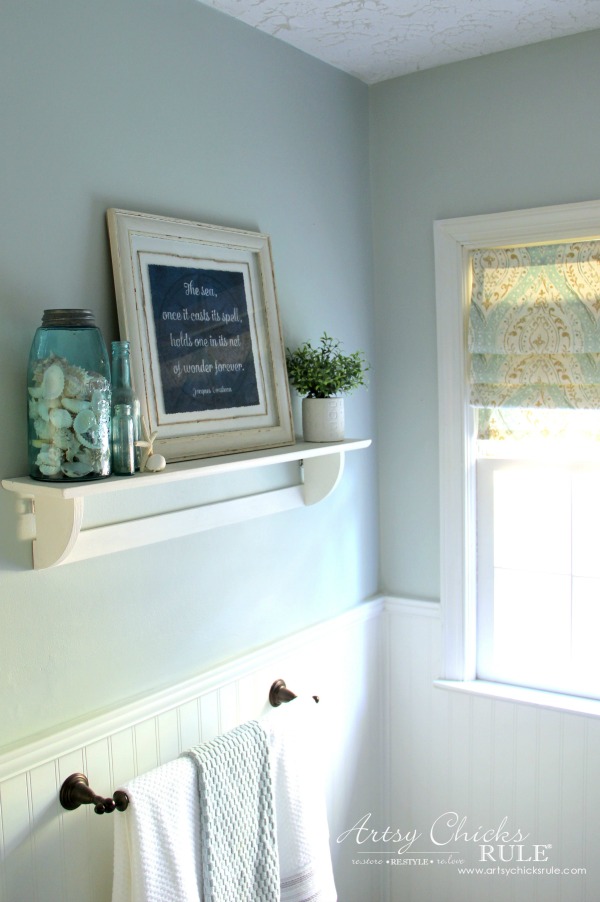
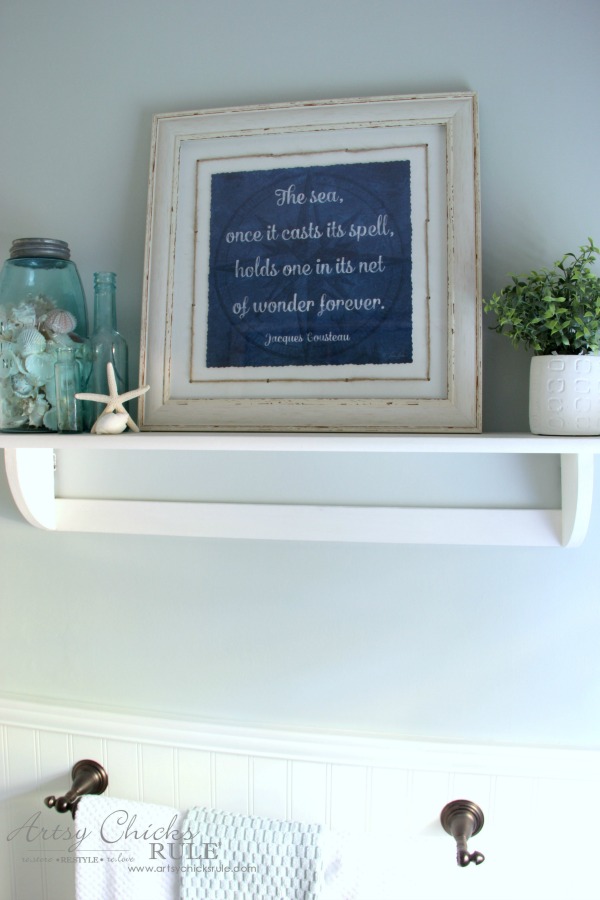
The same simple shelf I had in here previously with a few new and old items.
I found this nautical framed print at Ross, the greenery from TJ Maxx and the rest I already had.
You can find the window treatment here >>> No Sew Faux Roman Shade
And just to give you an idea how tight this little bath is….
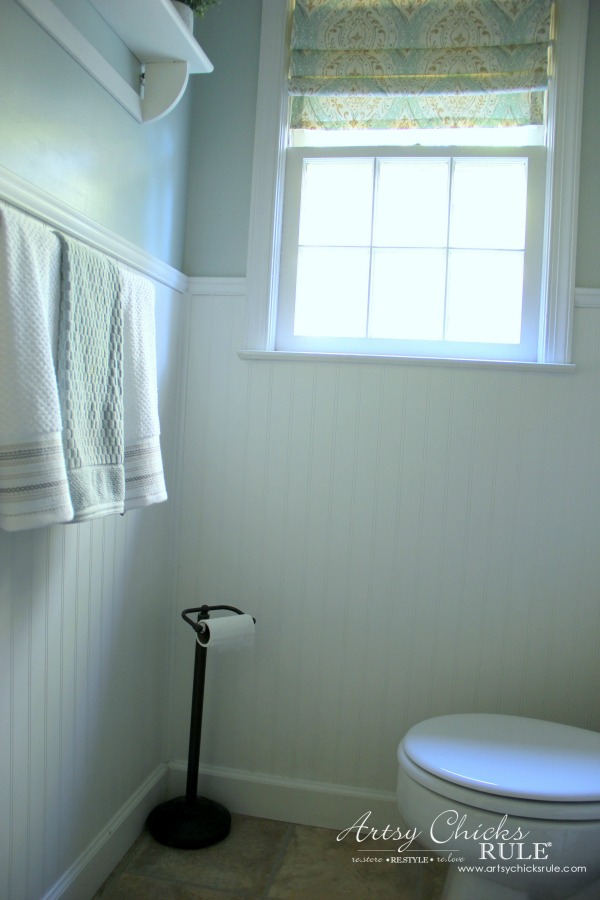
So as you can see, lightening up the paint was a good thing to do. :)
Also, removing the larger shelf stand I had in here previously also gave the space a more open feel. (with the smaller utility cart)
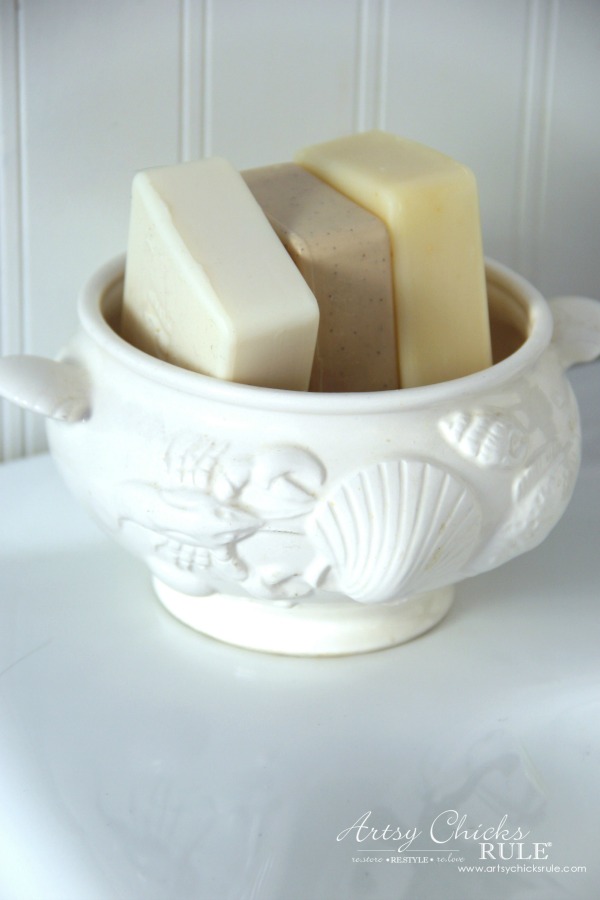
I even reused an old coastal dish (which was a thrift store find) to hold soaps on the sink.
I’m thrilled with my coastal farmhouse bath.
What do you think? Like the the new look?
UPDATE: We’ve changed the flooring in here…finally!!
For details on the flooring AND to see our newly made over (it’s a doozy! ;) ) Coastal Farmhouse Laundry room that adjoins this room, click —> here.
PIN this coastal farmhouse bath for later so you can come back to it for reference.
I hope you liked the coastal farmhouse guest bath!
Or maybe I’ve just inspired you to go ahead and do that makeover you’ve been thinking about.
Yes, do it, just do it! :)
I’ll see you guys back here on Thursday with some DIY Christmas Decor ideas. :)
xoxo

A few similar items….


")

")


gorgeous makeover! My bathroom has been made over 5 times. Thankfully I now love it! LOL Great job!
Thanks Anne! :) Haha, glad I”m not alone!! And yes, I think this one may stay awhile. :)
hey girl love the bathroom! So cool! You should come down to Oklahoma and decorate my bathroom!
Thanks Shawnna! :) And yes, wouldn’t that be fun?! xoxo
Love the new look! I may have to investigate Sea Salt for my new unfinished vanity – it looks gorgeous!
Really lovely. A beach theme is amazing. The cart sticks out like a sore thumb though. The loo paper holder is the same. A little paint should do the trick. I love your site. Thank you Nancy!
Thanks Elizabeth!
For the cart, I actually chose it because it sticks out. ;) I wanted a bit of contrast and love a bit of wood to go with the neutrals too. :) The same goes for the toilet roll holder. I love a little contrast.
However, the location of the toilet roll holder has been a consideration of mine. I have thought about putting it on the wall but it would need to go beside (it would be tight there) or in front of the toilet. (don’t think I’d love it there). So, it stays “as so” for now!! Thanks for the ideas, I do love hearing other people’s thoughts on things! Sometimes they are considerations I hadn’t thought of so they are always welcome.
Hope you have a great day!! xo
It looks beautiful, Nancy! I really like the cart and I love the new colors that you used for the wall and sink cabinet.
Thank you Paula! I’m so happy with how it turned out. :) xoxo
Hi! I’m new to your blog, and I love it! Love the makeover too. Everything about it. I have to ask you if you made your window valance? It looks great and suits the room well. I need to make some shades across a bay window I have, but I don’t sew. I’m thinking that liquid stitch stuff might work. But keep the inspiration coming!
Hello!
Thank you! :)
Yep, I made it. I usually try to link to other projects inside the posts so readers can find them.
Here is the link … https://www.artsychicksrule.com/2016/11/no-sew-faux-roman-shade.html
It is actually a “no~sew” window treatment. :) (and it was super easy too!!)
Hope that helps! xo
Very nice and tasteful! Done, but not overdone! This may sound silly, but how did you attach the wreath to the window frame? Love it!
Thanks Alicia! :)
Not silly at all, I’m glad you can’t tell, that’s how I wanted it to appear! ;) I used fishing line because you can barely see it. Guessing that it works good!! ;)
I add a tiny nail at the top, loop the fishing line around a section of the wreath, tie a knot and then hang on the nail.
Easy, secure and mostly undetectable. xo
Nancy
So pretty, Nancy! It looks so much lighter and fresher now, and my favorite is how you painted the vanity…lurv!! XO
Thanks Christy! It’s so different but was much in need of a makeover I think! :) xo
One word, Nancy! Absolutely gorgeous! OK… two words! :) xo
Haha thanks Karen! :) xo
Hey Nancy
Its really inspired me.
Thanks for sharing these wonderful images of coastal farmhouse bath.
Thank you! :)
LOVE this, Nancy! Looks amazing!
Thanks Brooke!! :) I was SO ready for a change up in there! xo
Did you tear out your tile or cover it with the beadboard? If you covered it how did you do it?
Hi Tina,
We removed the tile and then added the bead board. :) We glued and attached with some finish nails.
Please tell me where the black cart is from, looking for something like this in our powder bath. Thanks you, Terri
Hi Terri, I found it at TJ Maxx.
It is such a huge improvement. This bathroom and your laundry room look amazing. Everything goes together great.
Thank you so much! :) xo
The bathroom looks great!
Thank you, Lorrie! xo
Just repainted my bathroom and needed new towel hook ideas. Looking for shelf decor ideas too.
Good luck!
Hello my name is Ashley and I’ve been looking for small bathroom vanity and I love the one you have!! Can you tell me where you bought the vanity itself?
Thank you so much
Ashley Perez
Hi, this vanity came from The Home Depot many years ago. (prob around 15ish) It was one of their “all in one” sets, vanity, sink, and mirror.