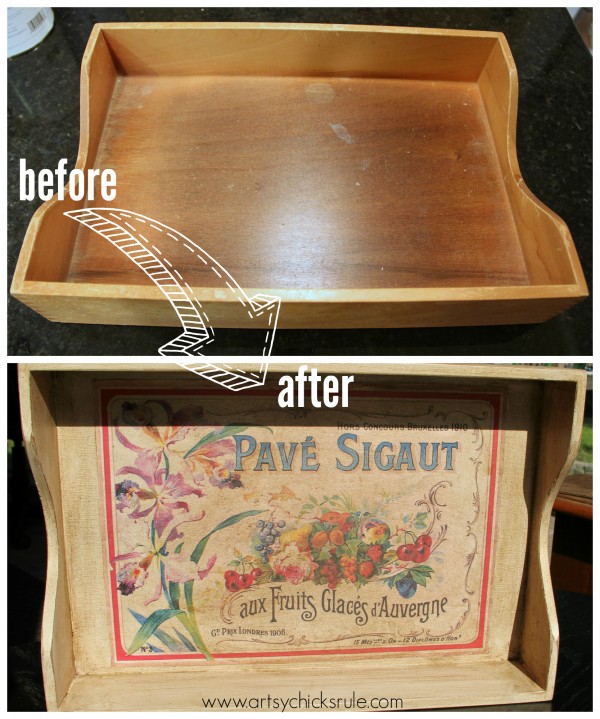
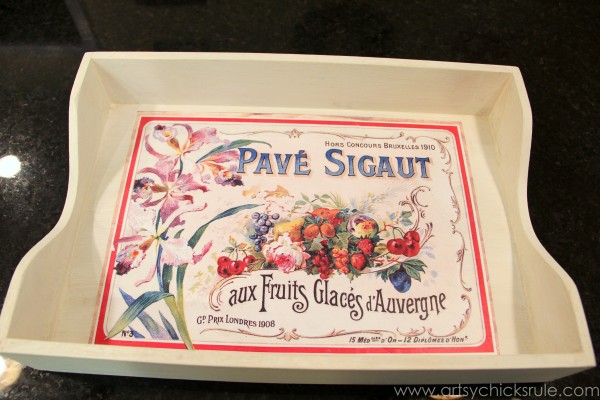
Old Letter Tray -to- “Vintage” French Fruit Tray
Today I’m sharing how I turned this old letter tray into a “vintage” French fruit tray.
It was fun to do and was a super easy, super cheap crafty DIY.
Just a little re-inventing and re-purposing….
I have a bunch of these trays. (some I picked up at the thrift store for $1 each…and the rest I was given by a friend)
They are pretty easy to come by and are so great to “makeover” for other uses.
Like this one….

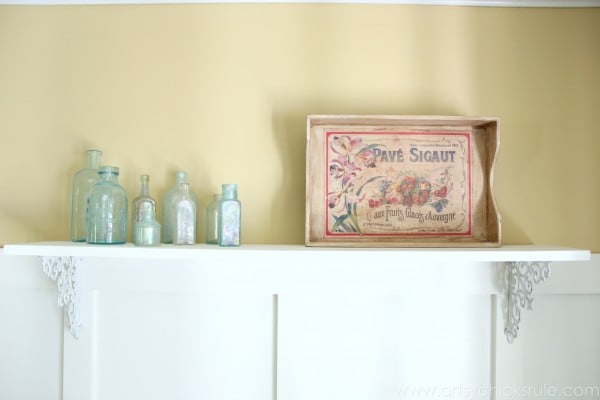
I painted this one Old White & Scandinavian Pink (Chalk Paint®) and use it for my decanters on the “bar”.
You can read about it –>here.
The one I’m sharing today also got Chalk Paint in Old White.
I found the gorgeous graphic I used over at The Graphic’s Fairy.
I just love Karen’s graphics….these french ones are a favorite!
I also used them on this “bar” cabinet (pictured above), my “coffee bar” and a thrift store cigar box.
I originally printed out the graphic myself…but below was as big as I could get it with my printer.
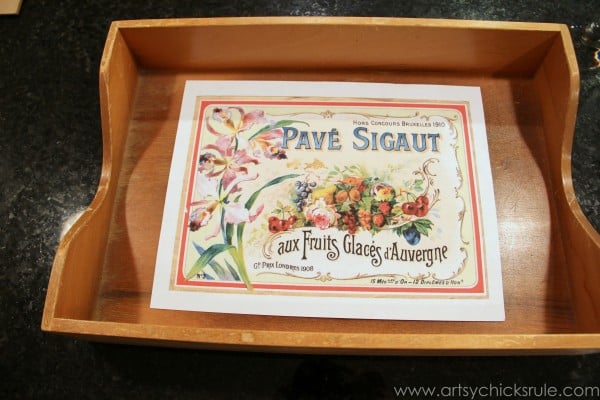
I decided that it was too small for this tray.
So I got my dear, sweet husband to print it off for me at work larger and on larger paper.
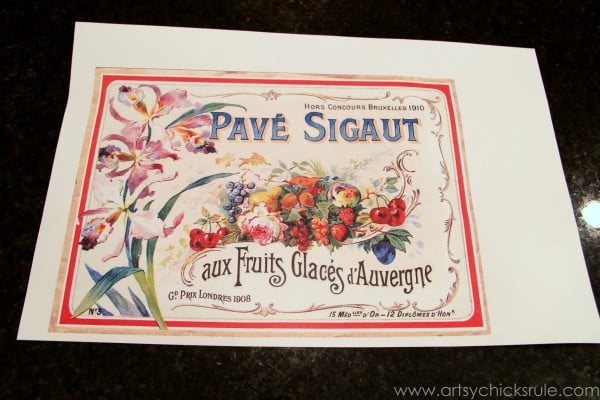
Much better!
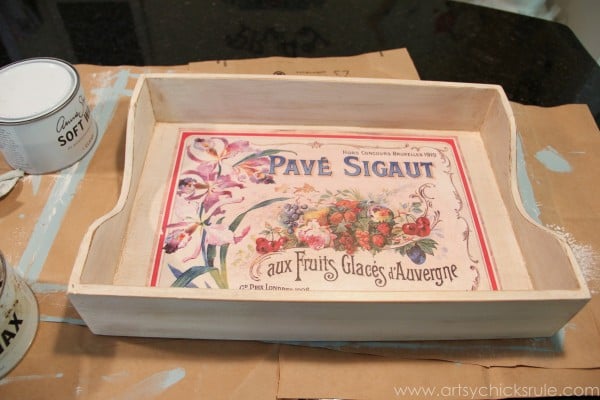
I painted the tray and let it dry. Next I applied the graphic with Mod Podge.
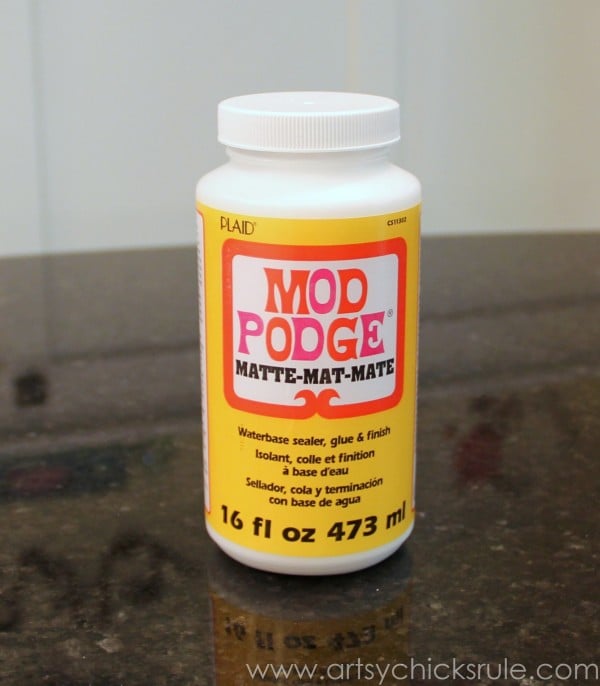
I have always used school glue (like Elmer’s) watered down for things like this but decided to try Mod Podge this go round.
Kind of boring and plain just like this, huh?
I know, it is. It’s missing that vintage feel it needs.
I think so anyway!
Next I applied tinted glaze I had on hand thinking this would be the look I was after.
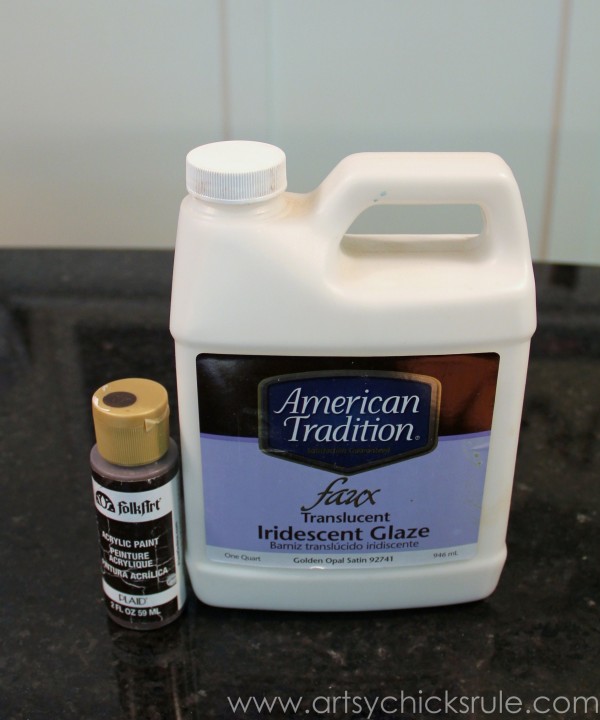
I applied it all over the tray and graphic.
Eh. Not great and a little too “pink-ish” for my liking.
So after that dried, I went back at it with straight Annie Sloan Dark Wax.
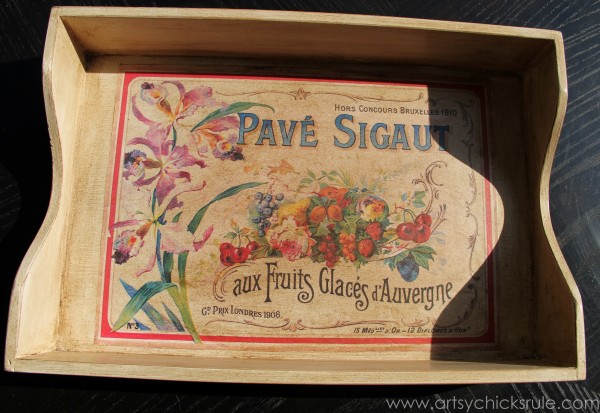
Perfect!
I wanted it old, aged and “dirty-ish” looking. I think I achieved that look. ;)
And up on my new shelf in the Family Room….
I’m not sure where I’ll use it yet. I did have it on my kitchen island with fruit in it for a bit but have since moved it.
We’ll see!
But I love it and love how it looks like an old vintage piece.
Super easy too!
Want to see even more ideas on simple updates with Chalk Paint (that aren’t furniture??)
Check out this post, here!
Be sure to stop back by the blog on Thursday….I’ve got an awesome Giveaway coming up!! You don’t want to miss it! :)


")

")


so how did you like the modge podge? the tray is cuuutee and like you said looks easy too xx
Thanks Chris :) The Mod Podge…well, having just used once, I honestly can’t tell much difference between it and the other glue I usually use. But I have never used it has a top coat (which I believe you can) so that may be where it stands apart. ;)
Hope you are having a fabulous week!
xo
Nancy
Absolutely Love it! The aged effect came out wonderful! Your persistent effort paid off! Thanks for sharing! I have a number of these odd trays….now I’ll just ‘do it’ too! :)
Thanks Roxanne! :) Persistent = stubborn. ;) Oh yes, you should! Check out Karen’s site (The Graphic’s Fairy I linked). She has so many wonderful graphics you could use including this one!
Hope you have a great week!
xo
Nancy
Very nice tray makeover Nancy! I love the graphic you choose (thank goodness for Karen eh!). The dark wax just took that tray to whole new level of vintage goodness. Love it!
Thanks Marie! :) I know, exactly, her graphics are the best!!
xo
Nancy
I love the tray…. especially after you added the dark wax. I’ve got to get some of that! xo
Thank you Karen! Yes, I agree, the dark wax “made” it! :)
xo Nancy
Love the colorful vintage look!
If you don’t seal the image with a top coat of Mod Podge, do you find the glaze or wax is enough to protect the image from spills or for wiping clean? I have wondered about that because I find once I’ve applied the sealing coat of Mod Podge over my image it doesn’t take the dark wax very well for aging.
Thanks for sharing. Love your work!
Thanks Danna! :) Yep, the glaze or wax both will seal against that. OH, that is good to know! (about the Mod Podge) Thank you for letting me know about that!! :)
Nancy
Another beautiful piece! Love your style!
Aw thanks so much Christine!! :)
xo
Nancy
Love the look that the glaze and wax gave your tray. This tray got a great makeover!
Thank you Paula! :)
Nancy
I love this! I didn’t even recognize that tray either! :)