EASY DIY Merry and Bright Sign (Trash to Treasure Tuesday)
Making new signs from old thrifted signs is one of the easiest ways to create them! Today I’m sharing one that now says, “merry and bright”.
It’s Trash to Treasure Tuesday….one of my favorites of the month.
I LOVE to make over simple (and sometimes not so simple) things.
Today’s makeover was SUPER SIMPLE.
Really.
I’m sharing how I made a “Merry and Bright Sign” for Christmas.
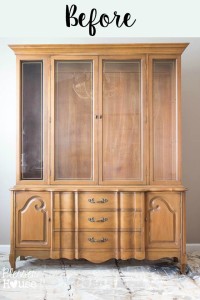
Which started out like this…..
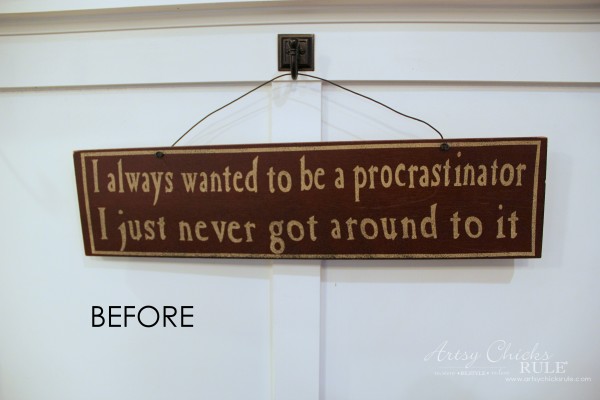
Haha, love this but I don’t think I’d hang it in my home.
And no, this is not the “really exciting makeover” I was eluding to in my last post.
That project is taking a bit longer than expected but I’ll be sharing it for our “Trash to Treasure” in December.
So, I ran to the thrift store, found this for a few bucks and literally threw this one together in no time!
Which is a good thing because we’ve been super busy around here.
I painted the kitchen this weekend (not planned!), we hung a large mirror in the dining room, hung all new hardware for the curtains in the dining, family and master bedroom and hung some gorgeous artwork in the family room. (if you follow me on Instagram you might have seen it already : ) ) I’ll be sharing it on the blog very soon.
And I started on a good sized chalkboard for the kitchen wall as well.
So this wall is no more… “Eat, Pray, Love Gallery Wall“.
I had no plans to makeover the kitchen at this time but the paint I bought for the family room did not work out…so I used it in the kitchen and it was perfect!
Love when that happens. Sorta. ;)
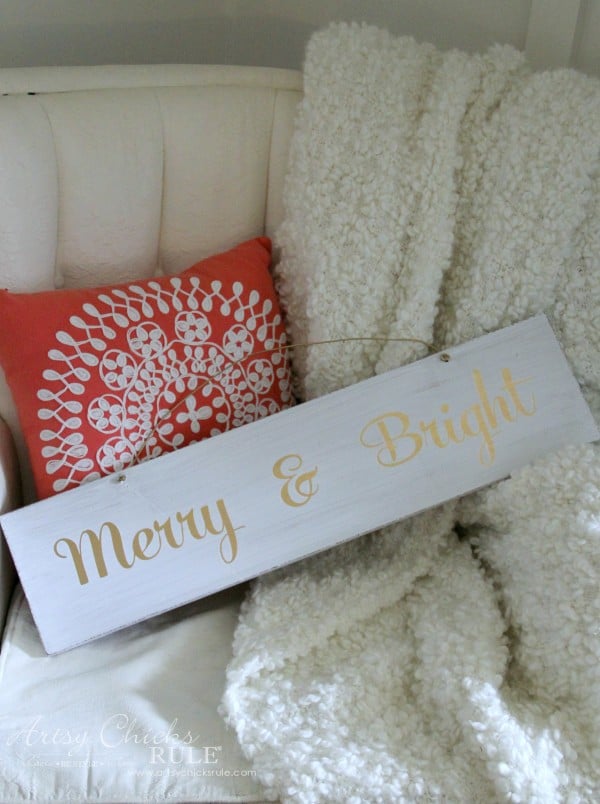
Oh….and I made this sign. :)
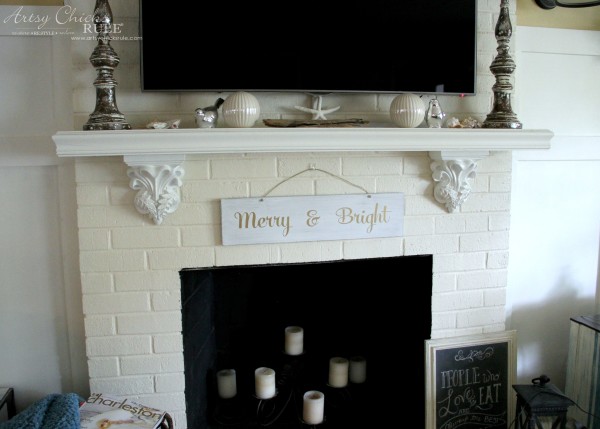
Which fell in about 1.2 seconds after taking this photo.
The 3m strips are great but I guess they don’t like brick.
Luckily the fall didn’t harm the sign I just broke my back over making. ;)
Kidding. It was the easiest sign EVER.
(by the way, the little chalkboard there is getting a makeover for Christmas…new chalk art)
So anyway, I tried it here instead.
Isn’t it pretty? I just love, love it.
And I’m sticking to my more neutral (creams, blues, whites, silver and gold) holiday theme.
We’ll see how it goes once I pull all my holiday decor out though! ;)
So let me share how I made this cute little sign.
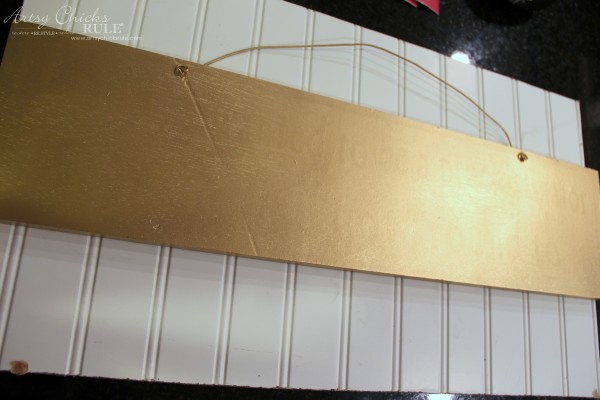
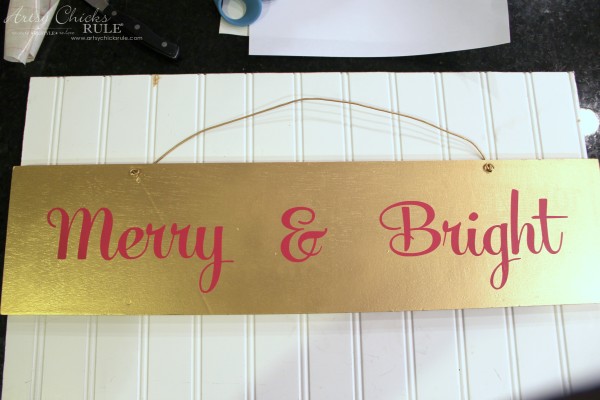
First I sprayed it will (affiliate link) Rust-Oleum Metallic Spray, Gold.
(I LOVE this gold)
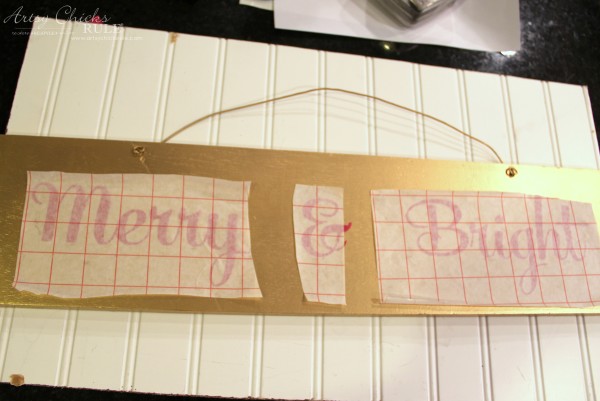
Then I designed the graphic in my Silhouette program and cut it out on vinyl.
I then attached it to the board.
You may remember a few other projects I’ve used my Silhouette for …
“Gather Kitchen Sign”
“Silhouette Merry Christmas Sign”
I love this machine and I’m not sure why I haven’t used it more?!
It makes things like this sooo easy, as you’ll see below.
You can see the Cameo here, if interested … (affiliate link) Silhouette CAMEO Vinyl Starter Kit Bundle with PixScan Cutting Mat
Next I peeled away the backer paper.
This left me with the lettering attached to the board. (be sure to measure when you attach, side to side and top to bottom)
Then all that’s left to do is paint!
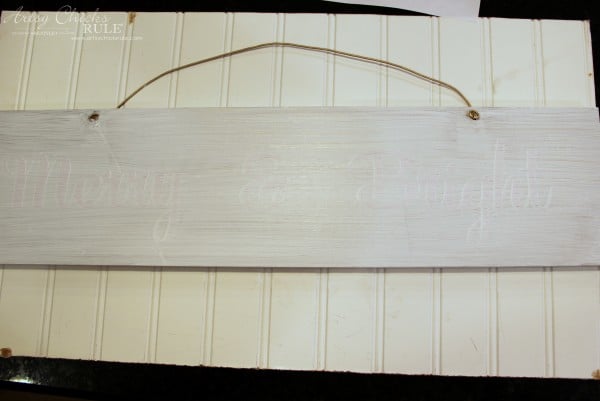
Yep, paint right over the vinyl letters.
I only did one coat of white because I wanted to see some of the gold shimmering through the brush strokes.
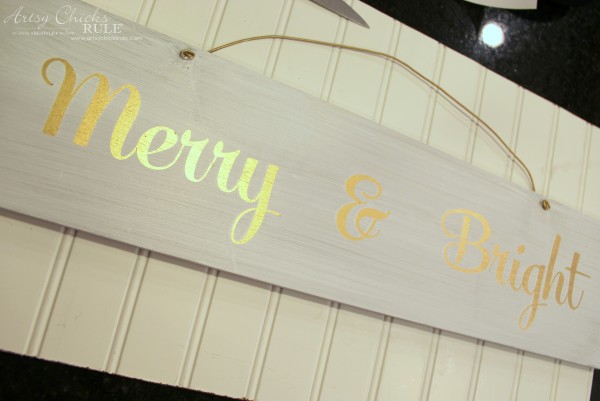
Then just peel up the letters which reveals that pretty gold underneath.
Seriously. Can that be any easier??? No, not really!
Want even more ways to transfer?? Check out my “How To Transfer Graphics” post! (sharing all the techniques I use)
I very lightly sanded the edges and a bit more of the white.
I was careful to stay away from the letters because I liked the crisp look of them.
I did this project in less than about 30 minutes total.
Here is the printable if you want to print it out and transfer the regular way. (or the way I had originally planned to)
You can see examples here…. Signs and Transfer Methods


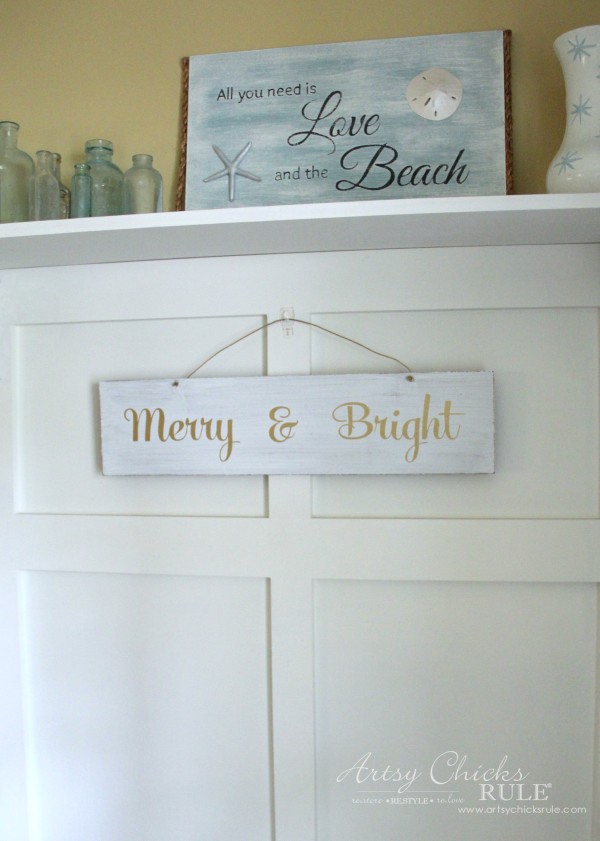
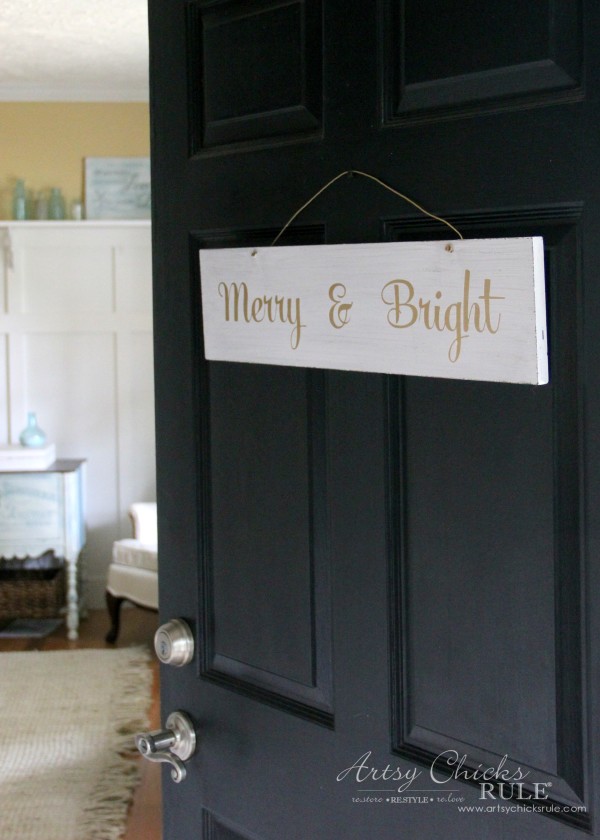
I hung it on my front door too ….
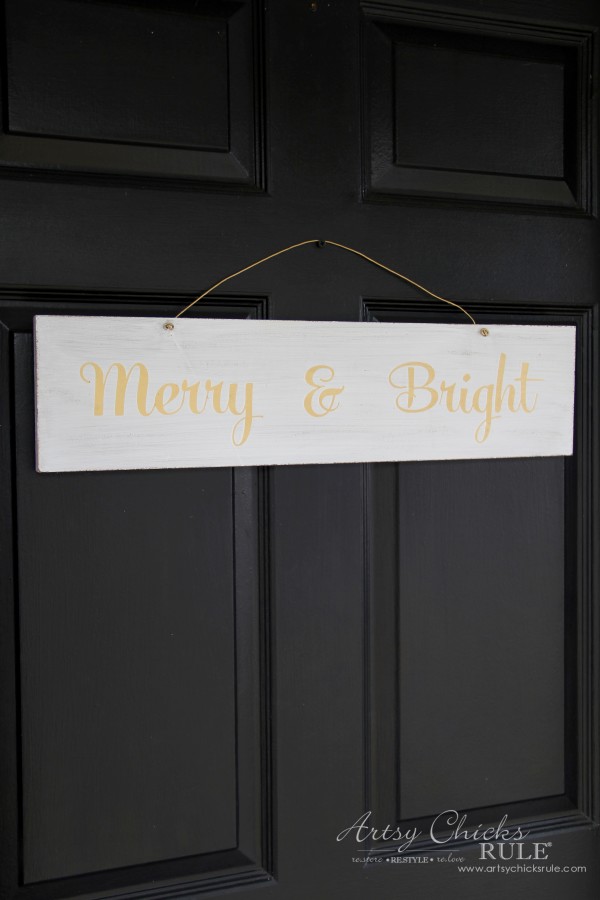
I actually planned something different for the front door but I kind of like it here.
I’m not sure where it will end up yet though. We’ll all have to wait and see!
Welcome to my home. :)
I might have to make a few more now.
That was just too easy.
And I love when I find “ready to go” old signs at the thrift store like this one.

I’ll be back on Thursday with round 2 of decorating one space, three ways.
My foyer got a makeover for Thanksgiving.
Now go and see what my friends created for their Trash to Treasure makeovers this month!
I’ve only seen these “before” photos and can’t wait to see what they’ve done.
Confessions of a Serial Do It Yourselfer Bless’er House

Prodigal Pieces Girl in the Garage

Follow along! –> Instagram ~ Facebook ~ Pinterest ~ Bloglovin
This post contains affiliate links, see full disclosure here.

")
")


")
")
")

I love how simple and fun this is, Nancy! Shows that you can take even the funkiest sign and make it new. Thanks for the tips!
Yep! So true! :) It was simple!!
Nancy
I have started using my silhouette more lately, it really does make sign making so much easier! I love this with the gold peeking through. It looks great everywhere you put it! We’re going to pull down our Christmas boxes this weekend…not sure which direction we’ll go this year yet either! XO
I know, it really does!
Thank you! I’m ready to pull those boxes down and get done so I can enjoy this year! ;)
xo
Nancy
That is such a cute sign Nancy, thanks for sharing and seeing how easy it can be. It looks great with your decor! :))
Hi Sandra! :)
Thanks so much!
xo
Nancy
Dang, another project using that awesome Silhouette machine that I want so much. Love your pretty gold script Christmas sign Nancy! The original message on the sign was cute.
Thanks Marie!! I know and I’m such a resister!! (old dog, right? ;) ) I like my comfort zone but it really does make things easier once you get the hang of it!
xo
Nancy
I was glad to see your post on this re-furbished sign topic. I would like your help with a decision that I am facing.. My now deceased husband had several plaques, commendations, and awards hanging on his office wall. I no longer have a use for them, so I am trying to figure out if they are worth saving for a future garage sale. The wood backing on some of these plaques is very nice, and it sems a shame to toss them, when they might be of use to someone. Is this the type of wood you would use in your projects? Should I try to pry off the metal sheet, that is engraved with his name, and the name of the institution that gave the award? I think this problem is kind of tearing at my heart strings, so I just need an outsider’s opinion. Thank you for your help..
Hi Linda,
I’m so sorry about your husband and I totally understand the heart strings. Yes, it does seem a shame to toss them.
I do see things like this all the time in the thrift store. I think if you are ready to let them go, you should remove the metal piece with the writing, etc, and keep that and take the rest away (thrift store, etc, where someone will make some use of them).
That is the meaningful part of the plaque and is the part you will feel good about keeping.
Blessings to you!
xo
Nancy
I see old signs like that all the time at Goodwill – great idea for a makeover! And that gold = <3
I know, I love when I come across them! They are perfect and ready to go, just need paint! ;)
xo
Nancy