Antique Dresser Makeover {Stripped, Restained & Repainted}
Time to get back to furniture makeovers! One of my very favorite things.
I haven’t painted too much lately and am so looking forward to getting back to it!
(and so is my husband, I’m sure, since we have a garage and storage unit full of it! ;) )
I haven’t been out looking for any new pieces in months!
I am having withdrawals.
I’m not kidding.
So today I’m sharing this makeover I did last year.
It’s an old antique dresser/mirror that was featured in my Holiday Home Tour, Part 1.
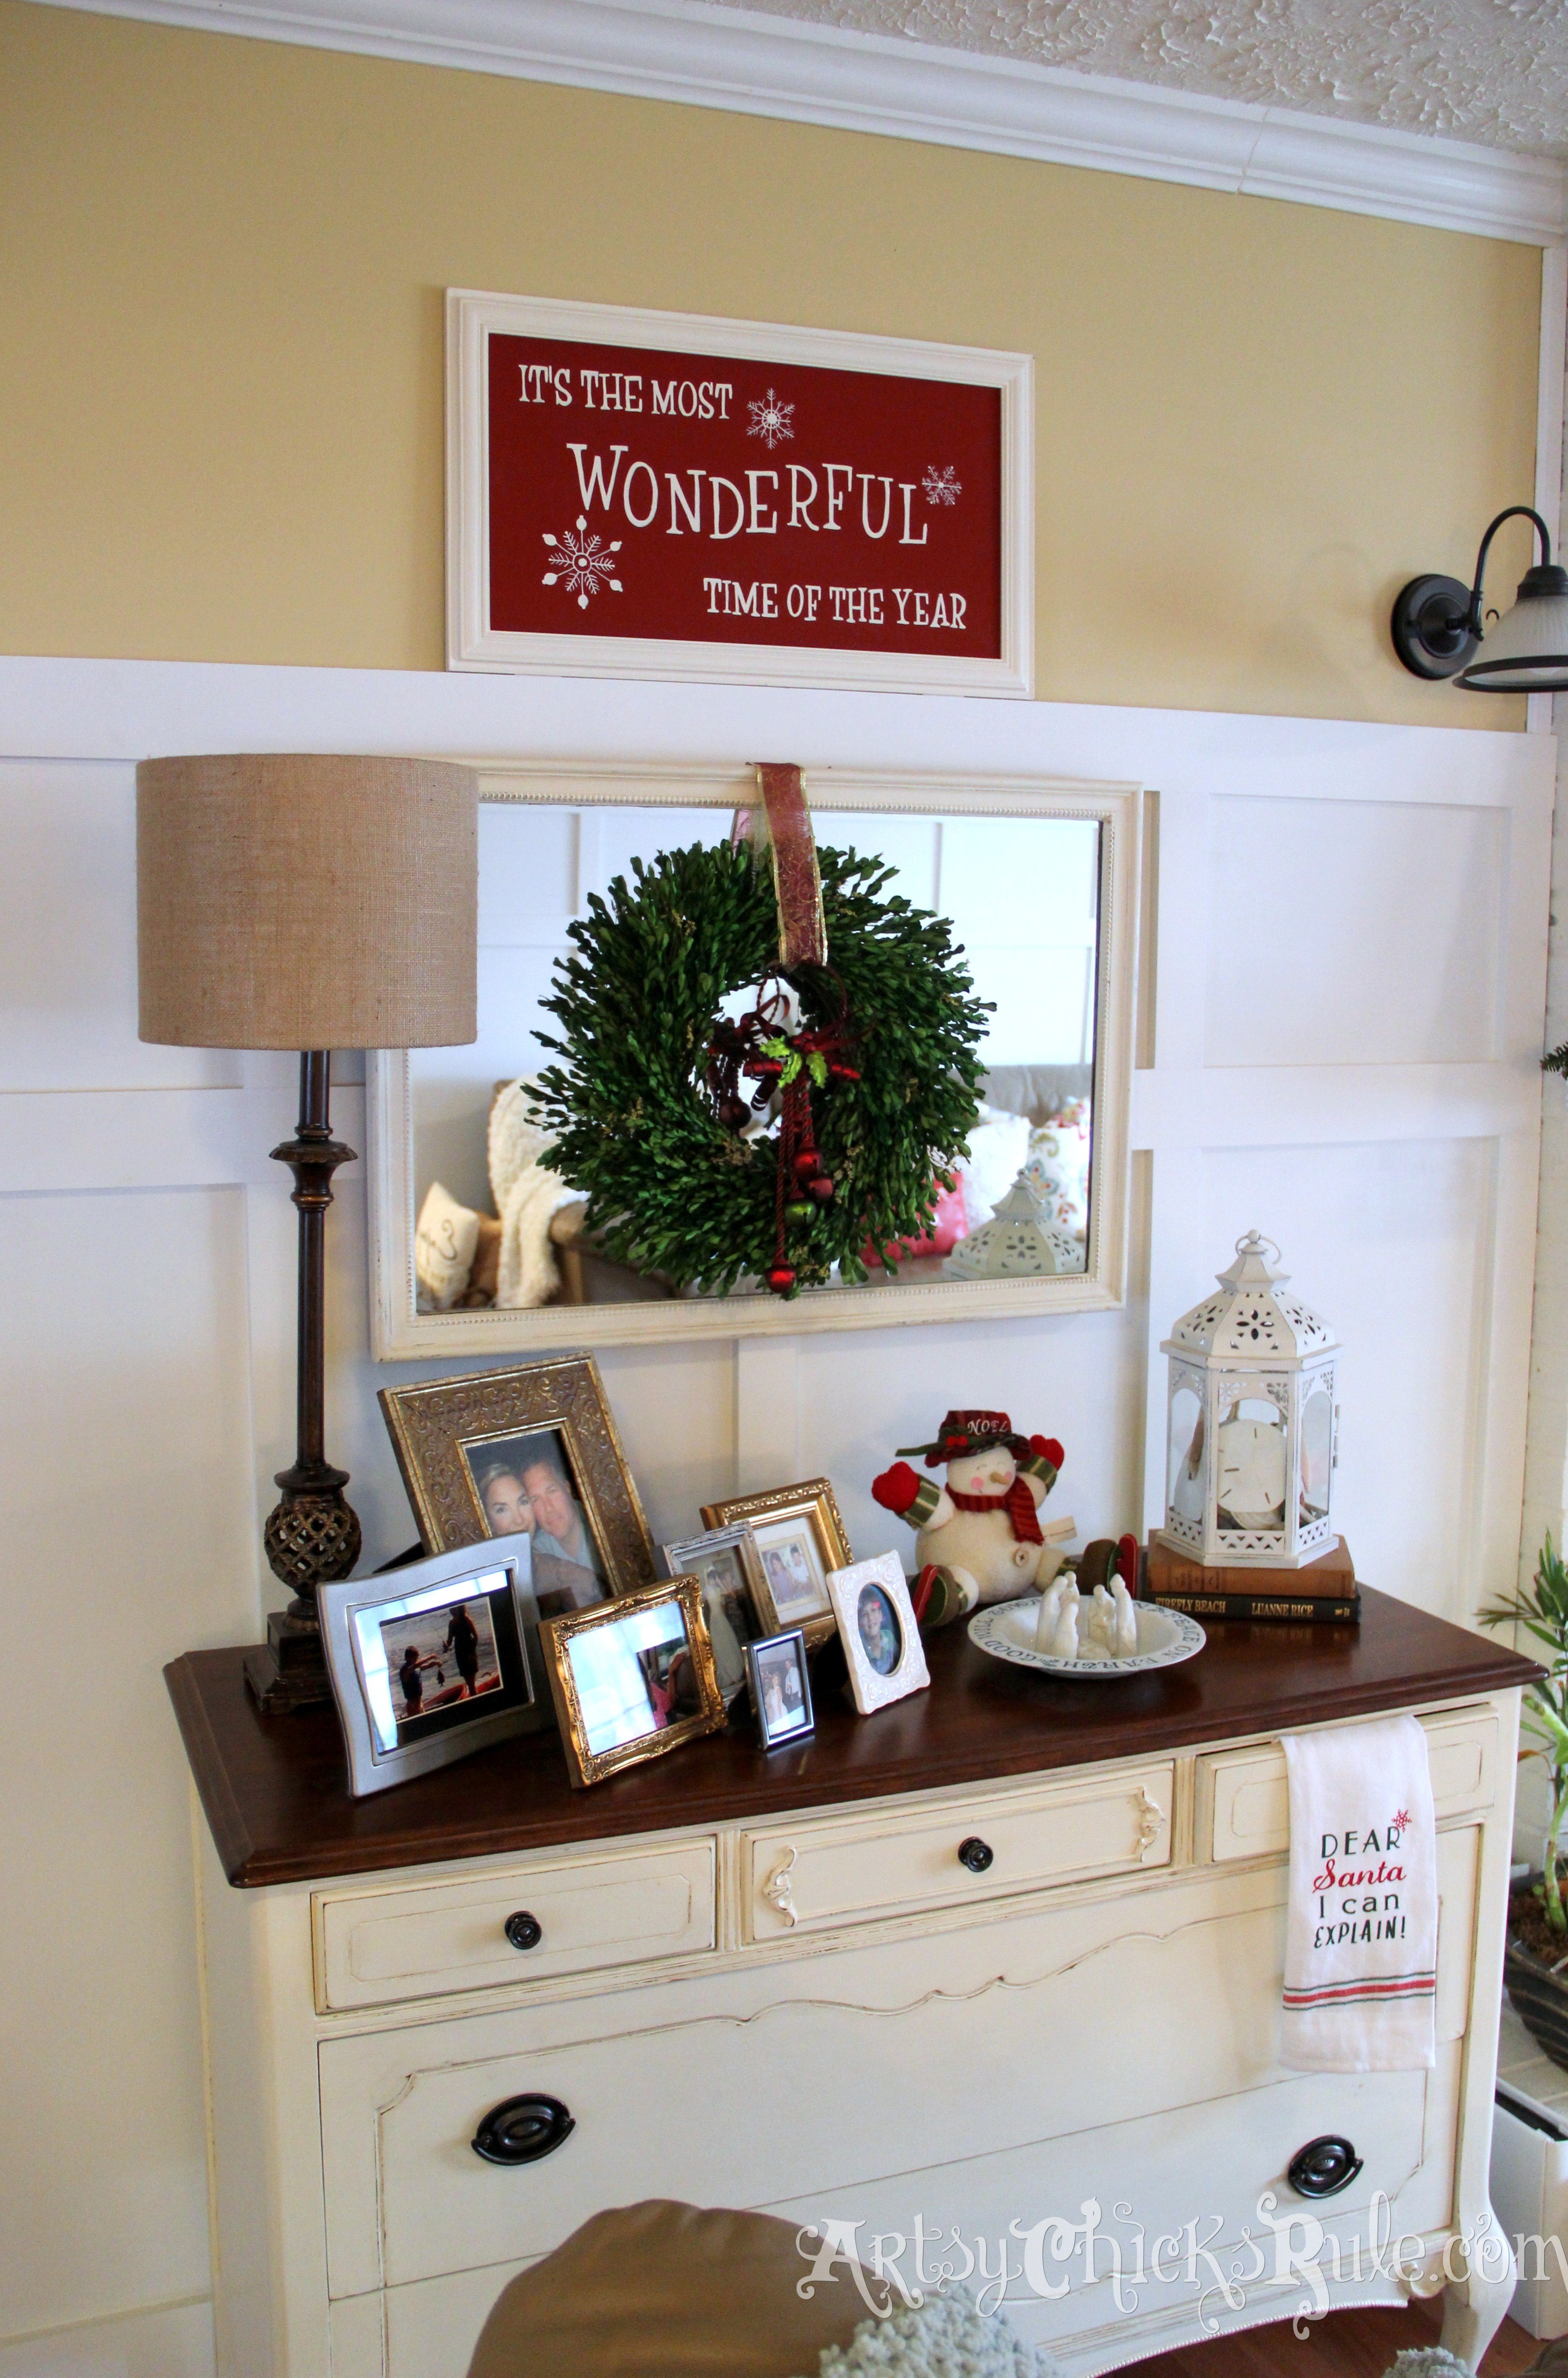
It’s a favorite of mine.
I purchased it about 10 years ago from a flea market/antique dealer.
It was metallic blue….like so:
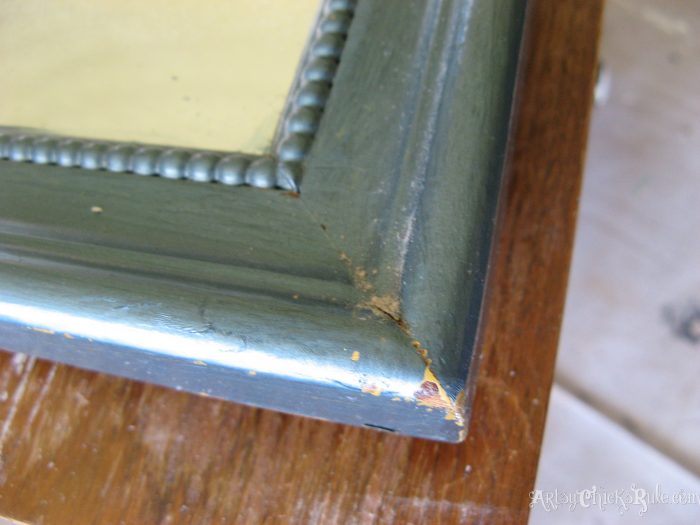
This is the mirror. I don’t have a picture of the dresser “before”.
The only reason I have the mirror “before” is because it sat untouched until just recently when I decided to paint and use it.
But you get the idea.
So when I bought it, I just painted right over top of that blue paint with an off white latex paint and then added a glaze over that.
This is how it used to look. (bad photo but all I could find)
It was not a really great transformation, in my opinion. Blah.
And so came the idea recently to strip it.
Ha, didn’t know what I was in for with this particular piece. It had 4 coats of paint to remove.
The one I applied, the blue one and 2 different yellow shades.
Fun, um, not.
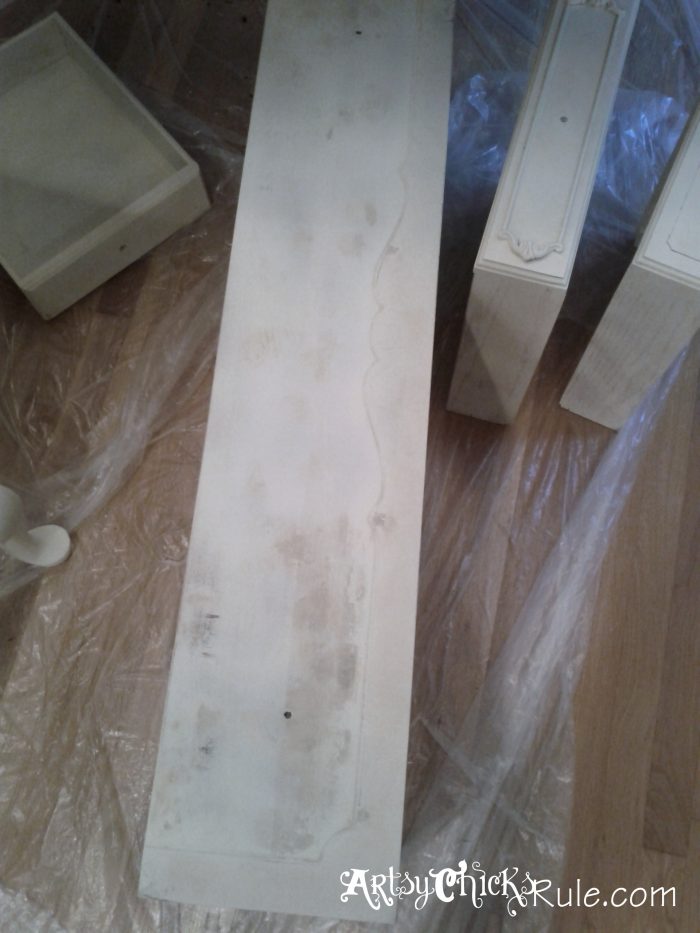
You can see the layers in this photo here. (and I painted right over this sucker, no more stripping of this paint!)
I did lightly sand where the paint was chipping/rough…then painted with Chalk Paint.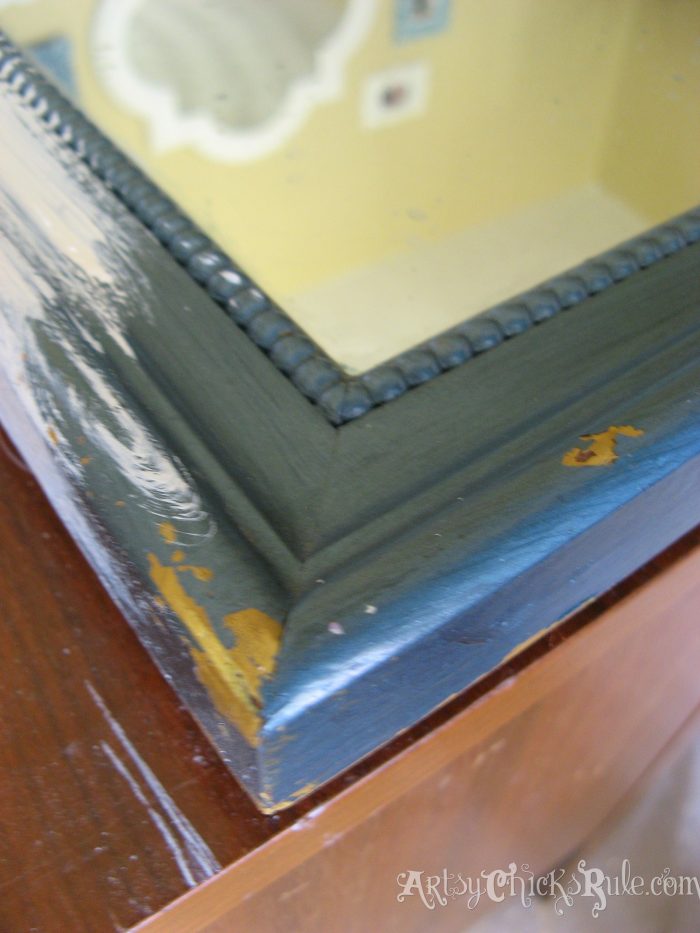
I used Citristrip to remove the paint.
(I don’t have a ton of pictures of this entire process because I hadn’t quite started blogging yet)
But there it is in the background, behind the chairs….all stripped.
It was a nightmare to get completely off.
A NIGHTMARE.
Not fun. AT all. (ha, just noticed hubby in the yard with the shop vac, cute ;) )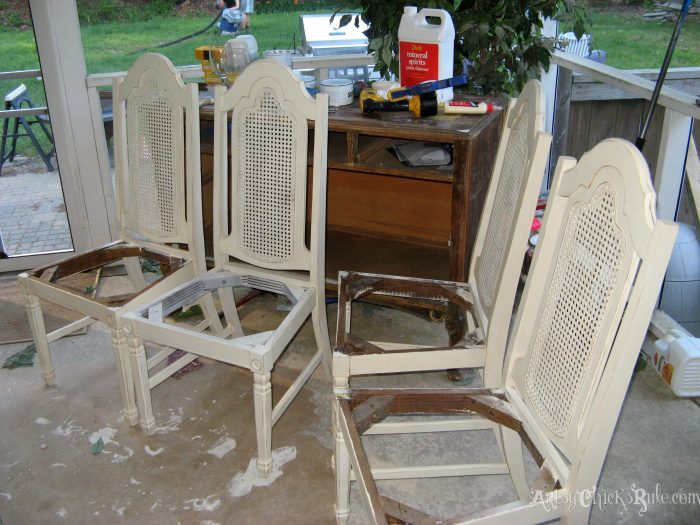 It’s hanging out on the porch because it had been such an ordeal to strip…I just HAD to take a break from it for a bit.
I, for the most part, do not buy furniture any more that is painted.
UNLESS the paint is in good condition and I can paint right over top of it.
Stripping paint is not fun and some paints can contain lead.
I like fun (and my health) so I skip that if I can!
The base was solid and in good shape but I ended up having to peel away the veneer from the drawer fronts.
It did not survive all that paint removal process.
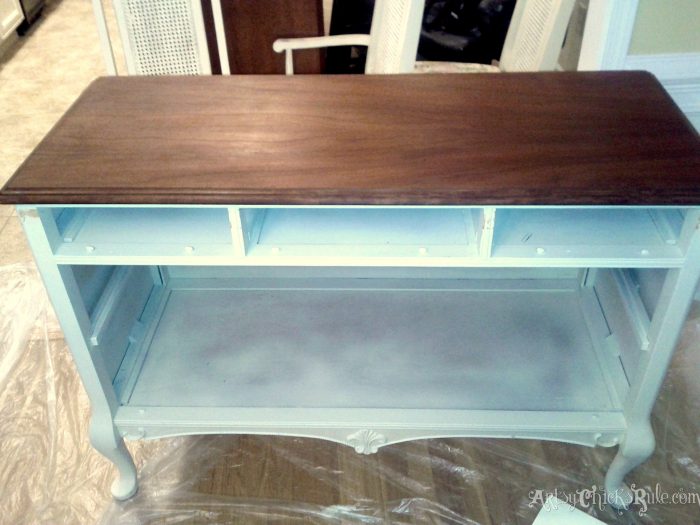
Below shows it sanded and primed. I sprayed this with my paint sprayer. (latex, water based paint and primer) And no, not inside my house. ;)
….I primed the entire thing well with the sprayer and then brought it in to hand paint the rest.
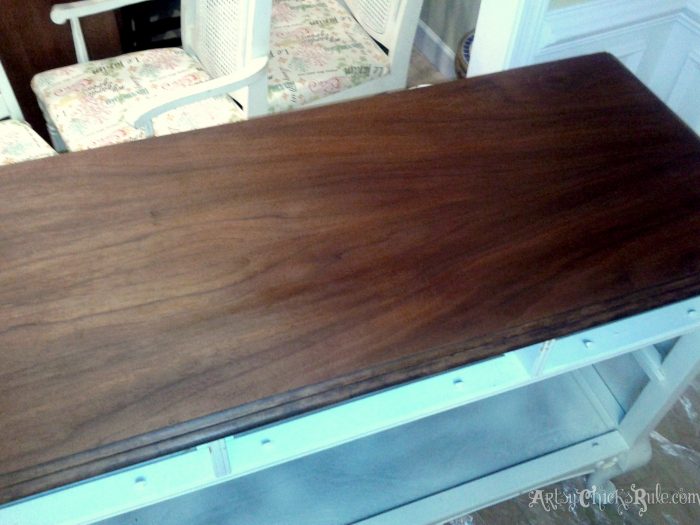
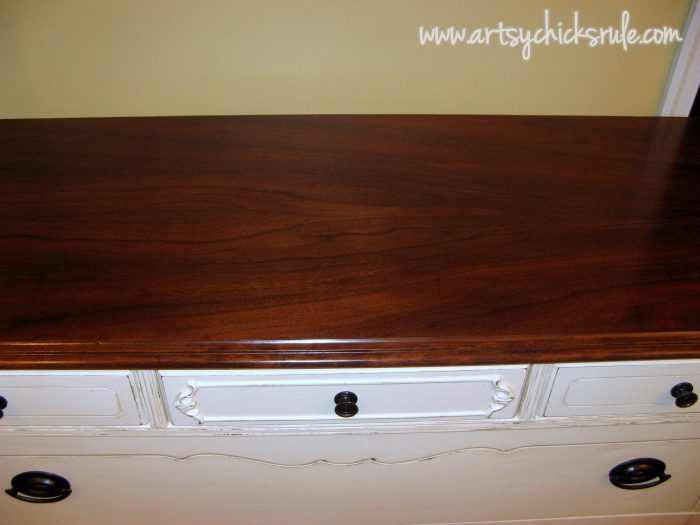
 The top was so gorgeous under all of that paint that I re-stained and poly’d it.
~I applied Minwax Pre-Stain Wood Conditioner first.
~Then used Minwax stain in English Chestnut.
~Followed by Minwax Polyurethane in a Satin finish.
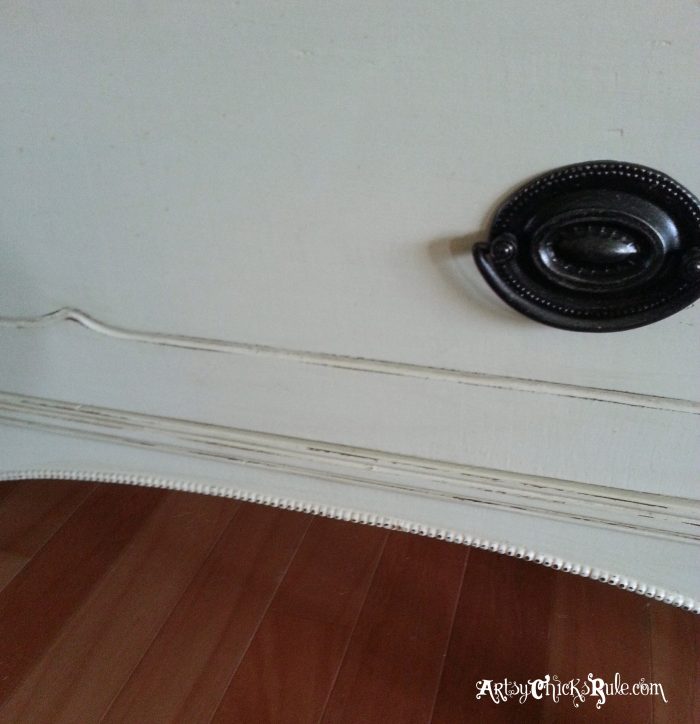
I had to repair one of the “teeth” at the bottom of the trim…..I hadn’t when I first purchased it.
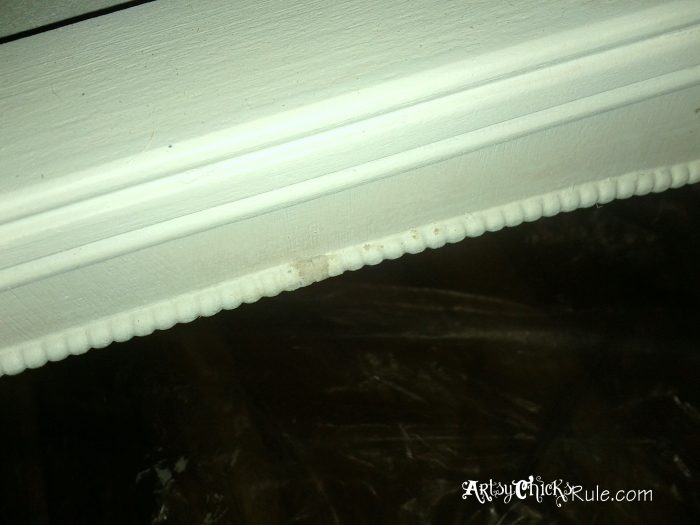
I used wood putty and just shaped it like the rest….then carved a line down the middle to create the space.
Voila! Fixed…. no more gap. :)
That finished top just makes me sighhhh….isn’t the wood so beautiful?
No way I could have covered that up with paint! (and I LOVE paint)
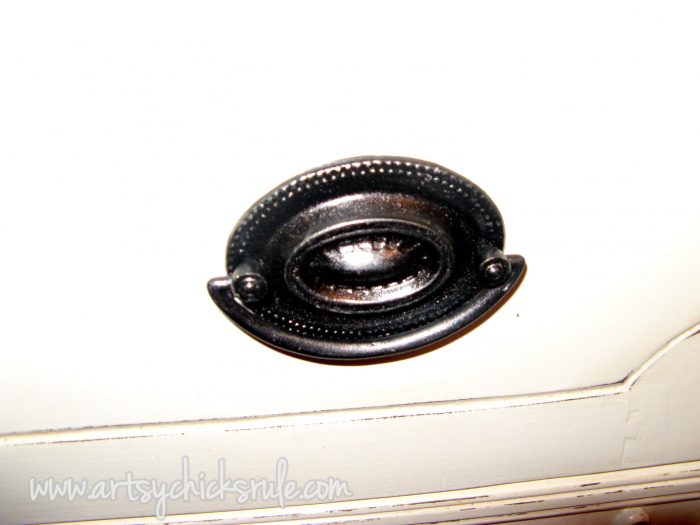
When the drawers were stripped you could see the round impressions of the old pulls.
I had already purchased these oval ones to replace what had been put on there. (I’m thinking they were exactly like these though, just round)
I wanted to get it as close to “original” as I could.
These were shiny yellow brass…until I sprayed them with Oil Rubbed Bronze spray paint, by the way.
Then added a touch of gold to the edges to “antique” them up a bit.
The bronze ones I found online were super expensive…these weren’t!
But I turned them bronze anyway.
Easy and inexpensive.
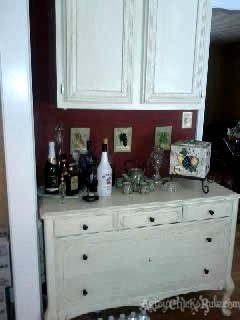
I used to have it in the Dining Room as the “liquor” cabinet. I have since found and painted something else for this spot.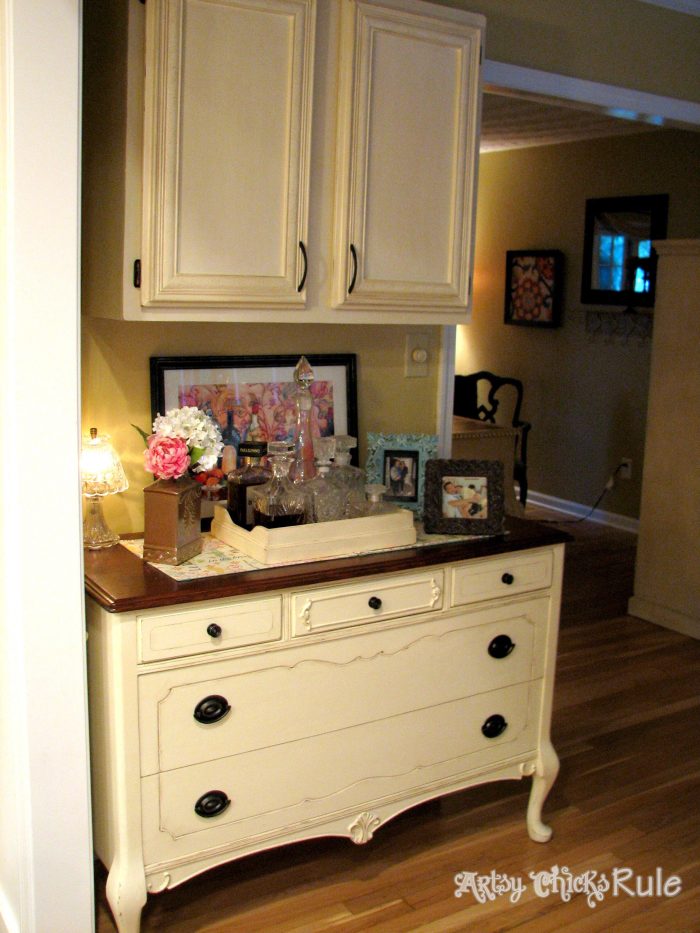
This Estate Sale Sideboard now resides in this space (and the antique dresser in my Family Room)
This one fits the space much better.
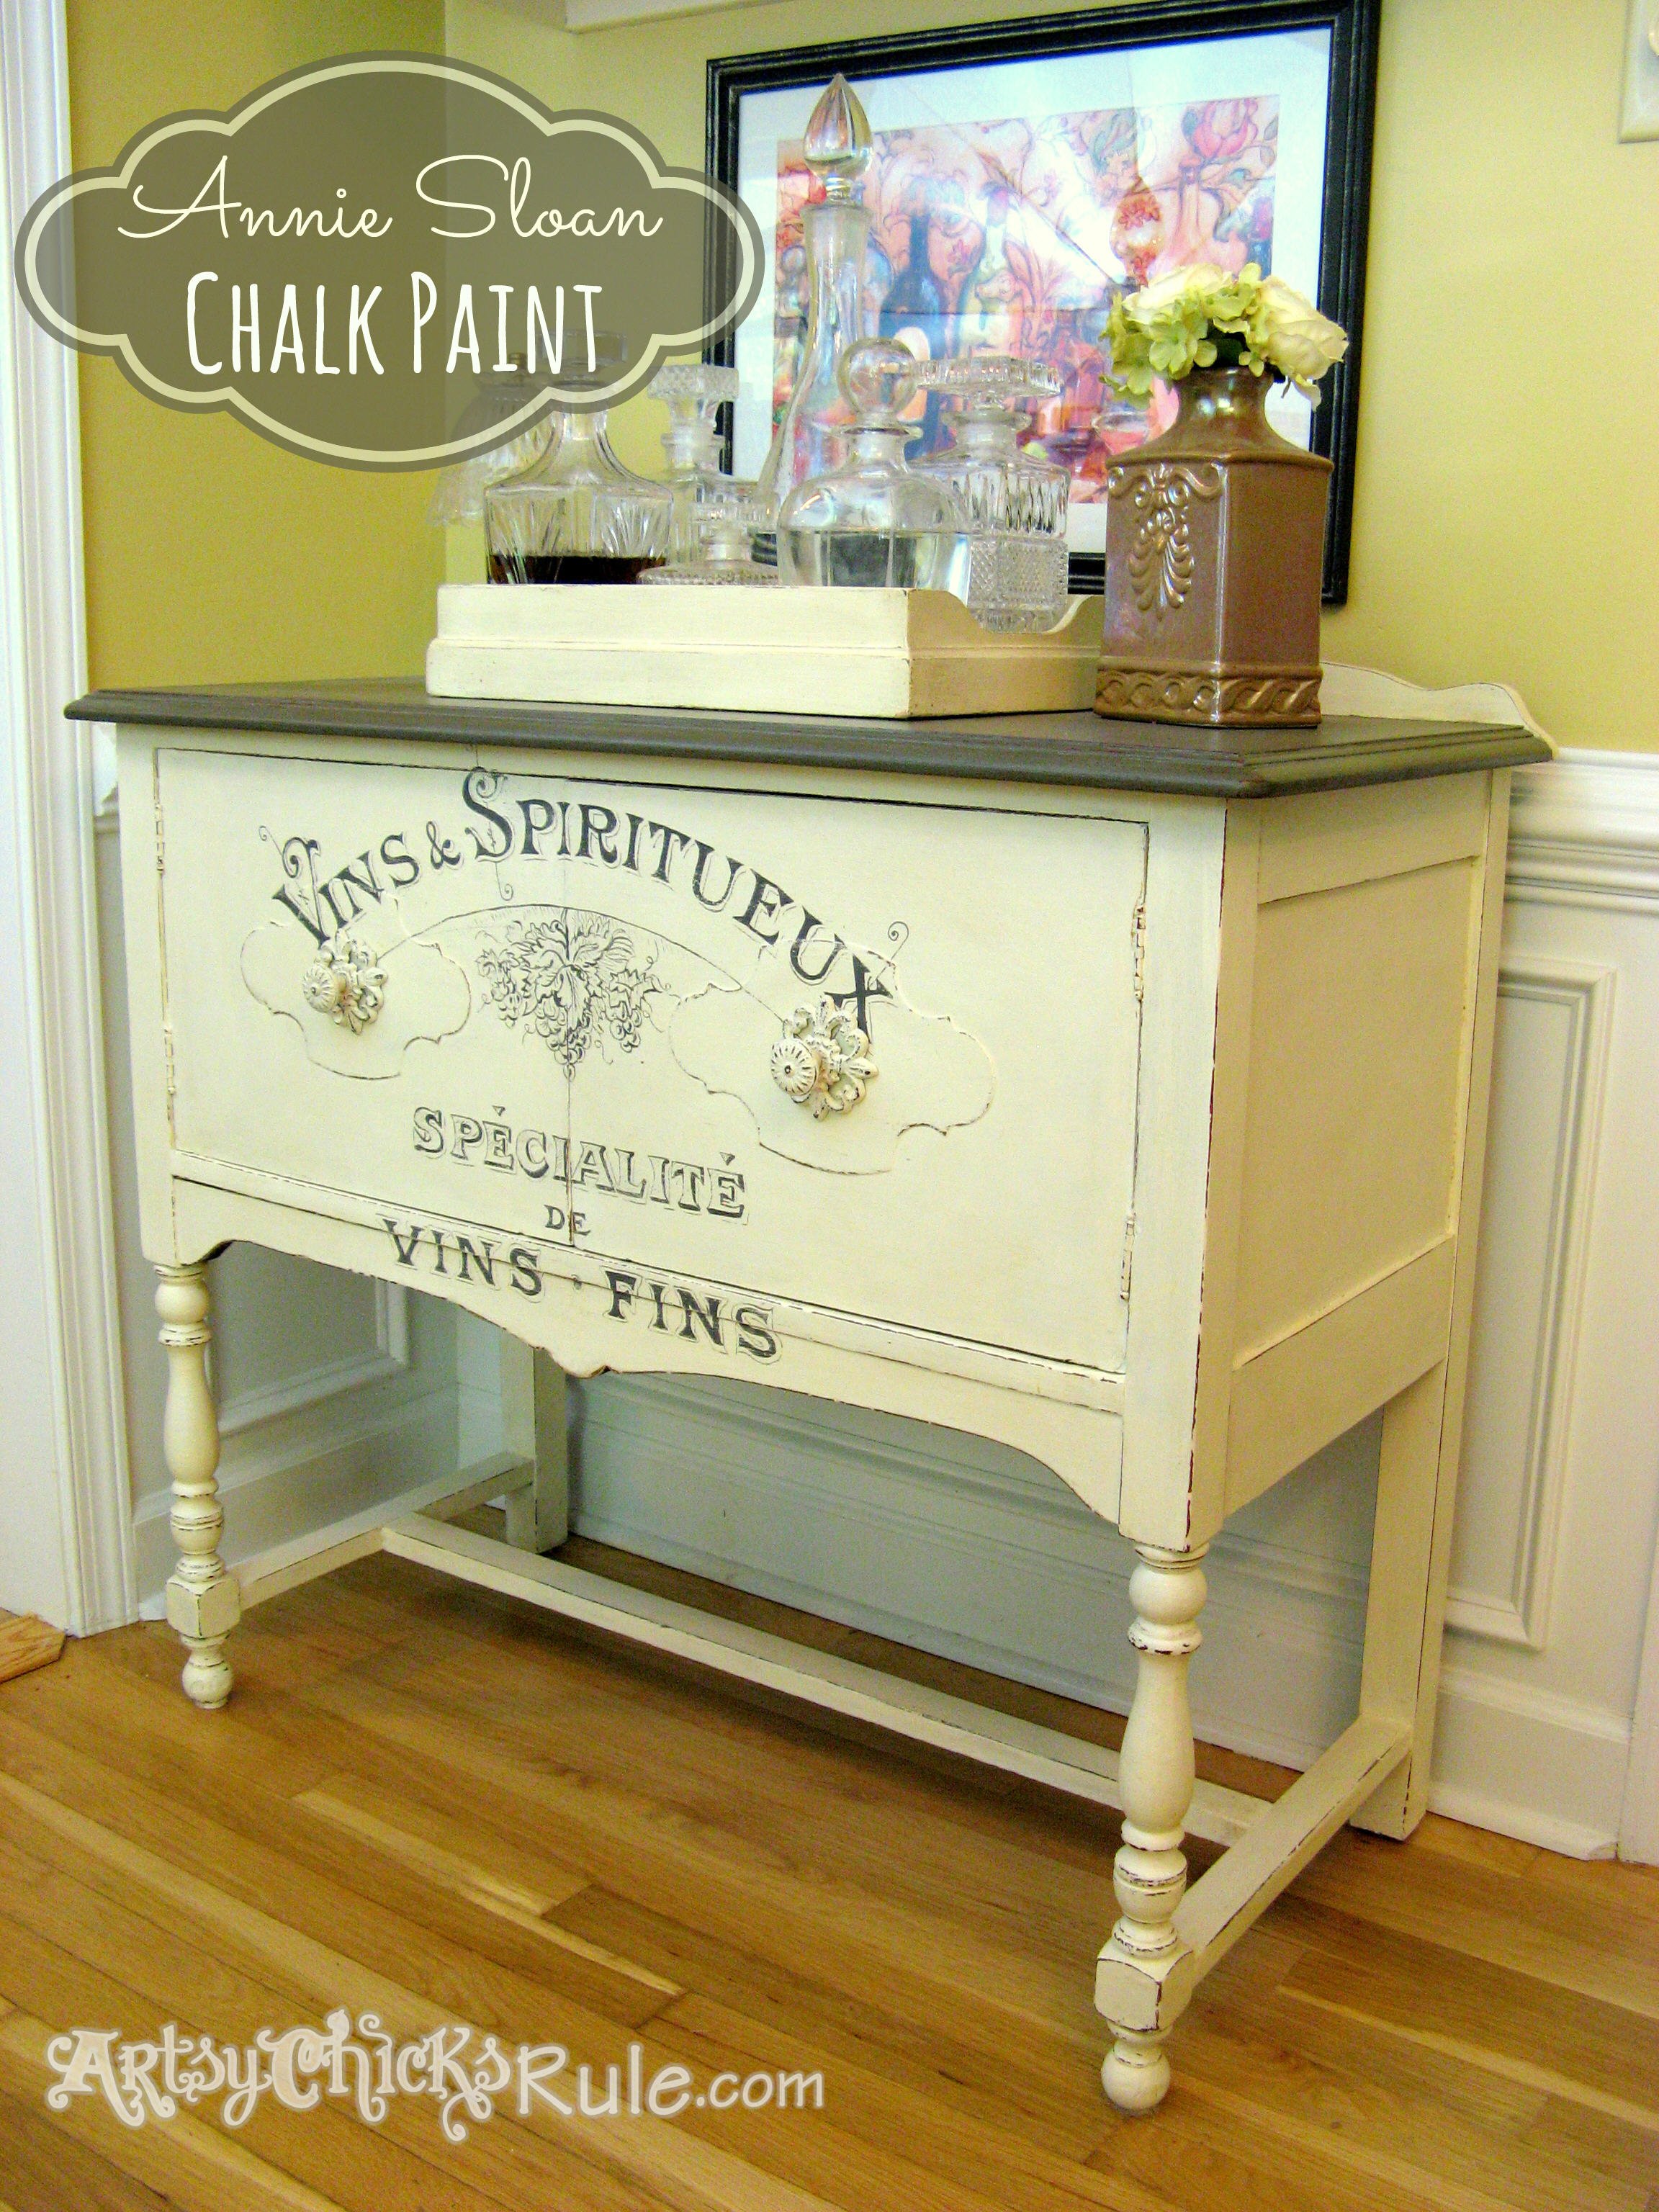
I finally painted that mirror to match (I used Old White Chalk Paint for that….latex on the dresser) and hung it over top of the dresser.
It’s a (VERY) heavy old mirror.
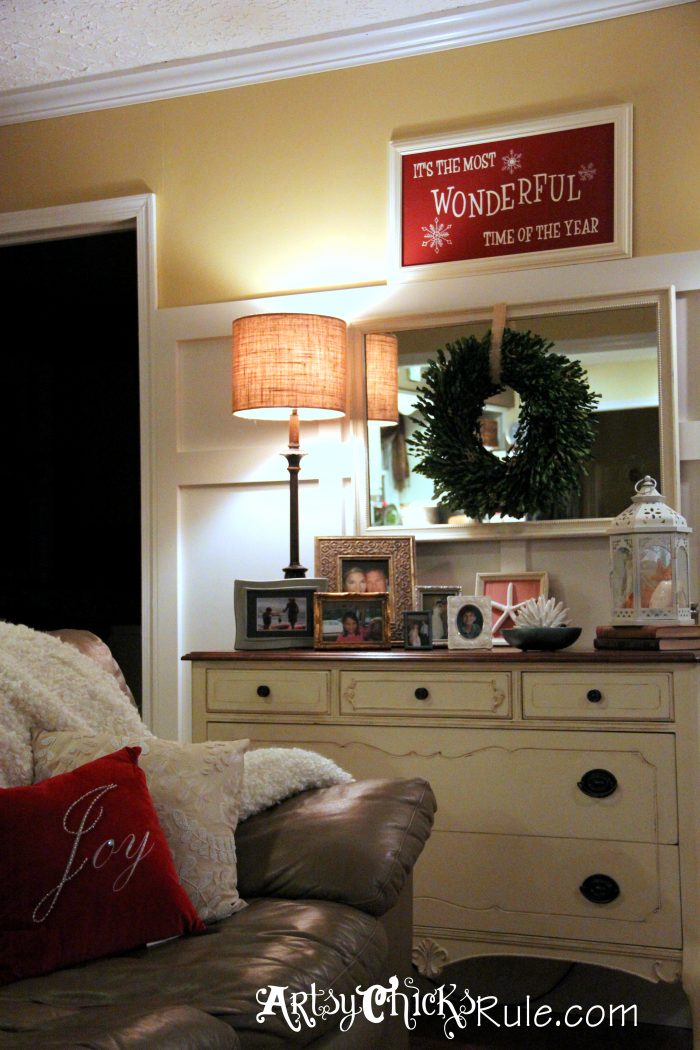 I now store our DVD’s, movies, workout videos,etc, in the drawers.
The top 3 drawers have misc controllers etc. Great storage!
And I just love it in the Family Room….perfect spot for it with the mirror over top.
Finally in it’s rightful place.
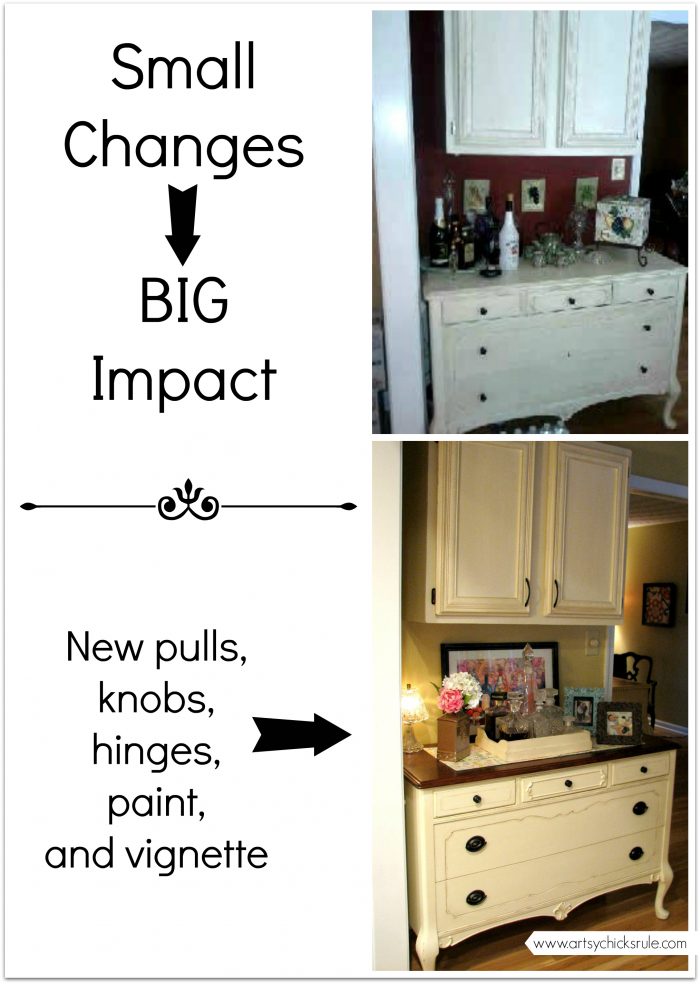
It was a lot of work to strip the paint….but the rest of the changes were really pretty simple. New paint with some distressing to pull out the details, new knobs, new pulls, etc.
Amazing what a few small changes make….
I love reinventing furniture and spaces in my home. How about you?
I’m always up to–>’changing’ something around here! ;)
I’m so excited about the new year and all that we have planned….quite a few DIY projects (large and small) in our home and many (many, many!) paint transformations.
So keep an eye out….there is much, much more to come.

Be sure to follow me on Instagram if you don’t already!
I always post projects and things I’m working on plus lots of fun random dailies. ![]()

Sharing with: Miss Mustard Seed,
")


")

Your dresser looks so nice and the storage that it offers in your living room is convenient. I really like all of the detail on the front of the dresser.
Thank you Paula!! Oh yes, the more storage (aka place to put junk!) the better!! ;)
Nancy
It was pretty before, but it’s gorgeous now. I love that you left the top stained. And the hardware is perfect! Have a great weekend! ~ Angie
Thank you Angie! I do love that top! ;)
Hope you have a great weekend too!
Nancy
I completely GET the withdrawal. We have our own shop and I look forward to painting furniture. I REALLY look forward to painting furniture for our home. Great job!
Oh so great you understand! ;) I do have to sit with most pieces I get for awhile until it talks to me though. Then I can hardly wait to tackle it!
Thanks!!
Nancy
I love how you kept the top wood. It is just a stunning color. I’m always so impressed with your furniture skills!
Awe thank you Megan! :)
Nancy
Just stunning Nancy. Great job!
Thanks so much Beth! :)
Nancy
Sooooo Beautiful!!!!!
-andi
Thanks friend!! :)
Nancy
Its beautiful. What color paint did you use? Also, have you used spray paint on new wood furniture that has a stain and poly finish? I stripped one drawer and sprayed it. It looks great but it was alot of work. I was wondering if I could just prime and spray the rest with a similar result. Love your blog. Thank you!
Hi Toni,
Sorry, I don’t have the exact color (I’m a mixer! I mix up colors until I get what I’m looking for..and this is one I did that to).
I have not used spray paint on fresh, new wood, no. I have spray painted some chairs recently however (they were stained).;) I’ll be doing a post on them soon. I really like painting with latex or chalk paint much better though. You could probably spray the rest…but be sure to use light, even layers so it doesn’t run (which spray paint has a tendency to do) You can seal it after with any spray sealer or poly.
Good luck!! :)
Nancy
Nancy, that piece is just beautiful. It is one of my favorite pieces you have done. I love stained tops with painted bottoms. Very classy.
I look forward to seeing what other things you have coming!
xo, K
Thank you Karen! :) I love the wood tops too!! I want to add some beautiful rich wood back into my home (like those wood counter tops I can’t wait to get started on!! ;) ) One day!!
xo
Nancy
Gorgeous, Nancy! I love that you stained the top. That vignette with the mirror is picture perfect! Have a great weekend! XO
Thanks so much Christy! I love a little peek of wood too! :) I am a contrast loving girl so it’s no surprise though!
Hope your weekend is going great!!
xo
Nancy
I love make overs like this! you did an amazing job!
Thanks so much Shannah! :) I love transforming furniture!
xo
Nancy
The drawer pulls were sprayed with ‘oil rubbed bronze’ and then you added a touch of gold. How did you add the gold? Was it just brush painted on top?
I want that look for an old desk I’m working on (the stained top, painted bottom and the darker pulls). Hopefully when I’m finished it’ll look as nice as your piece does.
Hi Aimee,
I hope you are doing well. :) Yep, I sprayed them with ORB and then just put a dab of paint on my finger and lightly rubbed it over the edges of the handle. Super simple! :)
I am sure yours will be beautiful! Would love to see it when finished!!
Nancy
Love the hardware you have put on the buffet. I am working on a buffet right now can you tell me where you purchased them or from what web site it was.
Hi Sherry!
I’m so sorry, I have no clue where I bought those now. I wasn’t blogging at the time so didn’t keep that information.
I always do now though…and share it! :) If I come across again, I’ll reply here and let you know.
Nancy