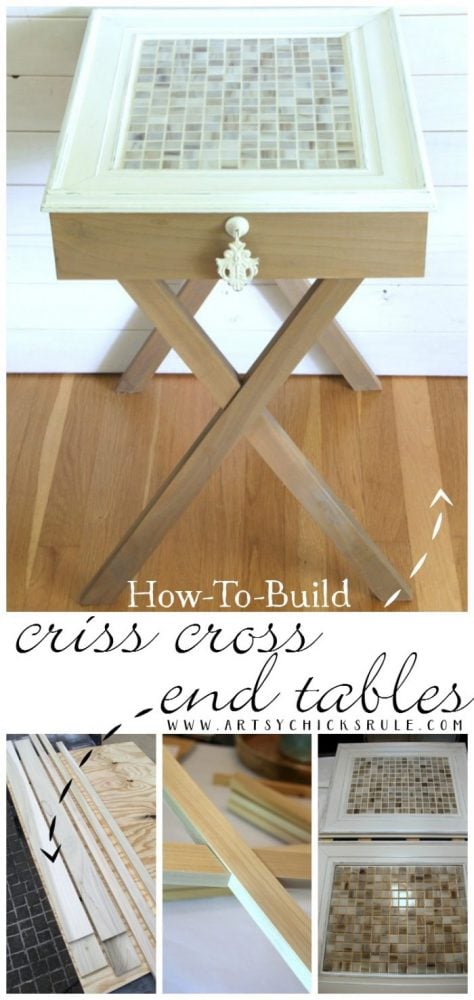
How To Build Criss Cross End Tables (Tutorial)
It’s fun to build something completely from scratch. And even better when you use thrift store finds as part of the build! Follow along as I show you how to build criss cross tables for you own!
Hey Friends! I’m finally sharing how to build criss cross end tables.
It’s been a long time coming considering I first posted about them back in November! Oops!
Click here to read all about these tables and see the pretty styled photos of them.
So if you’ve been waiting for this, I’ve got all the details for you today.
I’ll include affiliate links for your shopping convenience below.
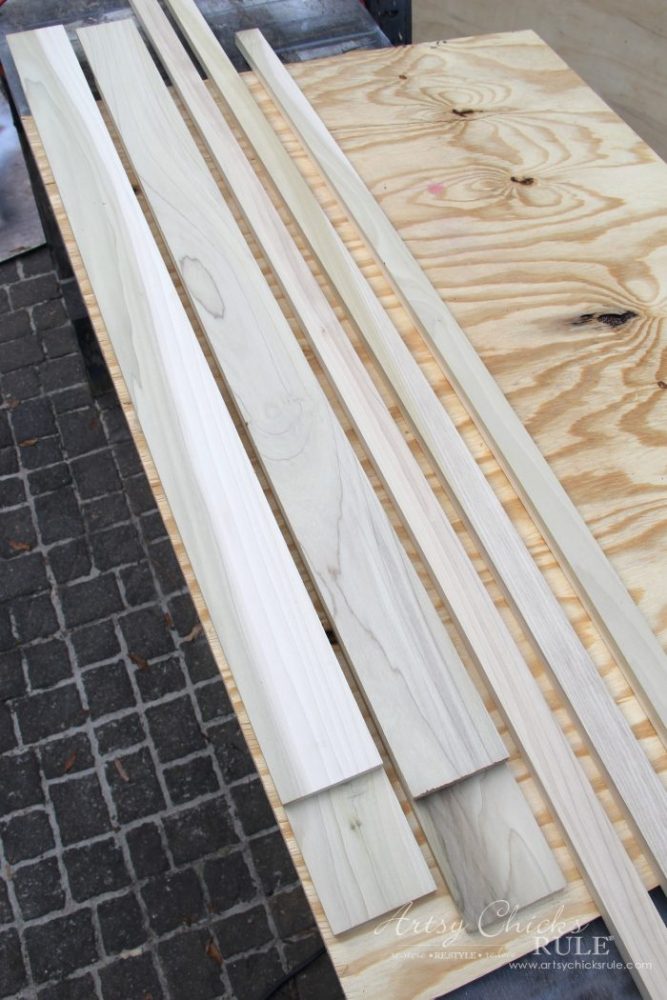
I used poplar for the outer boards, you can use pine or any other you like.
M A T E R I A L S L I S T:
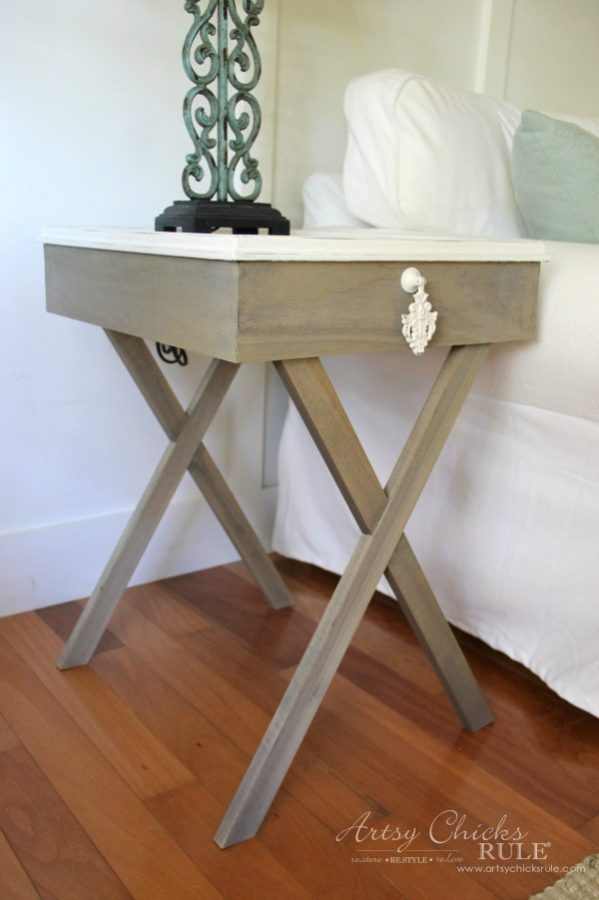
Table Dimensions are 16w x 19d x 24h
- 1 – 1 x 4 x 8 ft poplar board (cut into 4 boards @ 19 inches each)
- 1 – 1 x 4 x 6 ft poplar board (cut into 4 boards @ 16 inches each)
- 2 – 1 x 2 x 10 ft poplar board (cut into 8 boards @ 26 inches each)
- 1 – 1 x 3 x 6 ft pine board (cut into 4 boards @ 15 inches each)
- 1 – 1 x 2 x 6 ft pine board (cut into 4 boards @ 15 inches each)
- wood screws
- strap clamp
- speed square
- Kreg Jig
- screwdriver
- router
- miter saw
- clamps
- E6000 glue
- wood glue
- tiles
- ready mixed grout
- old frames (I found 2 at the thrift store)
- Driftwood stain (or this one I’ve since switched to Driftwood Stain which is a stain AND finish in one)
- Persian Blue paint
- White Chalk Paint
- High Performance Top Coat
We decided to make our own because number one, it’s cheaper!
Number two, I really hadn’t been able to find anything I liked for this space.
As you can see below, the space is limited and I didn’t want anything “heavy” in there.
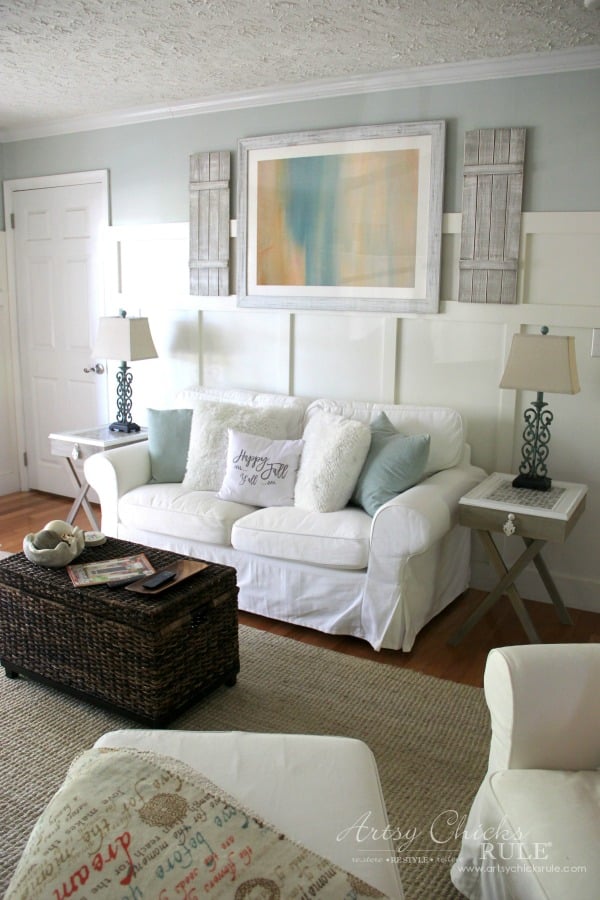
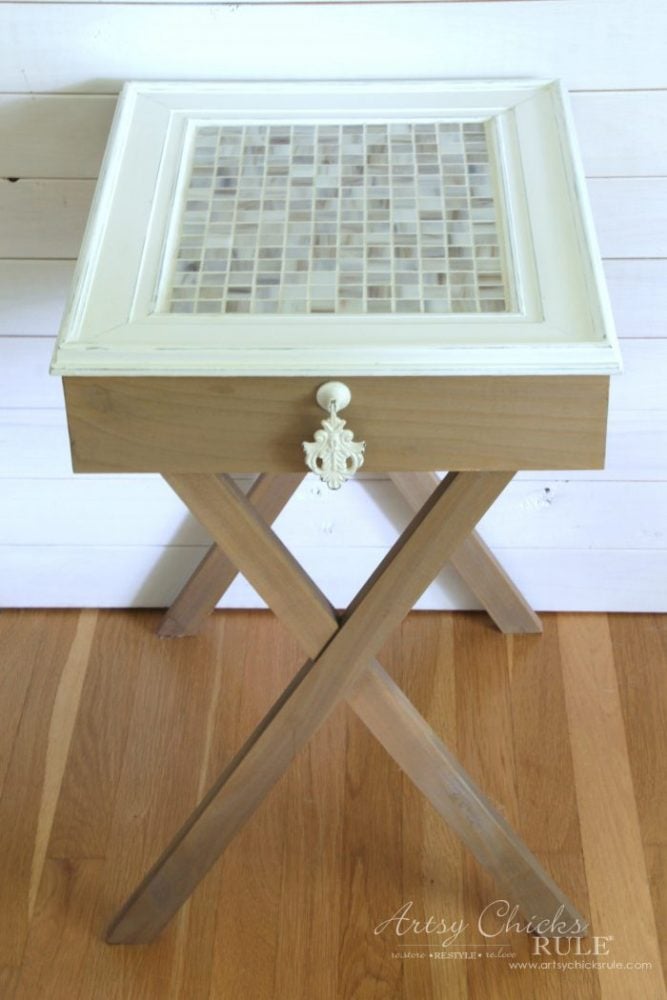
The criss-cross end tables are perfect, light and airy….and functional!
I decided to use poplar and stain. (my fave, Driftwood stain) UPDATE -I also love this Driftwood Stain I’ve been using a lot lately!
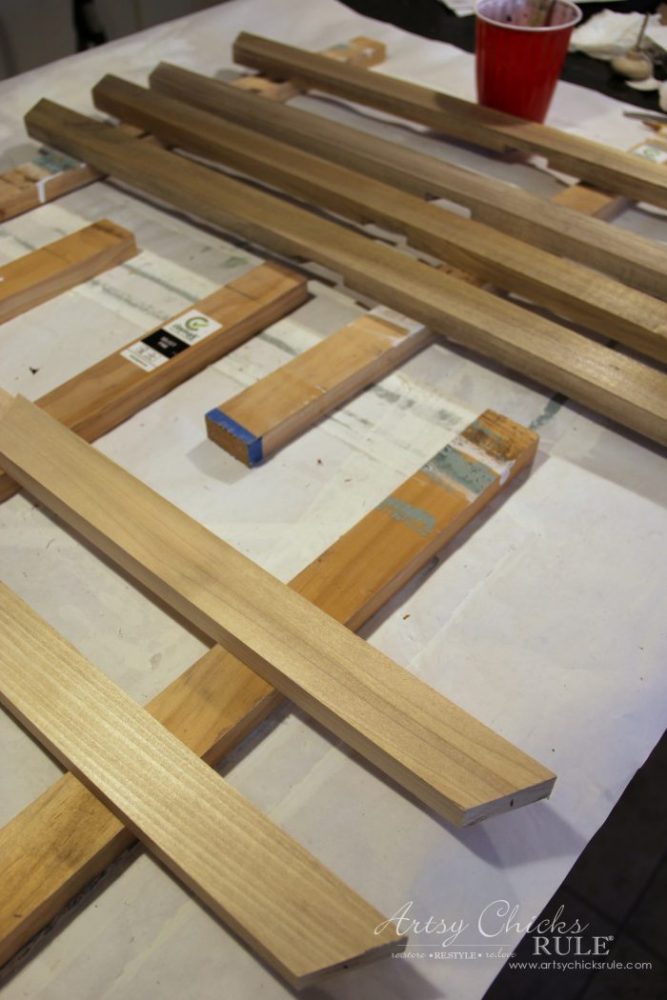
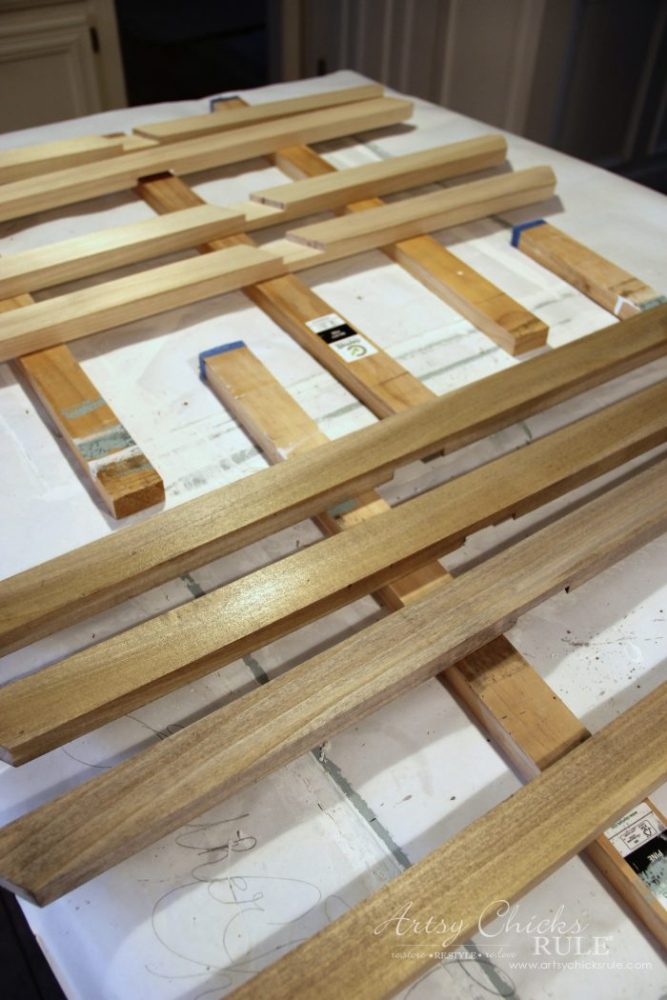
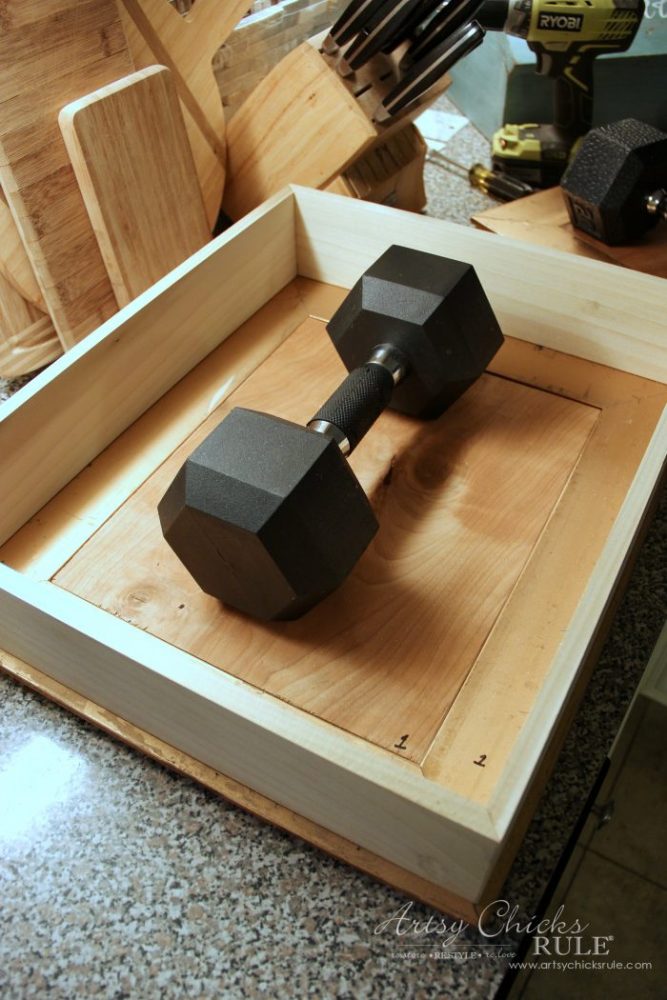
My husband used a miter saw to cut the 1 x 4 boards into 4 – 19 inch and 4 – 16 inch pieces for the box frame.
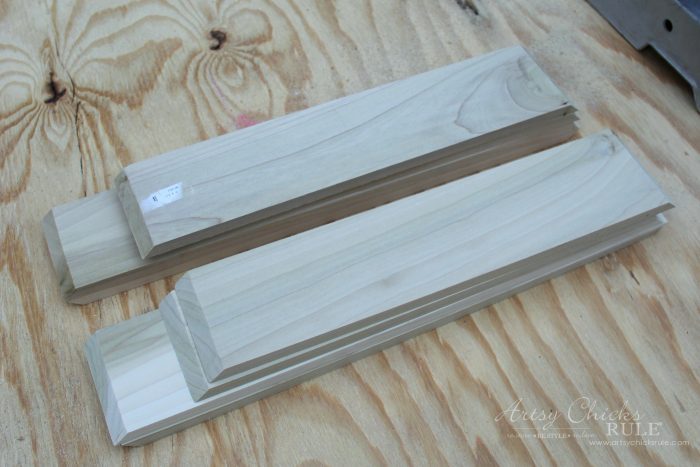
This will create our “boxes”.
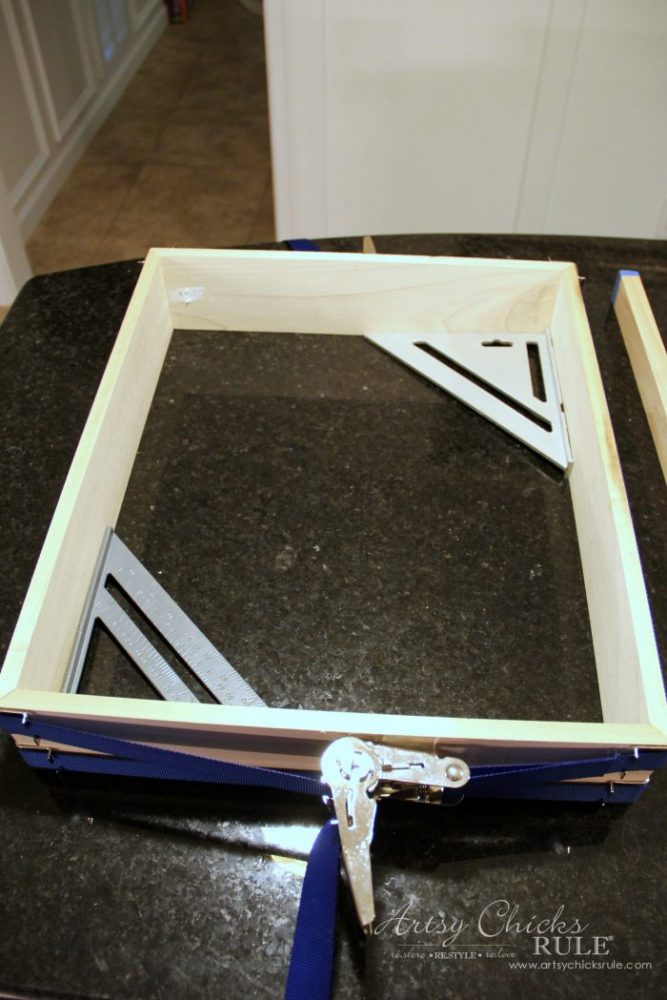
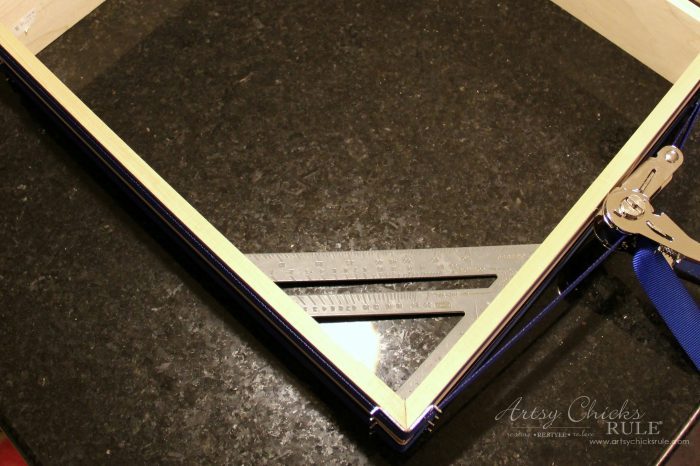
We used a speed square, strap clamps, and wood glue for this part. (linked above in the “Materials List”)
This worked so nicely for getting a perfectly square box.
We had considered putting a drawer in but kept it simple instead. You surely can add a drawer though.
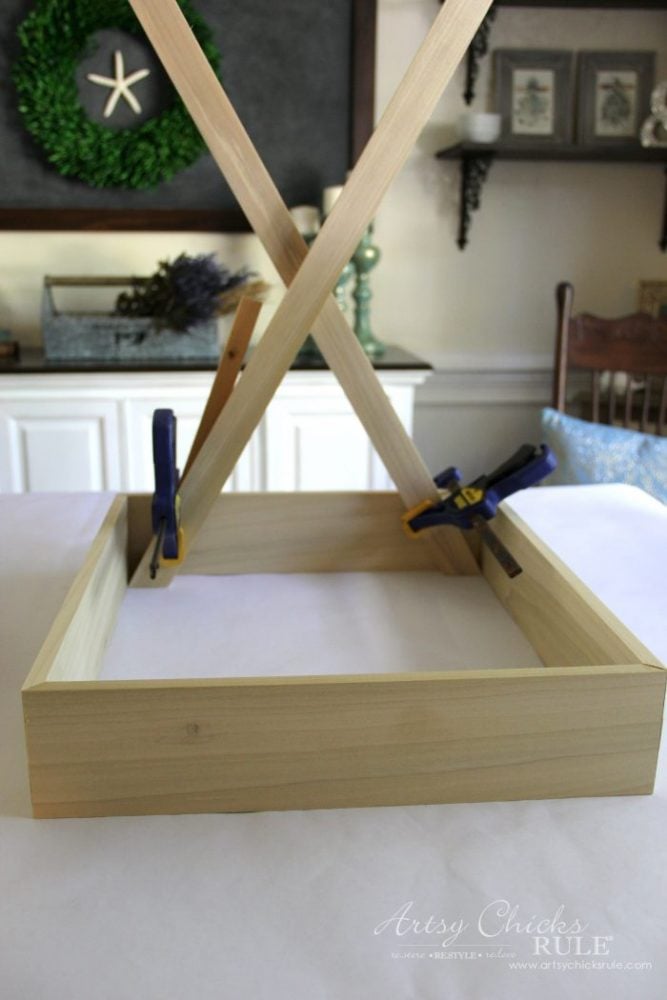
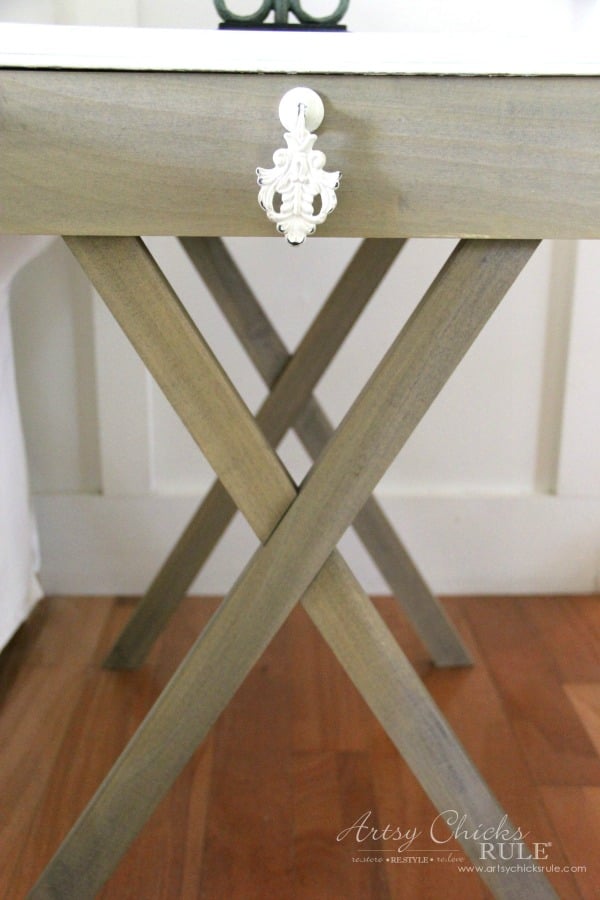
The legs were cut at approx 26 inches (for a 24-inch table height).
To get those angles on the leg ends, my husband used the ” 3 – 4 – 5 rule” which is a geometric equation for finding the length of the legs for a right triangle.
Which is… A squared + B squared = C squared ….. and a little (or a lot) of trial and error. ;)
Surely don’t ask me, I don’t do math!
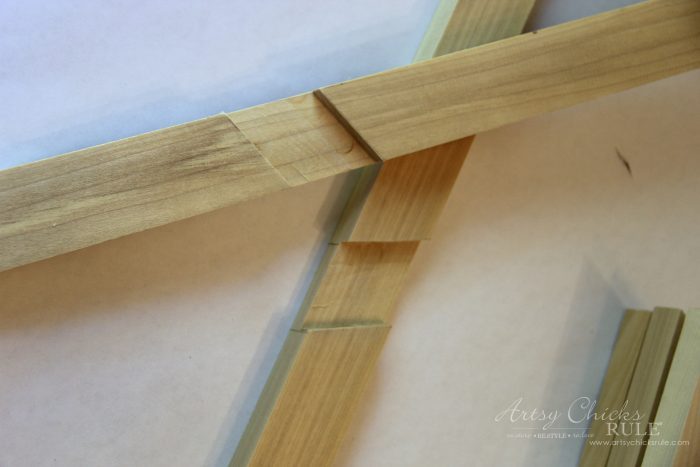
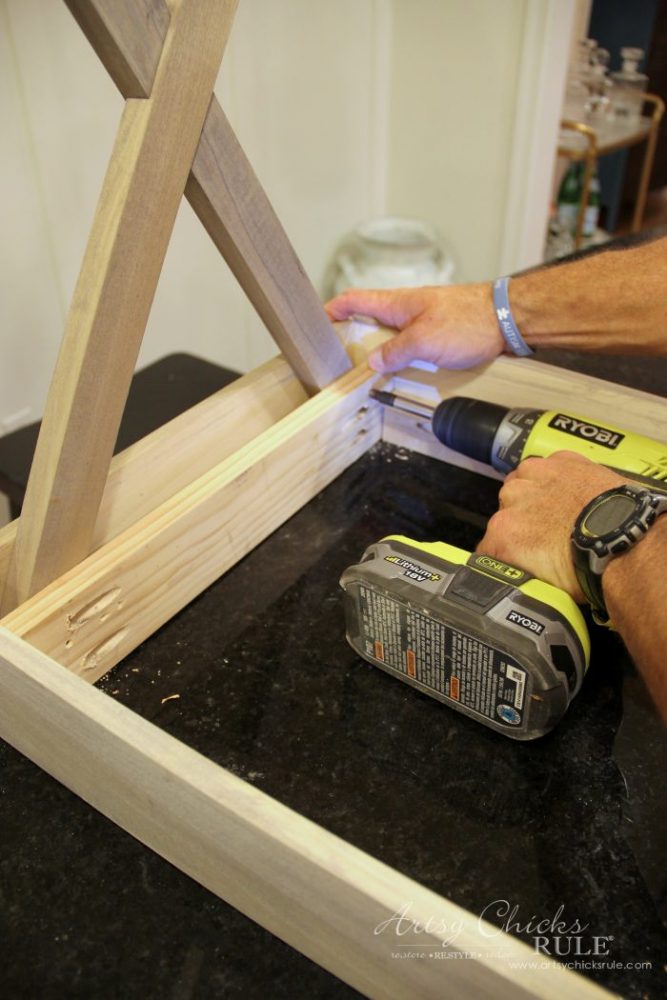
The picture above and below shows my husband lining the legs up to mark where he will do the cut out so the legs will fit together nicely.
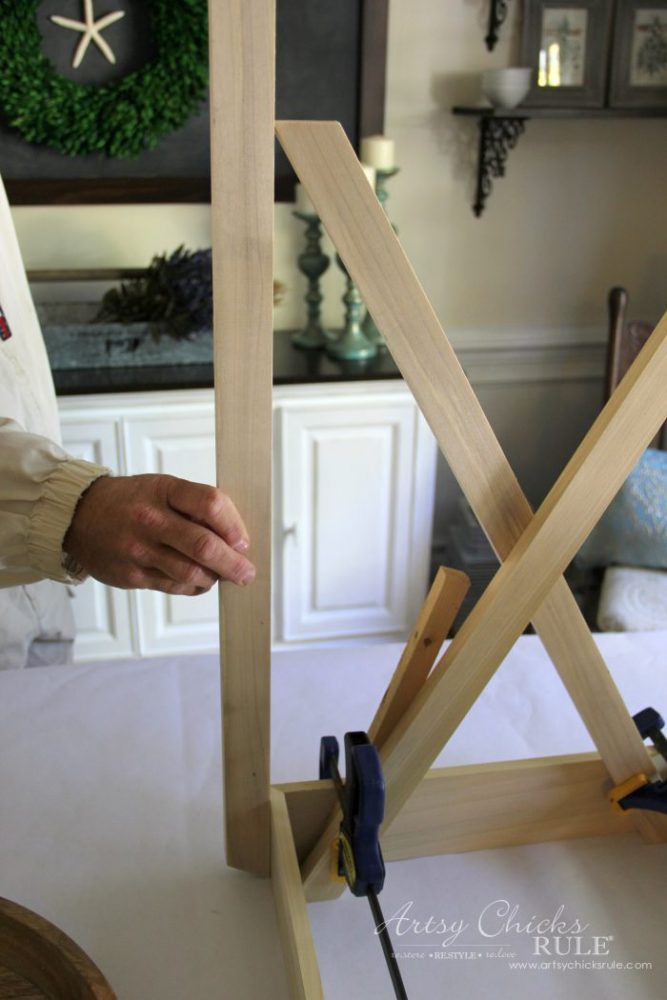
He used a scrap piece of wood and clamps to hold the legs where they need to be for marking.
Once marked, he cut them out with a miter saw and used a router to cut the section out on each.
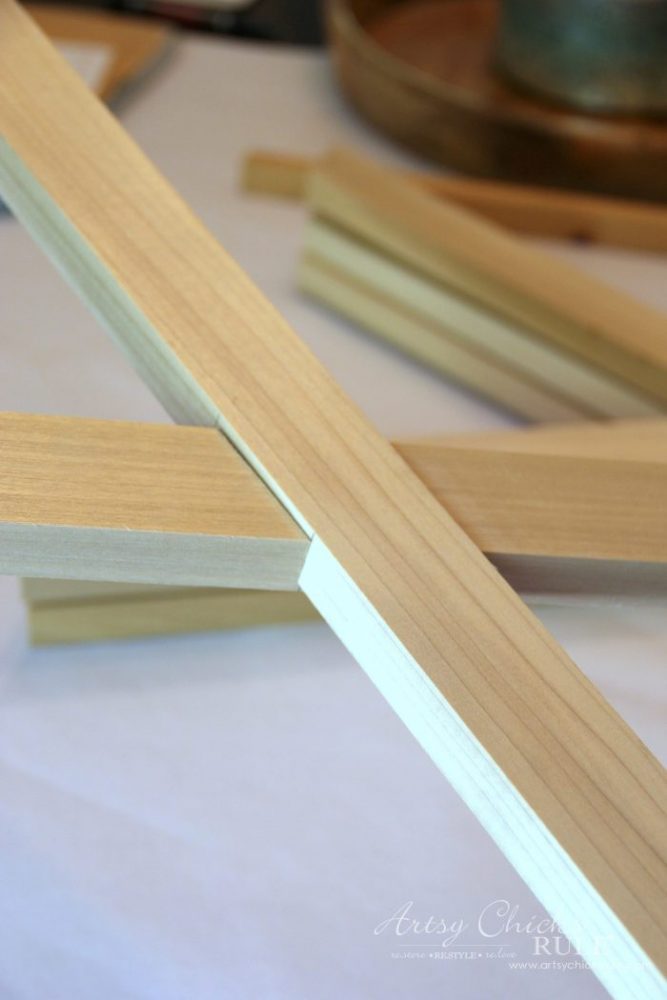
I went ahead and used the Driftwood stain on them before we went any further.
They were glued together using wood glue after the stain was dry.
Then attached to the wood box frame.
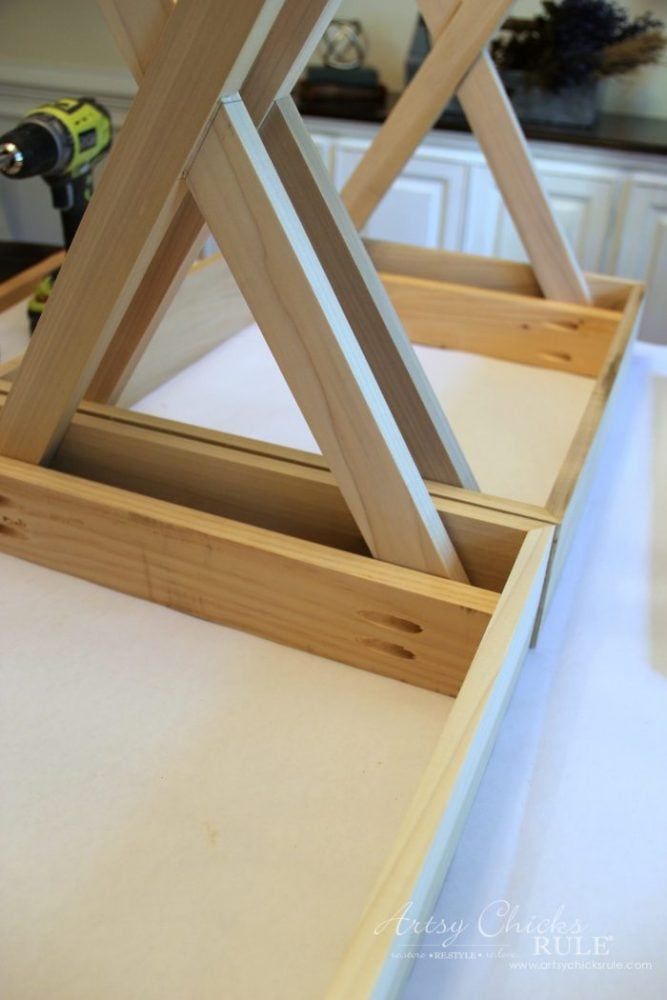
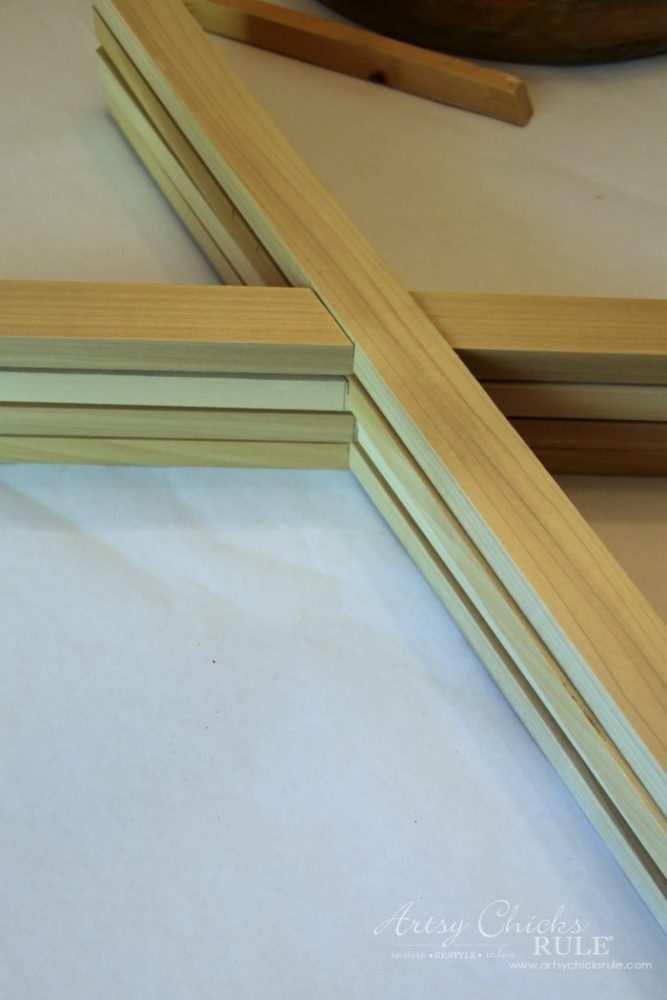
My husband glued and attached a piece of wood for bracing.
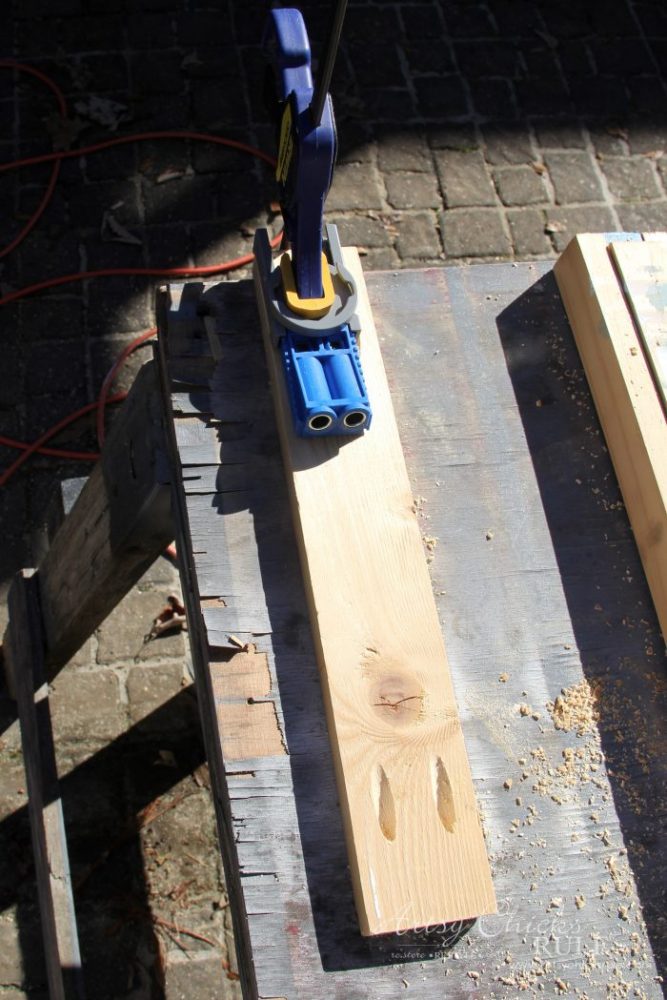
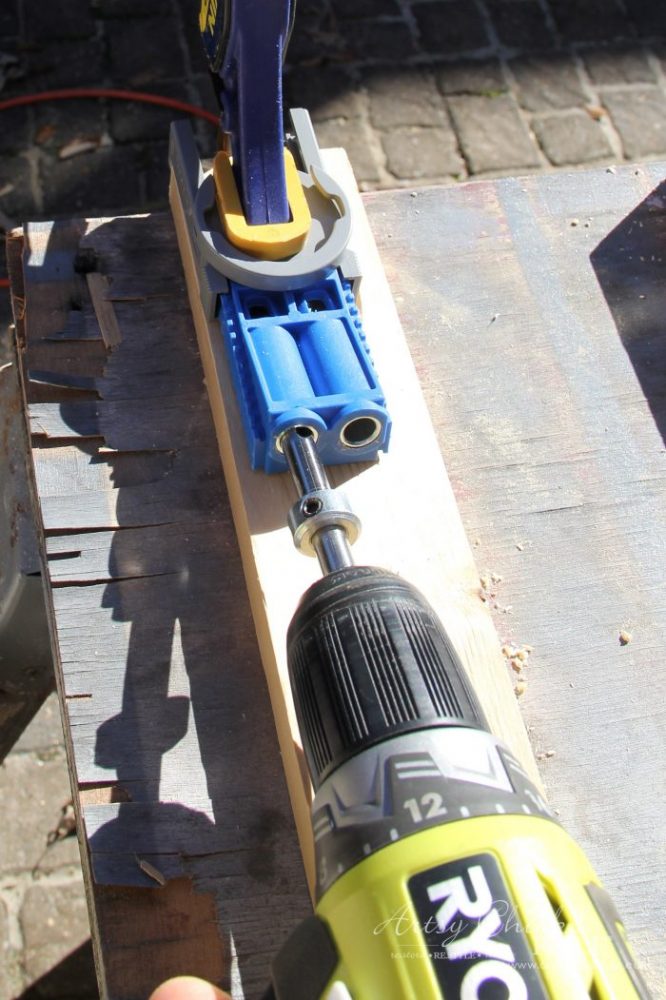
It is a 1 x 3 that he cut into 15-inch sections.
He used a Kreg Jig so the screws would go where he wanted them and be secure.
Once the screws were in where he drilled with the Kreg Jig, he also added a few wood screws through the legs for even more support.
And also added another piece of wood bracing on each side of the inside of the box frame.
1 x 2 at 15 inches repeated with the Kreg Jig for screwing into the frame.
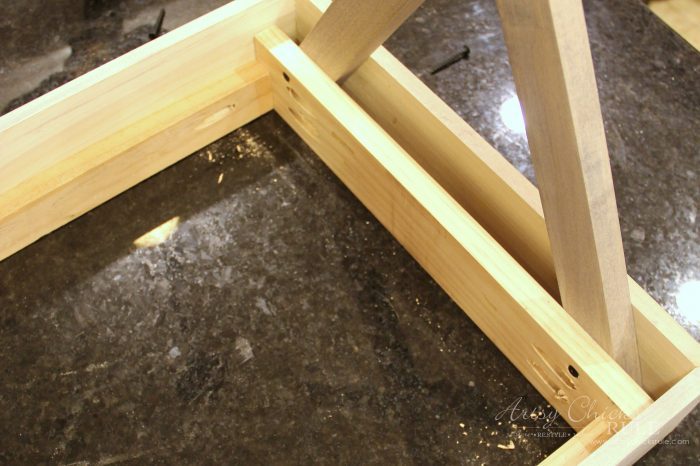
So they are very sturdy now.
Now for the fun part!! The tops…
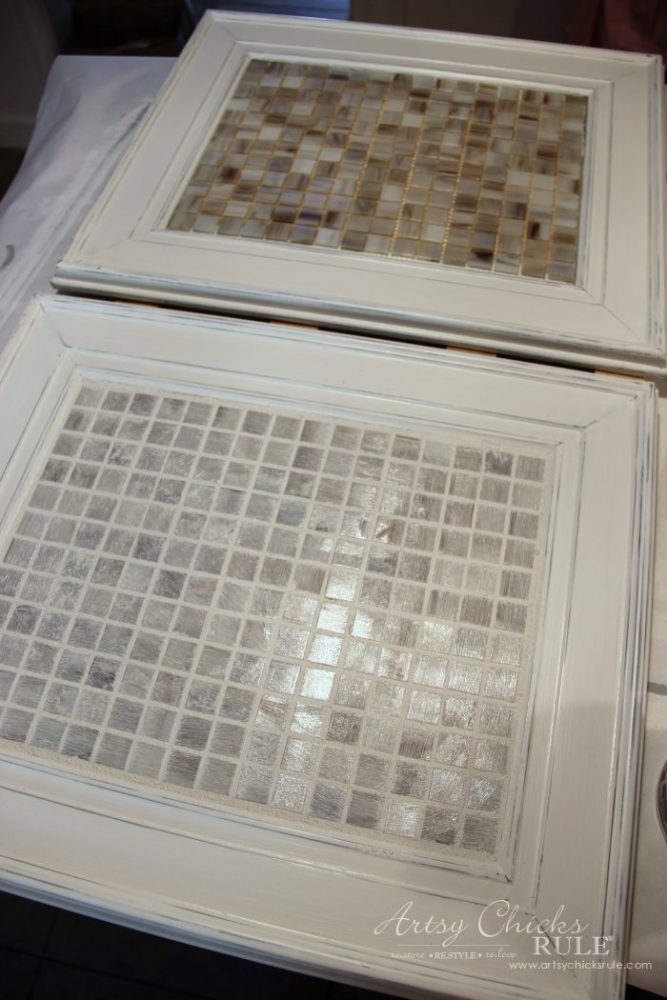
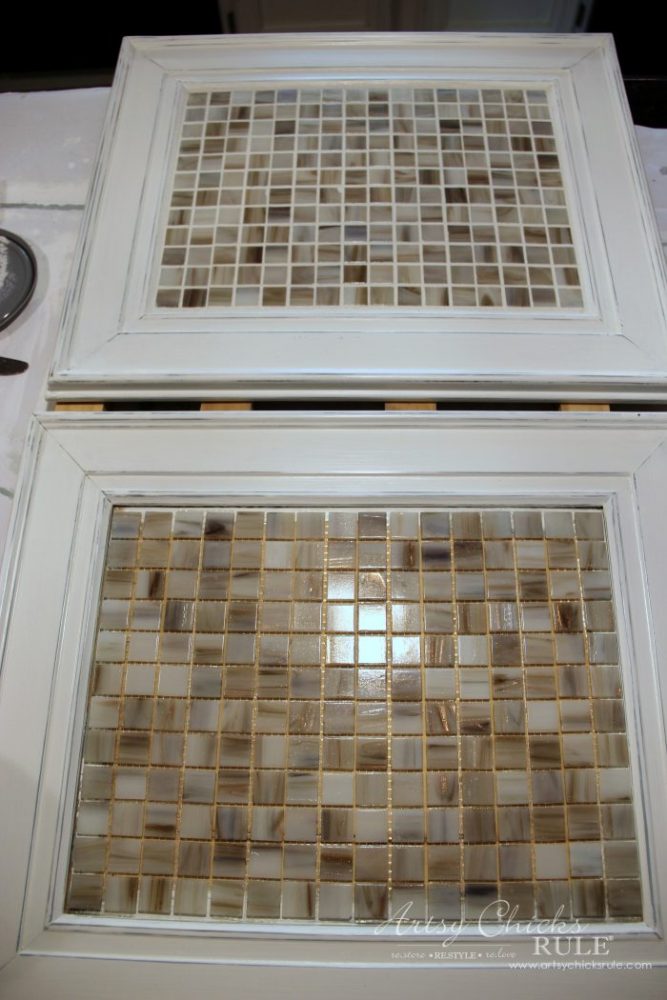
I found these 2 frames at the thrift store and thought they’d be perfect.
That means less we’d have to make and also very cost-friendly.
Here they are with the plywood cut and glued to the insides already…..
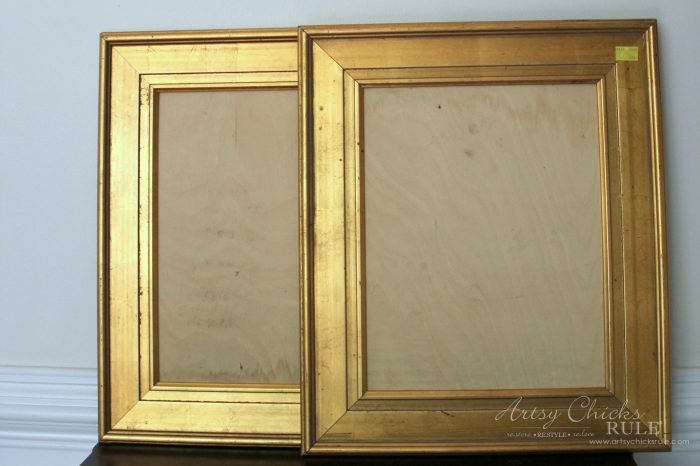
I used E6000 glue to hold them securely in place.
I use whatever I have to weigh stuff down.
And as you’ve probably noticed, we work all over our house, dining room, kitchen counter, island countertop, wherever!
That’s one of the reasons I’m looking forward to moving.
I can’t wait to have a dedicated craft/workspace in a spare room on the first floor…or in a big ole garage.
Ours is a one and a half car garage and is small. (or maybe just filled with too much junk!)
And who wants to carry all these projects up and down the stairs all the time?
I sure don’t!
I painted the frames Persian Blue as a first layer.
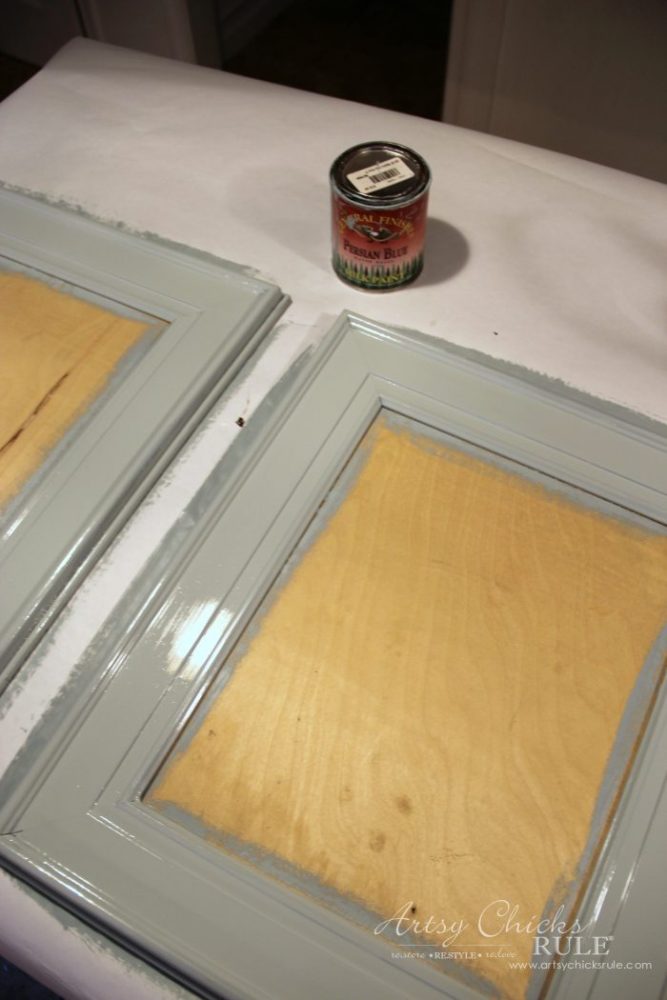
I did this because I wanted a hint of blue to show through once finished.
Next, I added a layer of white using Chalk Paint as it’s a bit “chalky” and fairly easy to sand/wipe away to reveal the blue underneath.
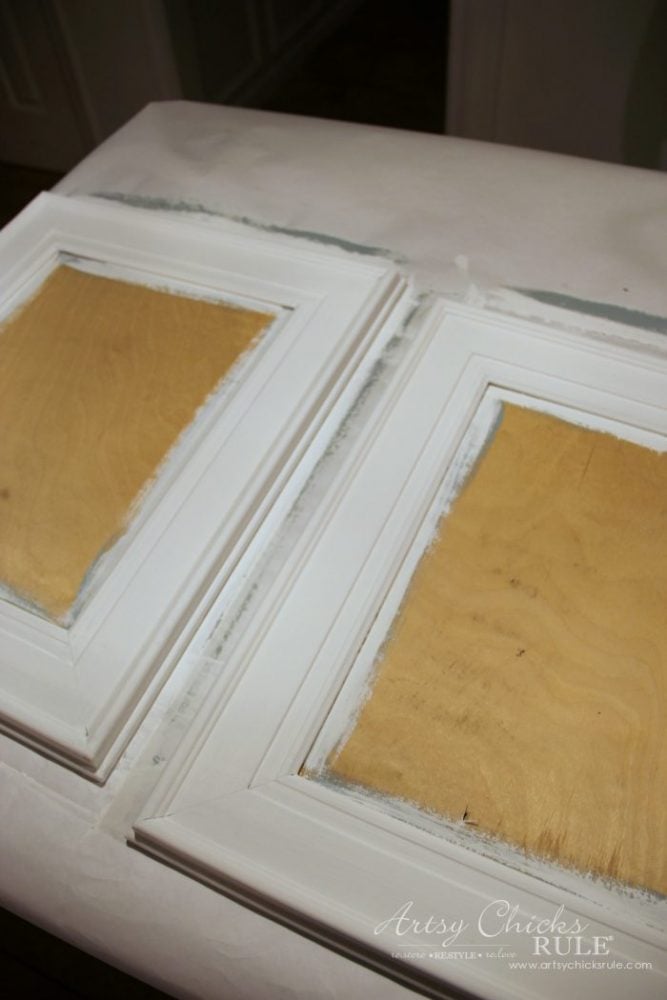
Then I used a damp rag and wiped away a bit of the white on the edges to reveal the blue.

If you used regular paint you can use very fine sandpaper to do the same.
Just be careful to not over-sand as you will remove both layers of paint.
Not the desired effect, in this case.
I added a topcoat sealer. (also linked above)
Then I added the tile…
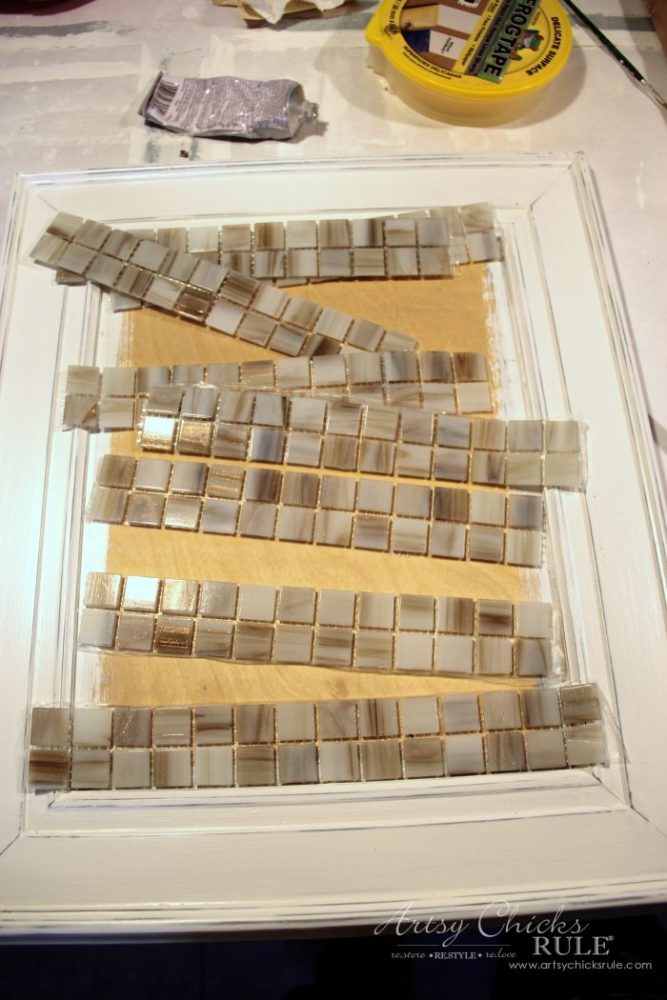
The square mosaics are pretty easy to use in this type of application because everything is square.
I used E6000 to attach the tiles.
Then I used some ready mixed grout I had in white.
You can see two similar tiling projects here and here.
Pretty easy!
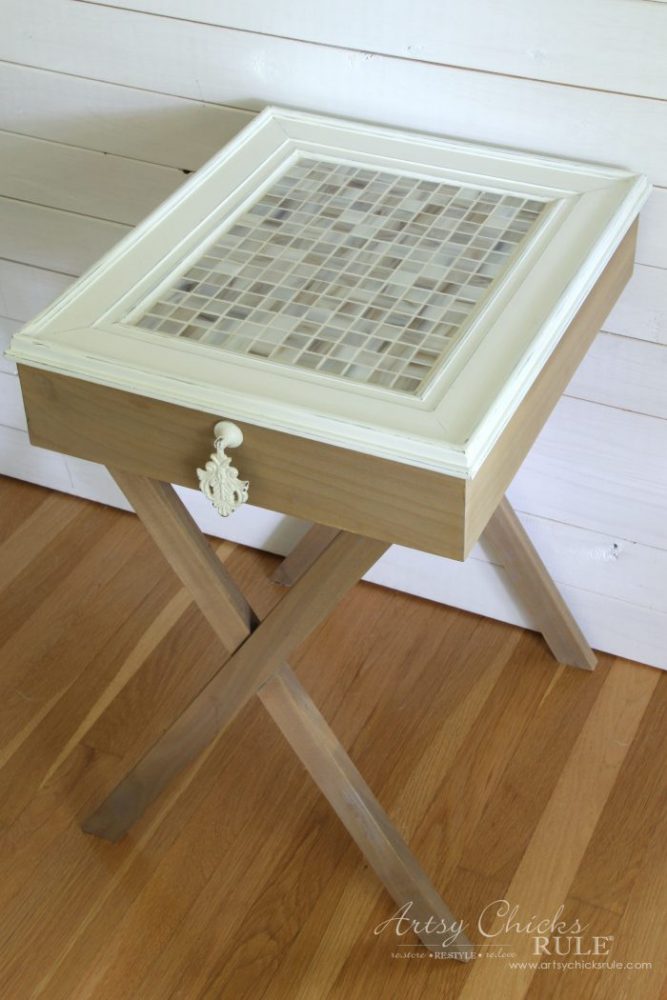
Once they were done, I used the E6000 once again to attach the tiled framed tops to the wood box frame of the table.
Use clamps to hold it secure.
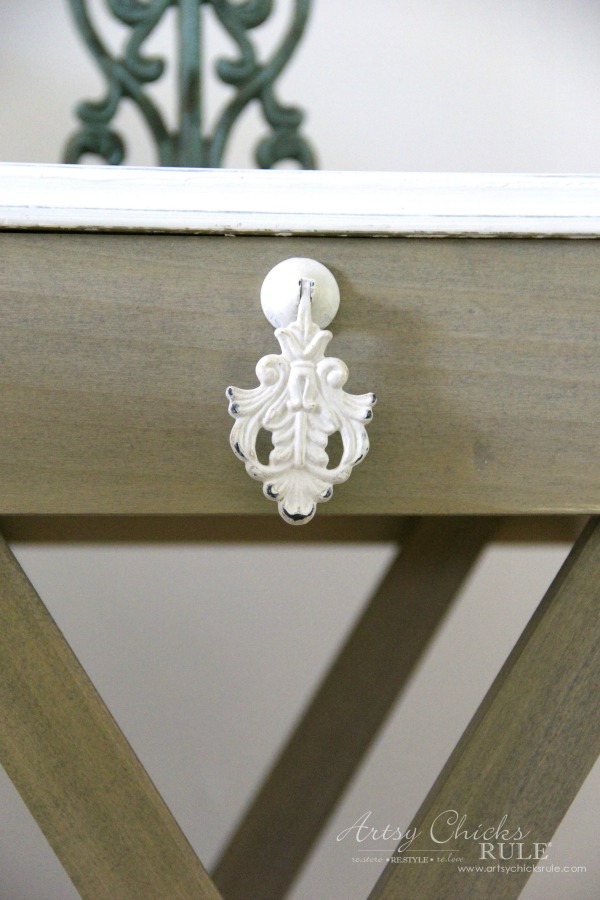
I used the same Driftwood stain on the box as I did on the legs.
Doesn’t it give the wood the neatest look?
Then I added these knobs I picked up at Hobby Lobby to mimic the look of a drawer.

But since they were such an off-white, creamy color I painted them white and distressed them first.
And done!
Semi-easy little project.
No, I won’t be saying this one is SO easy, anyone can do it!
But anyone can do it.
It’s just not what I would call a simple “easy” project because of the angles to be cut and such.
Full disclosure here on the blog. But don’t let that deter you, as I said anyone can do it, as it’s a very doable project.
Just take your time and keep a hold on your patience.
So go ahead and PIN these directions on “How To Build Criss Cross End Tables” so you can build some too!
By the way, this was a very thrifty DIY project.
We basically paid for the cost of wood (and the cheapie thrift store frames) and that’s it.
The rest of the supplies we already had on hand.
Much cheaper than store-bought!
Can’t beat that, right?
I’ll see you back here on Thursday with a brand new (re-do!) makeover on this…..
UPDATE! See it now, here!
xoxo


")


")

")
")


What gorgeous looking end tables. Love the hardware (drawer pulls) and the tile really makes it look like a million bucks
Thank you Colleen!! :) I’m so happy with them!! xoxo
Would love to win your craft giveaway, especially the stencils. Couldn’t do lots of stuff with them!
Good luck Vee!! :)
I had forgotten all about these end tables. You guys did a great job on making these. And when you got to the angle part, my brain started clouding over. I actually liked math in school, I am just no good at applying skills to real life situations.
Thank you Paula! :) I know, mine too!!! That was just not something I felt comfortable explaining.
What a brilliant idea.
Thank you!! :)
The tables are really nice and a great idea to use picture frames.
Keep up the good work!
Thank you, Mary! :)