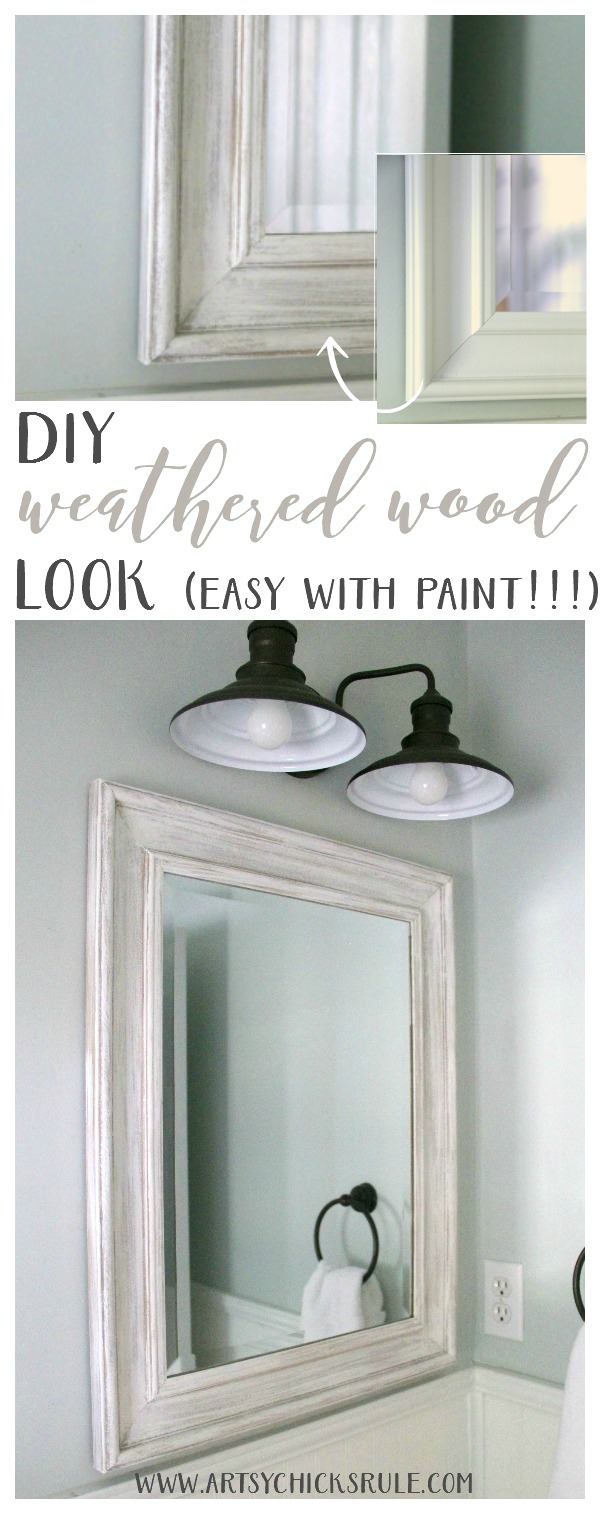
DIY Weathered Wood Look with Paint (simple technique!)
Creating a DIY weathered wood look with paint is so simple! Follow along to see how.
Hey Friends!
I know I’ve shared about the weathered wood look several times before but I can’t help myself.
It is just SO ridiculously easy to achieve that painted weathered wood look that so many are after.
You don’t have to find or use old pallet wood.
You don’t have to sit your wood outside for weeks or months to “weather’ it.
Just paint it to make it “look” as if you did!
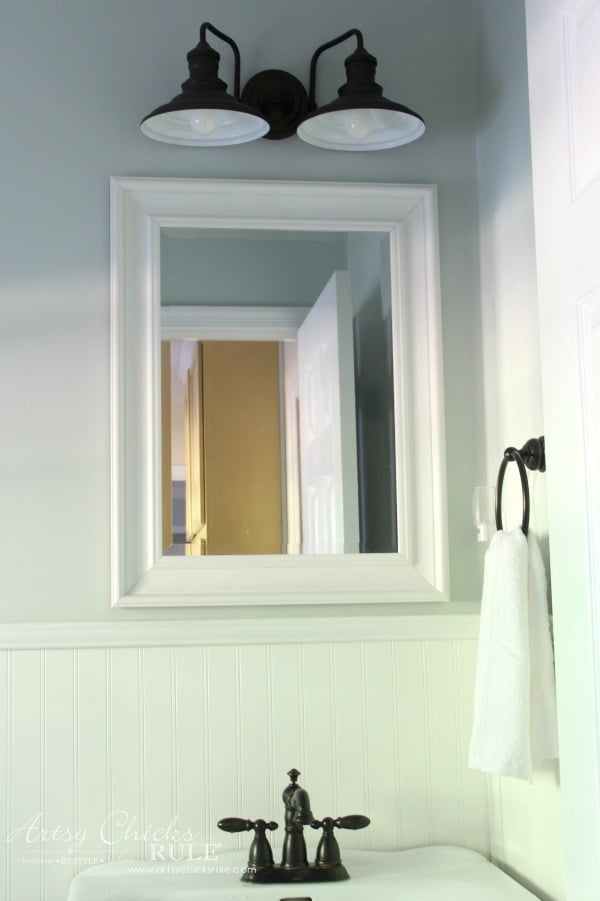
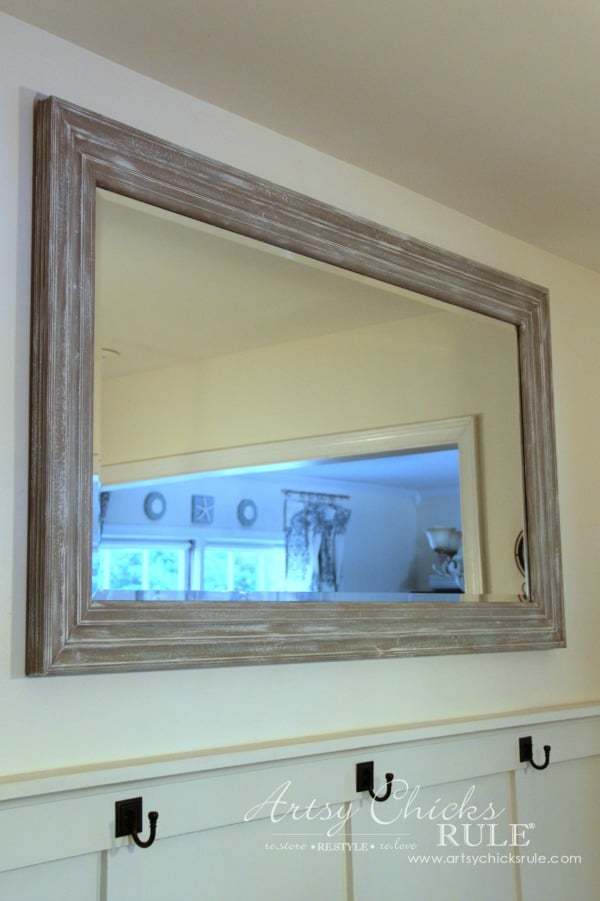
Recently I shared my bath cabinet makeover with y’all and mentioned the white plastic mirror.
And my dissatisfaction with it.
You can find it at Lowe’s, by the way, for $24.
Here’s what it looked like “before”….
It’s okay but it honestly bugged me every time I came into the bathroom.
Not because it looked bad necessarily, but because it was just “off” for the room.
See up close?
I wasn’t feeling it…so I painted it. :)
Brown!
MATERIALS LIST
- Coco Chalk Paint (this color will give a similar look)
- White Paint (my new go-to chalk paint style white, also cheaper)
- Flat Finish Top Coat (no shine, good stuff!)
- Chip Brush
- Blue Paint (I love this one!)
Coco (Annie Sloan Chalk Paint), to be exact.
It’s the perfect base color for a “driftwood” or “weathered wood” base, in my opinion.
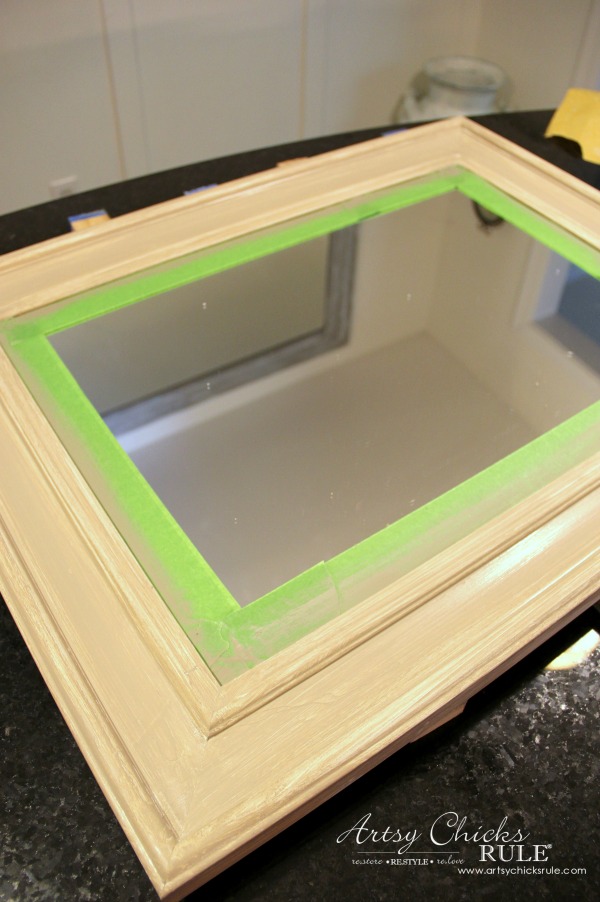
As you can see above, I did one very thin coat and that’s all.
I was totally okay with the white showing through on this one because I wanted it to be mostly white.
Want to see some of these projects in “live” time? Hop on over and follow along with me on INSTAGRAM. I’m always sharing in my stories as I’m doing projects, finding new furniture, fun finds….just all the day to day behind the scenes.
Once that was dry, I started adding white, lots of white with a chip brush.
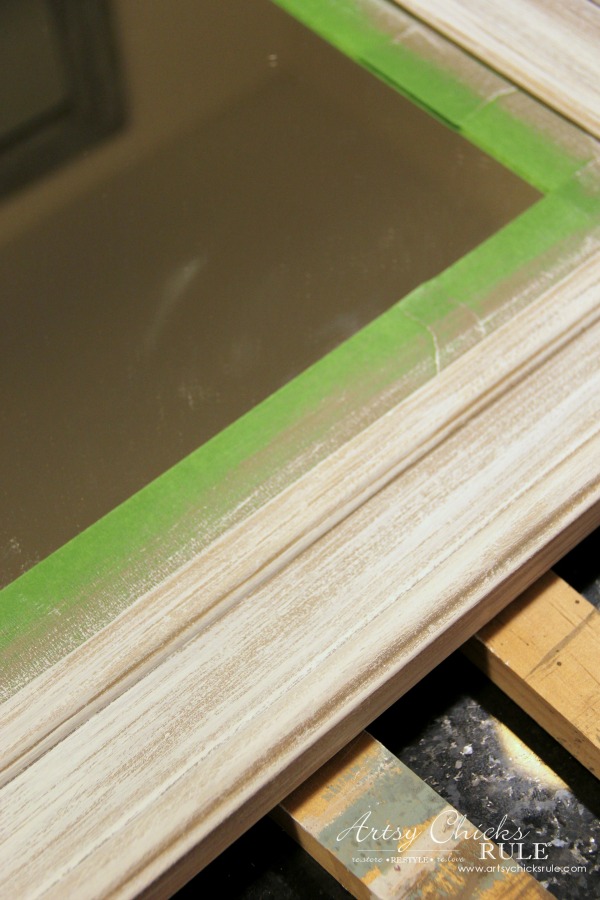
And more white, until I thought it was white enough.
I actually had to take it to the bathroom and hold it up several times before I finally added enough white.
The key to this is using a dry paint brush with little paint and keep adding layers.
This will require more strokes and does take some time but it is what will give you the appearance of worn, weathered painted wood you are after.
I didn’t want it to look “brown” or too weather-y, just a tad bit with mostly white.
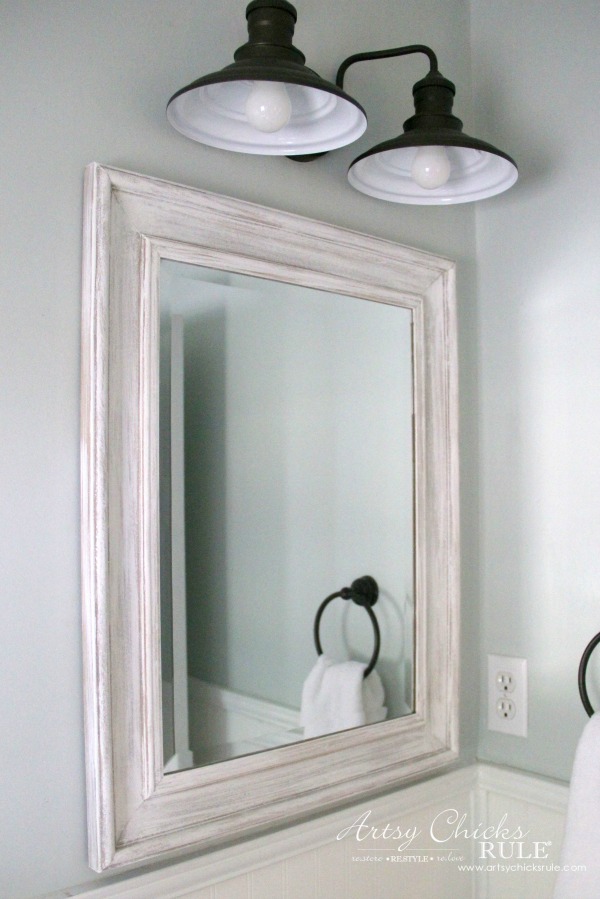
I think I achieved that.
I’m so much happier with it!
The lesson here? If you don’t love it… paint it!
Don’t just settle, fix it up and make it how you really want it.
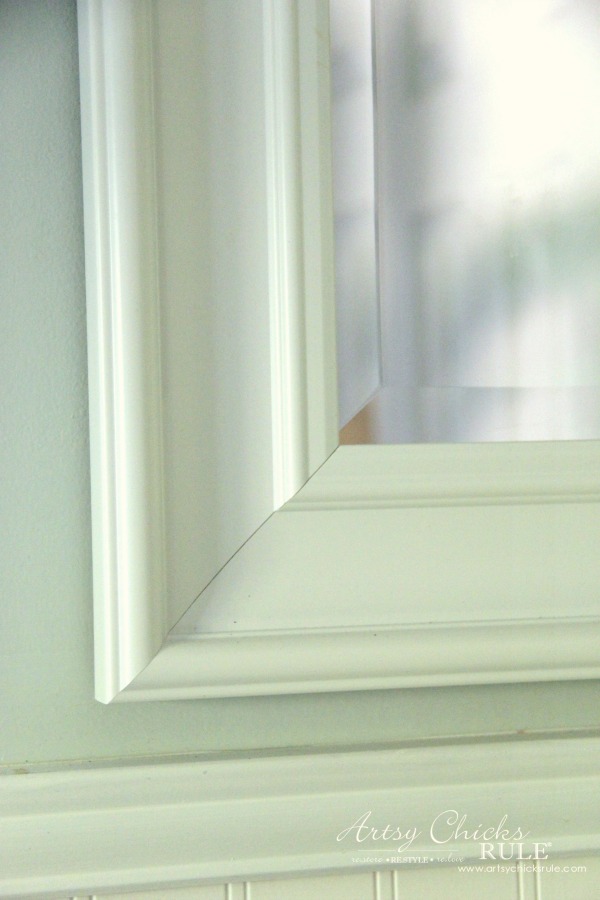
Up close…
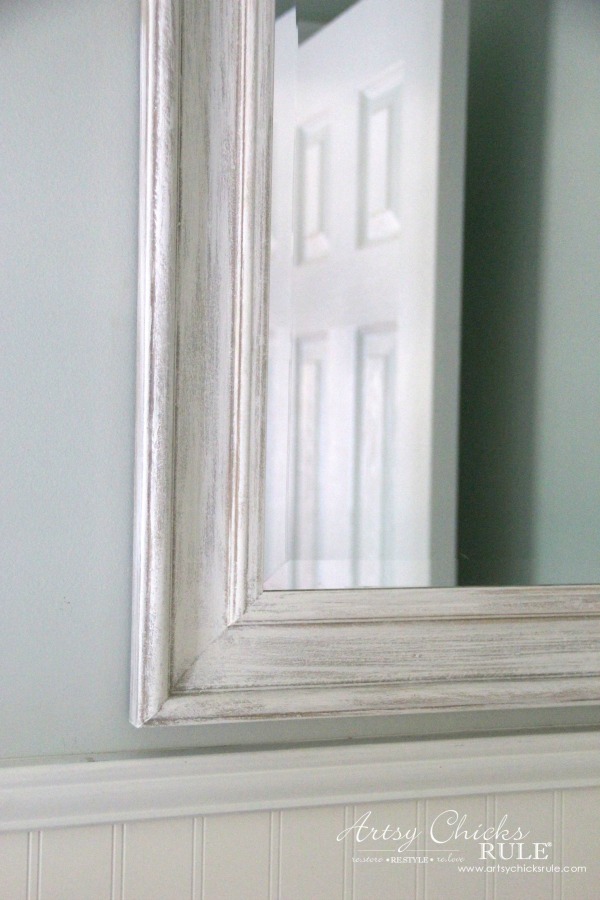
I LOVE the depth and detail it has now.
It doesn’t look plastic-y anymore.
As a matter of fact, I doubt anyone would even know it was plastic!
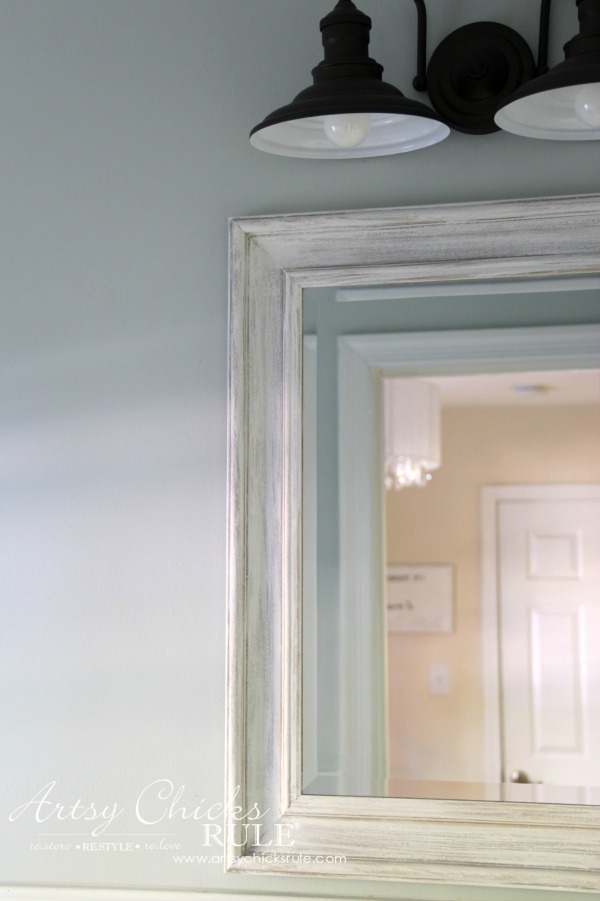
I sealed it with a coat of flat finish. Remember, I wanted it to look old so didn’t want it shiny.
Here is the sealer I used this flat finish top coat.
Pin this for later for your own DIY weathered wood look…
Now, I also promised I’d show you the mirror I moved out of the dining room.
And I am, but let me first preface this by saying that I am quite sure I’m breaking a decorating “rule” or two.
But I don’t really care because rules smules.
It’s my home and I’ll decorate it in a way that makes me happy.
And I think you should too! Everyone should.
It’s nice to know the “rules” and maybe have them as a guideline but sometimes they just need to go right out the window! ;)
Okay, so…as you know, I moved the chalkboard I had in the kitchen, to the dining room….
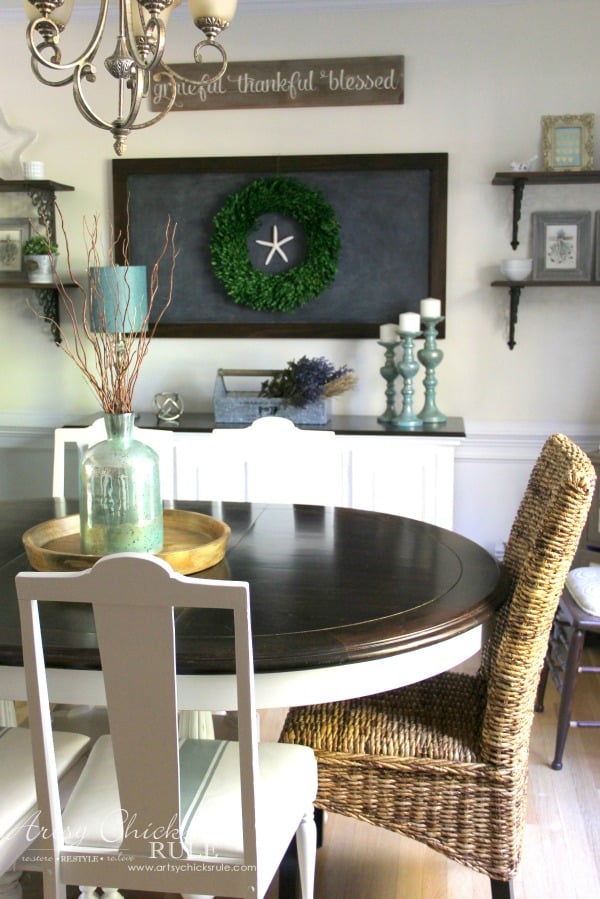
…so where do you think the mirror went?? ha… yep.
To the kitchen where the chalkboard used to be and it totally opened the space up.
Instead of having a large black board on the left wall (which sort of “closed” up the kitchen space) I now have a beautifully large reflective mirror instead.
So my hope for it opening up the space transpired.
I also hoped it would reflect some light back into the space.
It does a little and trust me, this space needs it much!
We have large trees all around our home, along with a front porch and back screened porch, all of which help block the sun a bit.
So I will take all the light and reflection I can get.
The dining room is actually pretty bright with the nice large windows and I don’t miss having the mirror on that back wall at all.
My husband and I had a time getting the mirror up in this space.
The factory set screws in the back came popping out of the plastic frame of the mirror on one side. EEEK!!
Can you imagine if it had done that when it was up. Thank goodness it was when we had our hands on it.
So, we had to do a bit of repair to get it up and secure.
Which leads me to why I painted it while it was up on the wall. ;)
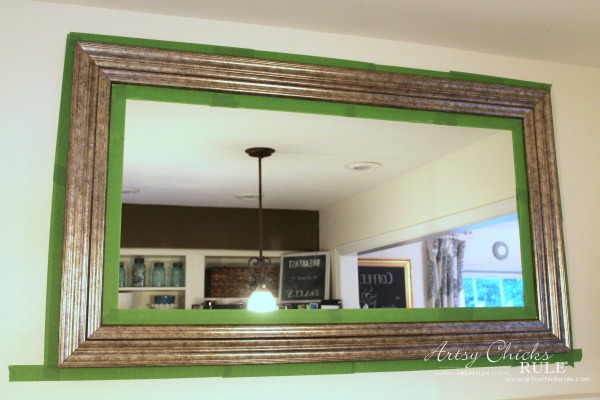
I was not about to remove it again!! ;)
And yes, as you see, my decorating faux pas….mirror up too high, I am sure.
Oh well, I am good with it and that’s all that matters.
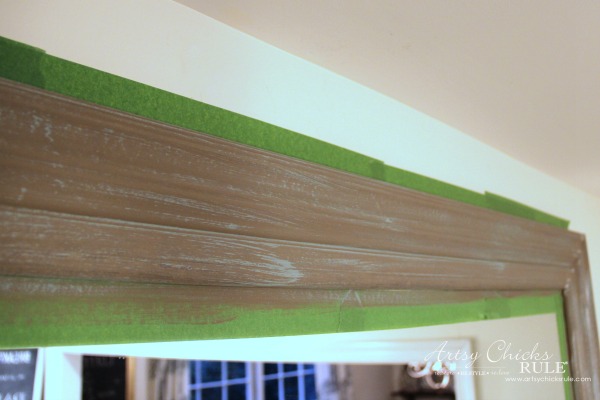
Anyway, I did tape it up pretty good so no paint would get to the wall.
And just to let y’all know that I’m really not paint happy.
I mean I am, but I’m not.
I had it up in it’s “faux gold finish” glory but decided that color was also not working for me in this new space.
I tried, really, I tried.
I used the fabulous Coco Chalk Paint on this too.
You all know that I’m giving my kitchen a mini makeover soon and I need this mirror to match.
For the kitchen plans you can see the bottom of this post here >>> “IKEA Ektorp Makeover and Plans”
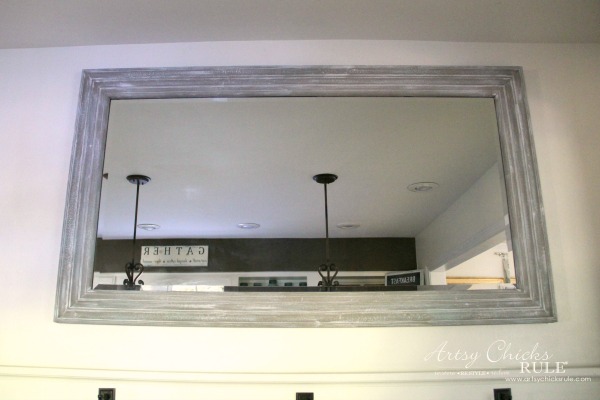
Now, I wanted the mirror frame in the bathroom to be mostly white.
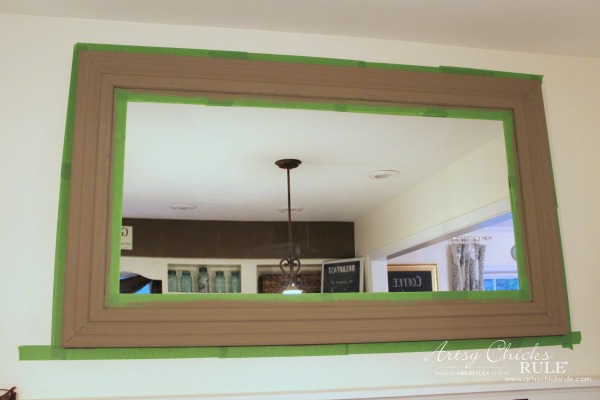
This frame in the kitchen, I wanted mostly “weathered wood look”, less white.
I wanted it to appear as if it were really old painted wood that had weathered naturally.
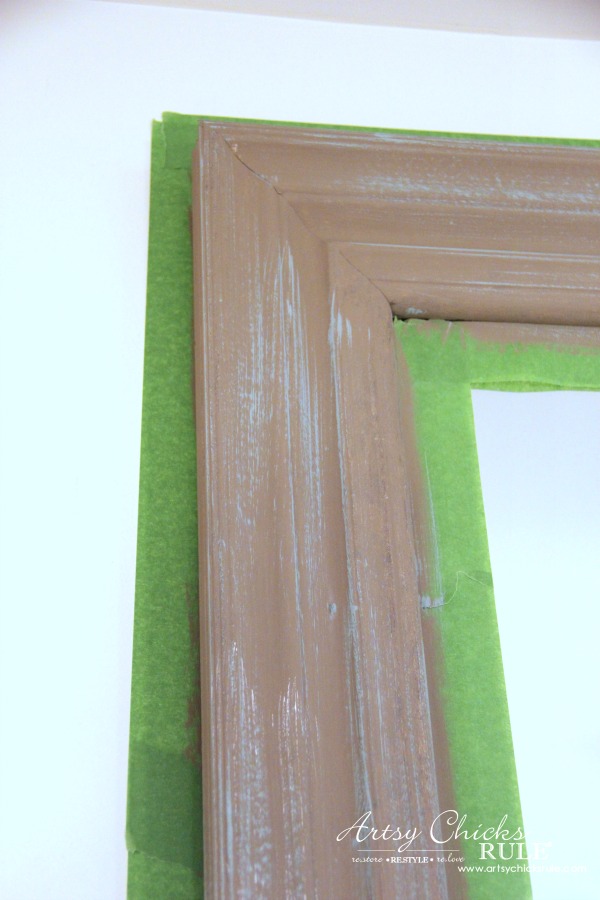
I also wanted it to look as if it had been painted blue at one time, so I added quite a bit of blue.
Again, same as above, using a dry brush with little paint and adding layers.
Once I was done with the blue, I went over that with the white.
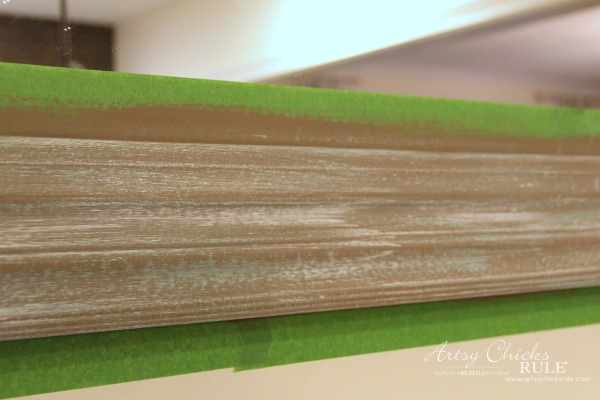
And more white until I was satisfied with the look….

…which by this point, I was.
It took several applications of white and also another brush of blue here and there.
I’m really happy with how it turned out and I immediately thought it looked better in the space. (for my decor style anyway)
And with my new “Green Berry Coastal Wreath”. I’ll be sharing how I made that soon!
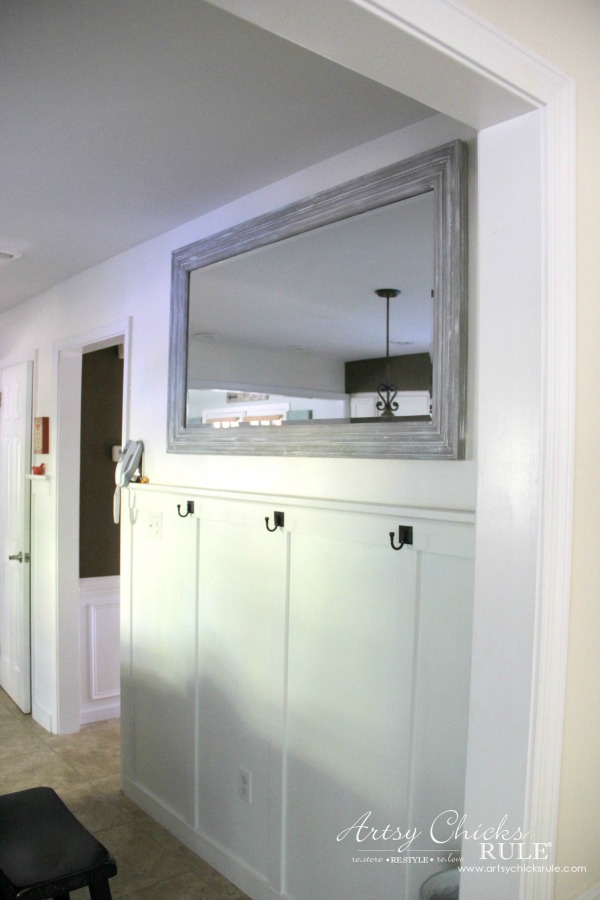
So happy with how it turned out and think it looks perfect here.
***To note, I shared this photo unedited to show how dark the kitchen can be.
And how the light shines in the window opposite directly onto this wall.
That’s why the mirror ened up there. :)
Also, I had considered having it “sit” on the ledge to get it a bit lower…but… I wanted that space for decorating or whatever!
So I centered it in the space instead.
Pin this for later for your own DIY weathered wood look …
If you like the look, it really is simple to achieve.
I realize not everyone does like this look though. ;)
It fits well with the relaxing and coastal nature I want my home to have.
I’ll see you guys on Friday with a little Black Friday fun.
I hope you have a wonderful and very blessed Thanksgiving!
xoxo

You may also like:
Related Posts:

")


")

")

Hi Nancy first, Happy Thanksgiving to you and your family have a blessed time, I know yours is coming up this weekend.
Your mirrors look so pretty and it all fits nicely into your space, the weathered look does look great on them!
I kinda chuckled a bit reading this because it reminds me of things around here with my husband. He always says one thing that’s constant in our home is change! Thank God for there help! Look forward to seeing the up and coming projects!
Thank you Sandra!:) Haha, you are so right, the only constant is most definitely change!! xoxo
hey girl- love the mirror! Y’all have a great Thanksgiving!
Thanks Shawnna!! Hope you had a great Thanksgiving! :)
Wow Nancy
What I love, is meeting other girls who paint and paint and paint. My hubby says if he stands still long enough I will paint him too. Thank you for your beautiful projects that pop up onto my feed. I so look forward to sharing all your labors of love. Love from Australia.
Aw yes, I agree!! Yep, mine has said that for years!! I even wrote that in one of my very first posts here on the blog so I guess it’s true. lol
Thank you for the kind words also!!
Hope you have a wonderful day over in Australia! (a place I’d love to visit someday! :) )
xo
Nancy
I love seeing how you layered paint until you got the look you wanted. I updated my fireplace surround a year ago and we designed an little alcove on the right side. The new white mantle and tiled surround was such an improvement over the aged brick with super-wide grout. It took me months to find the right “urn” at Home Goods that was a perfect size for the alcove. Well, it was almost perfect! I wanted it to be a little taller so I took a 5″ deep black shadowbox frame, and added layers of paint until it looked like the worn finish on the urn. Now it’s ‘perfect!”
Hi Nancy :)
OH yay, love hearing about other’s makeovers and “fixes”. So awesome!
xo
Nancy
Hi Nancy! Happy Thanksgiving. I love reading your blog. Can I ask why you choose to use General Finishes Flat Finish instead of AS Clear wax? Is it easier?
Hi Jan! Thank you, hope you had a happy Thanksgiving!
The wax finish would have probably been a nice choice for this too but I really wanted it to be “flat and worn” looking.
No shine at all as if it were real weathered wood. That’s the main reason. :)
And yep, it is an easier application too.
Hope that helps! xo
Nancy
Great tutorial, Nancy – pinned to share! It just so happens I was working on a piece this afternoon doing a weathered finish. I had to walk away from it for a bit because I am not feeling a 100% about it. After seeing your post I know exactly what I need to do – add another layer! Thanks friend xo I hope you’re having a wonderful Thanksgiving!
Thanks Marie! :)
Oh yay, can’t wait to see yours!!! xoxo
Hi Nancy, your mirrors look great. I like following your site, but I wonder why you always mention using AS paints. Most of us can’t afford them. Could you please tell us what other cheaper paints we can use? Thanks.
Hi Ellie,
I just happen to use and like the products. I do use quite a few other paints, quite often, as well. Plus, I do usually try to give alternatives, if it applies. Sometimes I forget that it’s a given in some situations. For example, on the mirrors, you could totally use any type of paint for this. If you want a flat look like I did, just use flat latex paint. OR you could even use regular old craft paint. Any paint can be subbed for most of the crafty things I make here on the blog. The only time AS would be specific is when I paint a furniture piece and do some extra special finishes, etc.
Hope that helps! :)