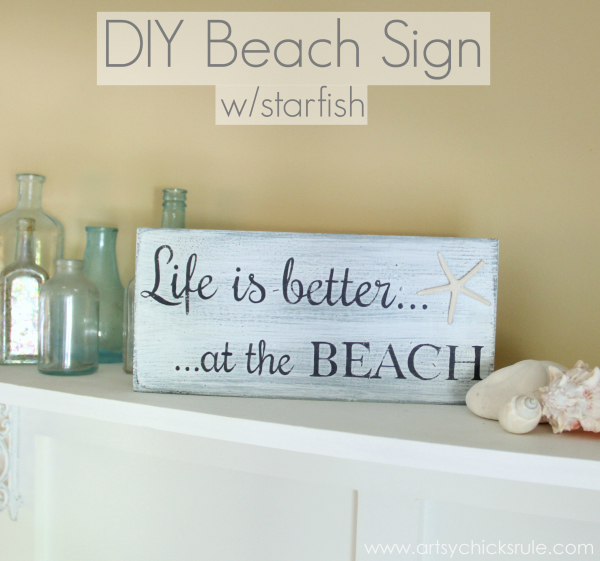
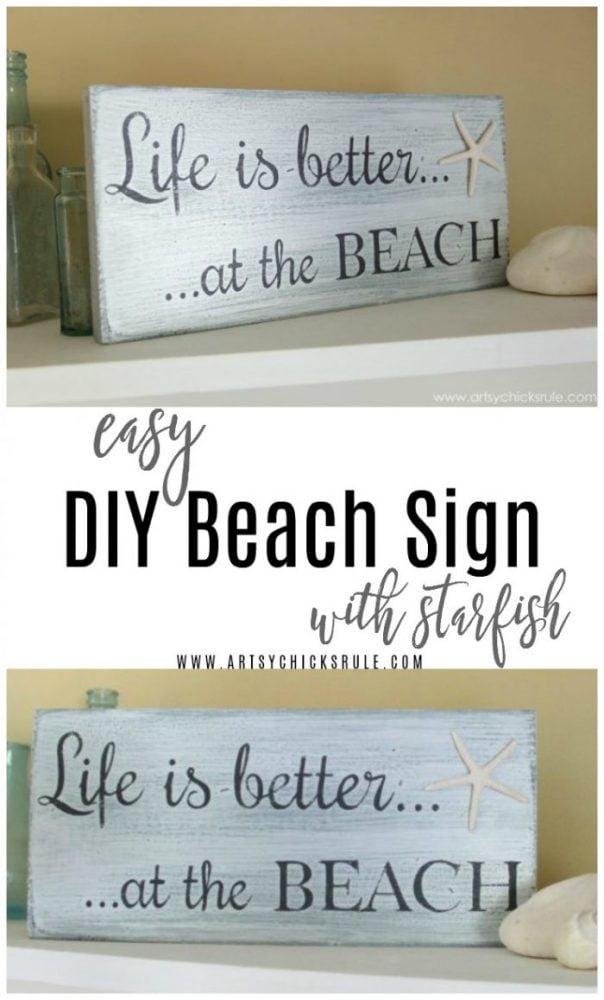
Life is Better at the Beach (DIY Sign)
Life is better at the beach…right? The sign says it’s so!
Are you ready for the beach??
I know I am! I live right by the beach so I can visit….but it’s COLD. No, I’ll just stay hibernated up in my house for a few more months!
But I really need some warmth and sunshine.
Oh well, I’ll have to wait.
So since we have a few more months of winter left, I’d thought I’d share this “Life is Better at the Beach” sign I made recently.
It was a gift for a dear sweet friend of mine.
These are so fun and easy to do.
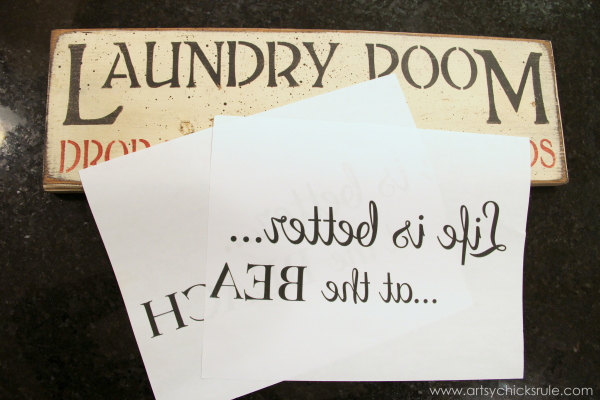
I actually found some old painted “signs” at the thrift store recently for cheap.
(ready to paint with hangers on the back and all!)
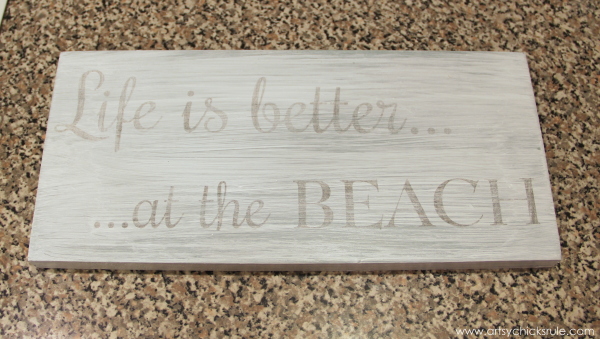
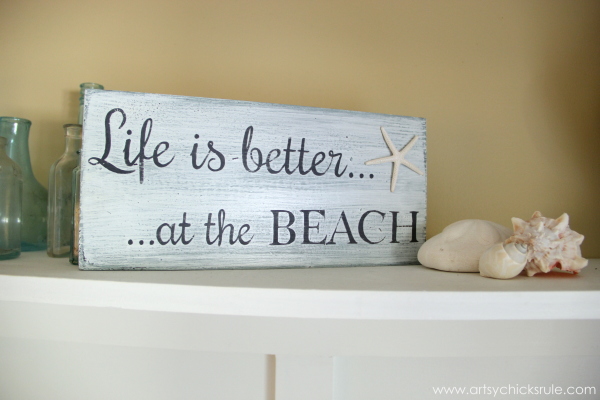
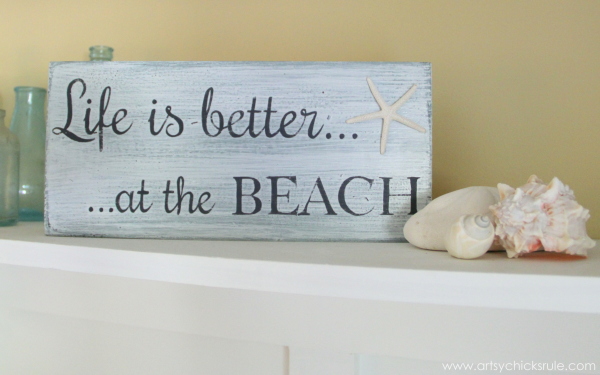
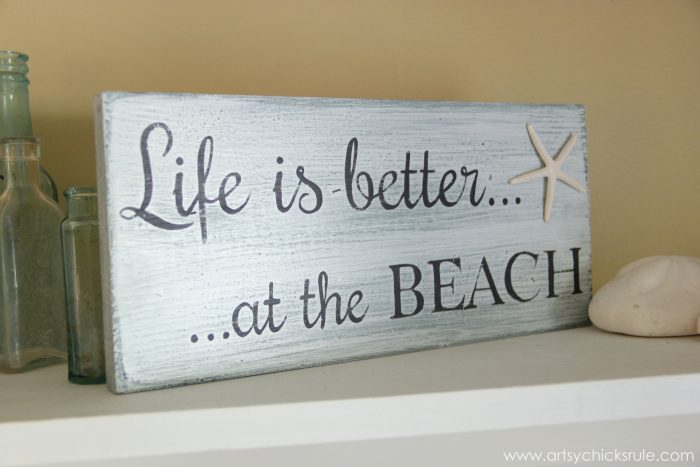
Life is better at the beach sign
I had intended to create this sign on the larger board here…
But oops…this is what happens when you are working on several projects at once.
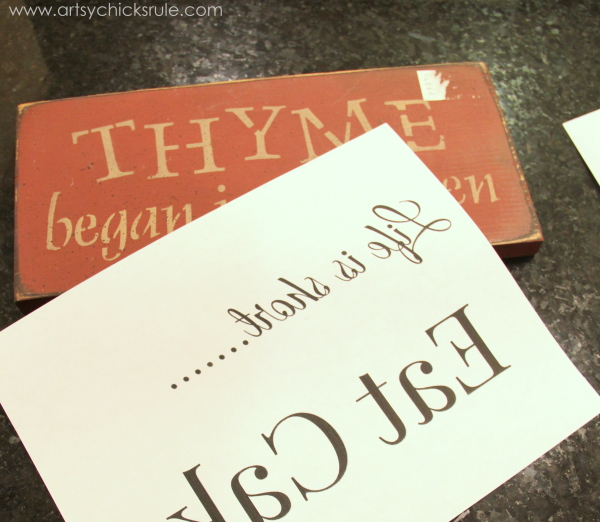
I got things mixed up.
Oh well. I didn’t realize my mistake until it was too late.
But the sign turned out really cute anyway.
Want the free printable?

So as you see above, it was painted red and had some stenciling done on it. Sort of 80’s/90’s country decor themed.
I began by painting blue (Aubusson Blue Chalk Paint) as a base coat. (right over the red)
Any paint will do, however.
Once that was dry I applied one coat of Pure White in the dry brush technique.
I wanted the blue to show through for that beach washed effect.
Then I aligned and transferred my graphics.
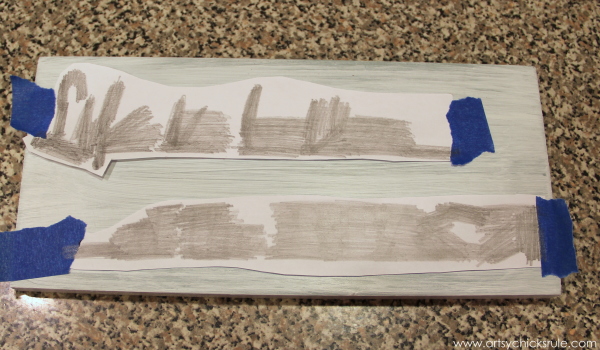
I printed the graphics in reverse and rubbed a pencil to transfer the printer ink.
Here are a few other ways to transfer graphics, click here to see.
This is what you end up with…
Next I just hand painted it in.
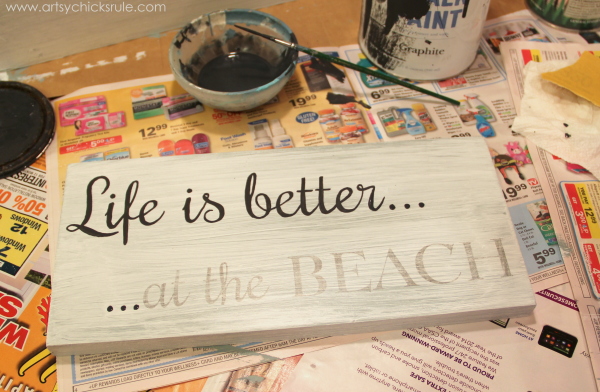
I used Graphite Chalk Paint, watered down, along with my script liner brush.
All done, before distressing.
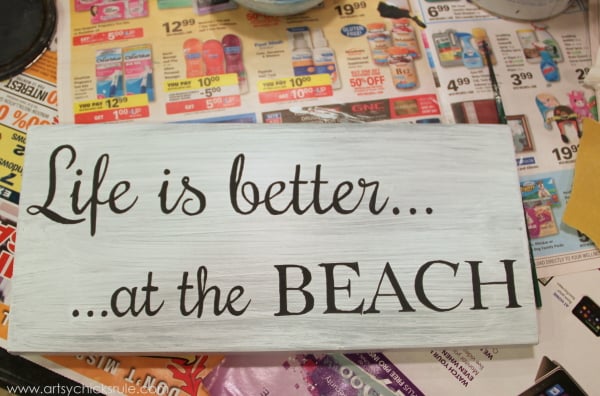
I sanded it a bit to “weather” it and bring more of that pretty blue through.
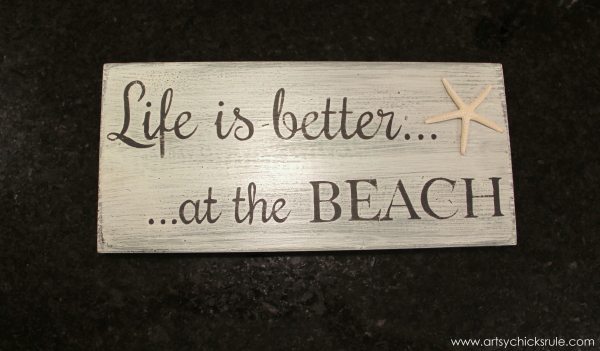
Then I sealed it with poly and attached a starfish to the top right corner (with a hot glue gun).
And styled up a bit on the shelf…
Even though I meant for this to go on the longer board I think it turned out pretty good!
PIN this “Life Is Better At The Beach” sign for later!
I have quite a few other signs with more tutorials (different techniques) over in my Project Gallery under “Signs”.
So easy, I hope you try this one too.
How do yummy sugar and salt scrubs for Valentine’s Day sound? (or any day really) I made Peppermint/Vanilla Bean, Lavender Lemon & Chocolate Mint Sugar Scrubs today.
Check-in next week for the recipes! (Update, see them now, here)
And here’s the next sign I’m working on…
UPDATE!! See it now, here!
xo

")


Hi Nancy-I keep having questions for you but I really love the finished results you get on your transfer projects. I love the transfer method used on this sign. Looked back at some of your other transfer projects and love your French Typography Whitewash makeover on the table. Question: Could you use the Beach Sign transfer method (rubbing with pencil) on the French Typography? Wondering if there are certain reasons for choosing a particular transfer method? I have also read where some use BlockPoster to create larger images for transferring. Sorry for all the questions. Thanks again for sharing your wonderful instructions.
Hi Lois!
No worries! ;) Ok, so here’s the thing, for small projects I will mostly just use my printer and do it as shown in this post. For medium to large projects I will use block posters or the projector. For large (like the French table) I always use the projector. For a table that size I would have had to print out many multiple sheets (at blockposter) to create the image. Then cute the excess, piece them together and tape. Then transfer the image. For time’s sake, I just set up my projector and go that route. :)
Hope that helps!
Hope you have a great weekend!
Nancy
Sometimes these little oops end up being a gift. It looks great on the smaller board – love it! I could use a trip to a tropical beach right about now.
Thanks Marie! And yes, you are right. And you and me both on the tropical! Anything with the word tropical sounds good about now. ;)
Nancy
I love what you did with that sign. Very impressive. My question is “What is a script liner and where do I buy one?”. My last transfer was done by filling in the graphic using a black sharpie. It turned out quite nice but I wonder if your method would be simpler?
Hi Rita!
Thanks so much! A script liner is a very thin, long bristled artist’s brush. You can find them at any craft store. Black sharpies work good too! :)
I just like the look of a painted lettering best. The marker is probably the easiest of the two.
Hope that helps!
Nancy
Love this! I need to make one that says, “Life is Better at the Lake!”
Thanks Paula! :) and yes, that would be perfect!
Nancy
Life IS better at the beach! This is my favorite transfer technique too. This turned out perfectly and I know your friend loved it. :)
Yes it is! :) I just wish it was warmer now!
Nancy
I’m fascinated by the “I just hand painted it in.” What is the trick to making all the edges of the letters perfectly smooth? I’m good at painting my nails, but I still make little goofs every so often. Your letters look like they were PRINTED, not PAINTED on! All your lettering projects look great.
Hi Barbara,
The trick? Is a steady hand. ;) And a good brush! A good brush, or the right brush, is very important. Using the script liner with a bit of watered down paint makes all the difference. Practice a bit and you’ll get the hang of it! :)
Nancy
And I forgot to ask about how long a sign like this would take to do the letters?
Probably about 30 minutes, give or take.
i stumbled across your site and your beautiful sign. I know this is a very old post but i was curious fi you remember what the font is you used for” Life is bette”r
Hi Michelle,
Thanks! It’s actually called Rochester. :)
How do you make the transferable graphics and how do you make them backwards?
Never made a sign before but this looks great and would love to make this one.
Hi Michele,
So sorry, I missed this comment earlier. You can make the graphic reverse in a program such as Picmonkey (.com). Then you can lay the paper onto your project and transfer the printer ink onto your project. There are several ways you can do it. I talk about many different ways to transfer to make signs in this post here, https://www.artsychicksrule.com/2017/03/how-to-transfer-graphics.html
Nancy