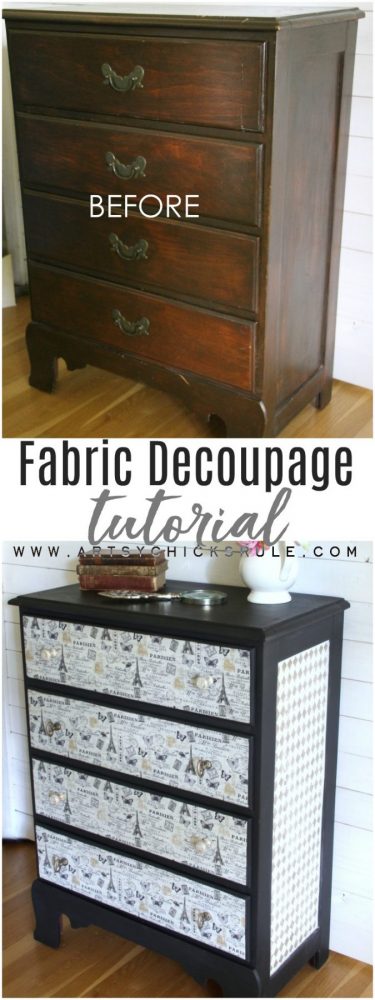
French Fabric Decoupage Tutorial (full how-to!)
Decoupage is a great way to create a unique finish and a beautiful designer’s touch to your furniture projects. And the design choices are endless when you use fabric. Follow along to see how-to in this fabric decoupage tutorial I’m sharing below.
UPDATED: 4-5-24
Hey friends, I’m back today sharing a brand new furniture makeover….with fabric decoupage!
You might remember this little table I gave a bit of fabric decoupage to recently.
If you follow along on my Facebook page, you might have seen when I posted this and a few other pieces a friend gave me.
She was moving and didn’t want to bring them with her. I was so happy to have them. Don’t you know it! ha!
Here is the photo I shared… (and the other pieces I still have to give lovely makeovers to)
UPDATE: One of them has been made over and I use it as my “coffee/tea server”. You can see it here.
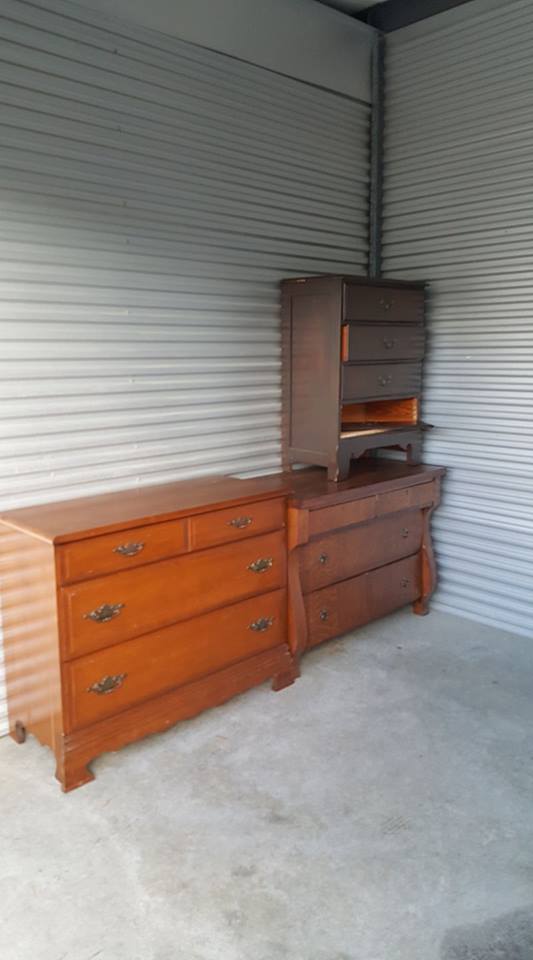
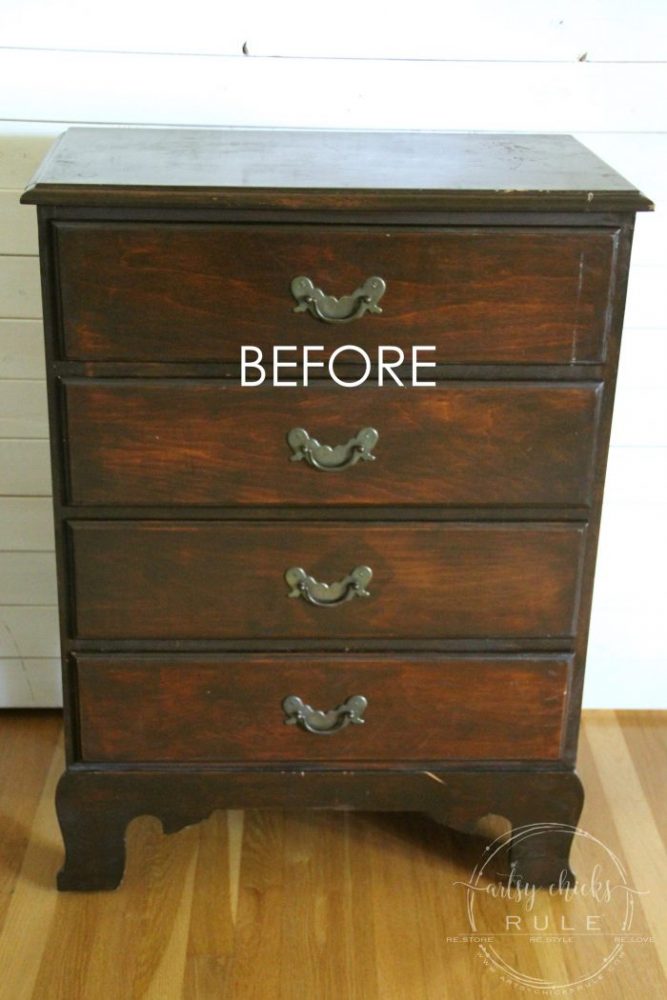
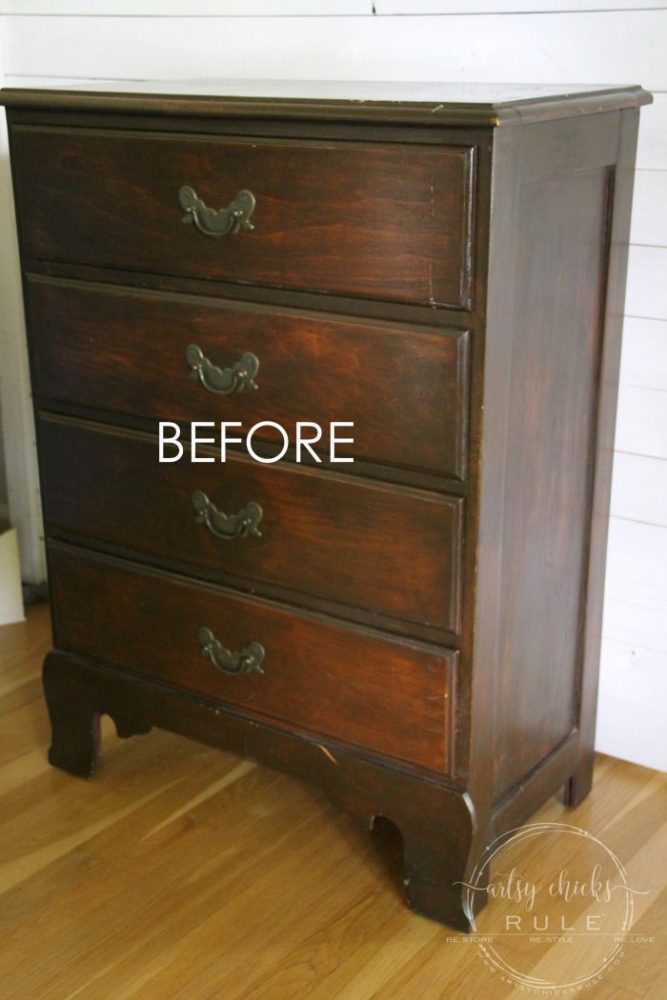
The top right one with the broken drawer is the one I’m sharing today.
The drawer was a pretty easy fix. Thanks, hubby! Just needed to be glued back together.
All drawers slide nicely and work well now.
My original idea for this dresser was not quite working out for me.
I could not find the fabric I had in my head, anywhere. Darn.
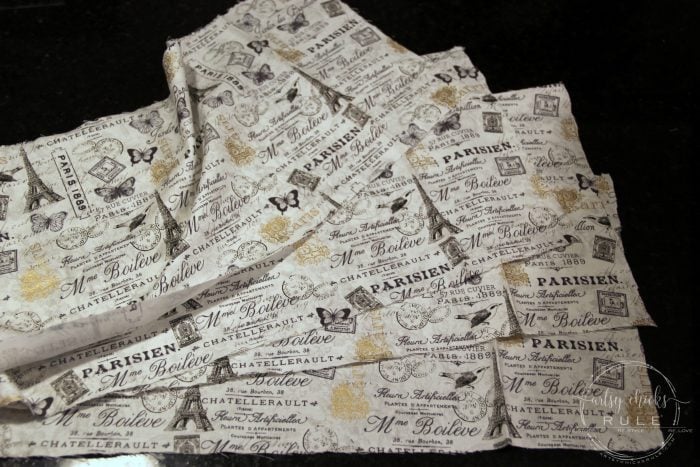
But I came across this gorgeous French fabric (while looking for the other design I was after) and another idea came to me entirely!
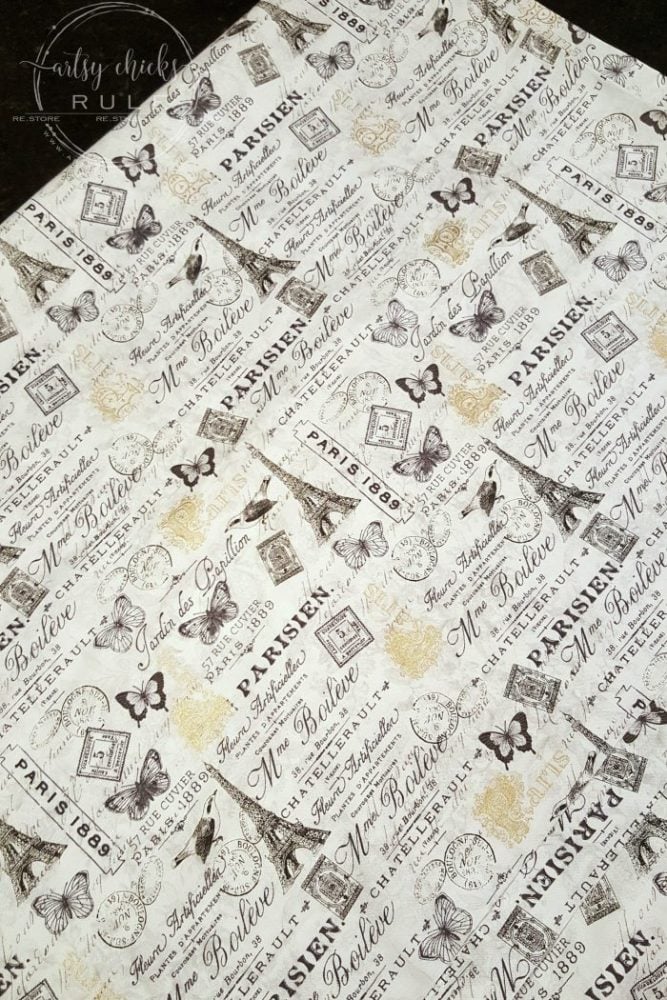
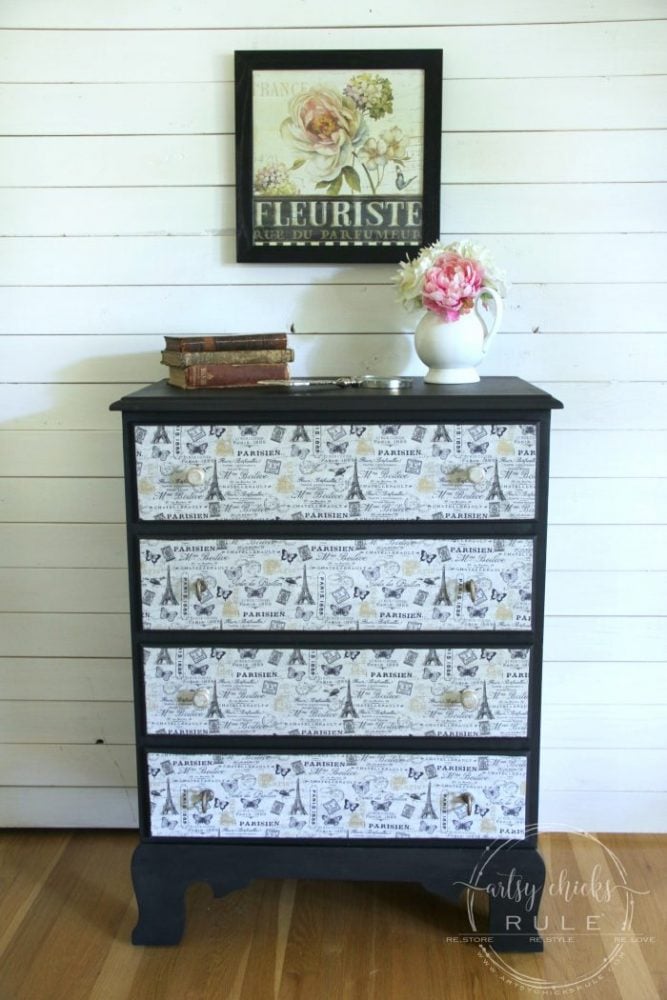
Isn’t it just beautiful?
French Fabric Decoupage Tutorial
I switched gears quickly to this when I saw it!
But …. I haven’t let the other idea go yet. Never did find the fabric I wanted for that one but I did find a sheet set that will work.
Yep, a sheet set! Can’t wait to share that one with you.
I may do that project on the very left dresser in the photo above.
So be on the lookout for another fabric decoupage tutorial soon.
MATERIALS LIST :
- fabric of your choice (here is the link to the one I used)
- Decoupage Gel
- X-Acto Knife
- Tough Coat Topcoat
- Coal Black Paint
- White Paint
- Gold Paint
- Wax
- Stencil (or this furniture transfer instead)
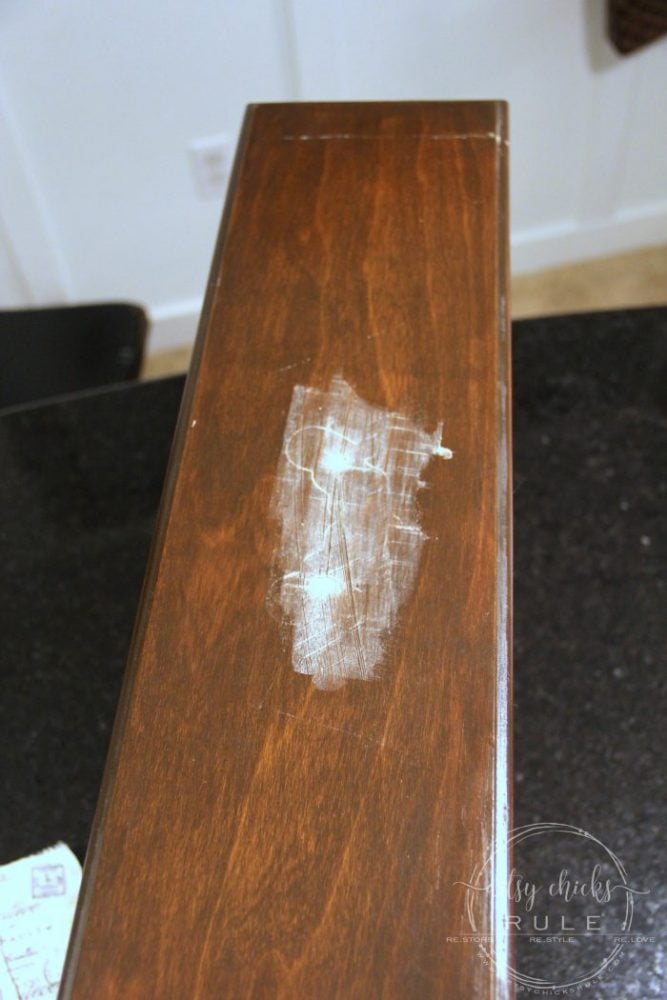
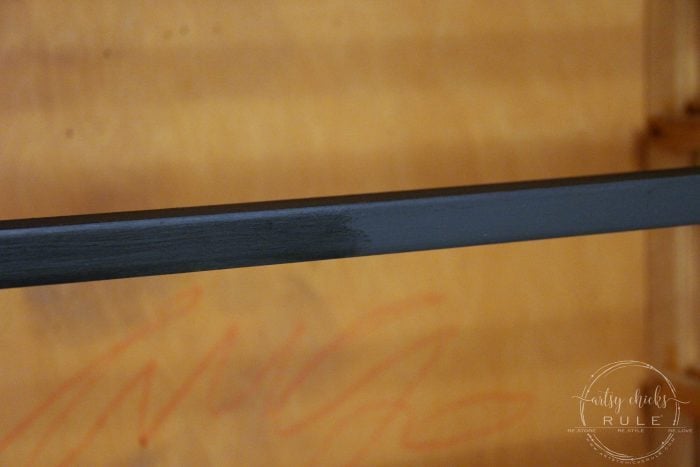
To begin this project, I started by sanding it a bit here and there to even out scratches and such.
Then it got 2 coats of black paint…
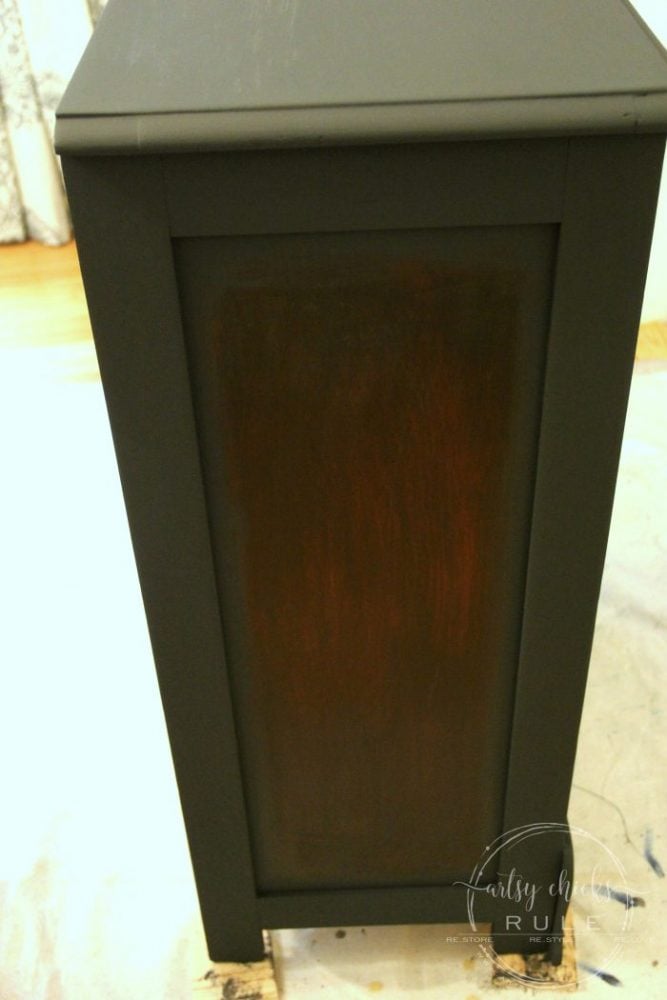
I didn’t paint that center area because I was planning to paint that white.
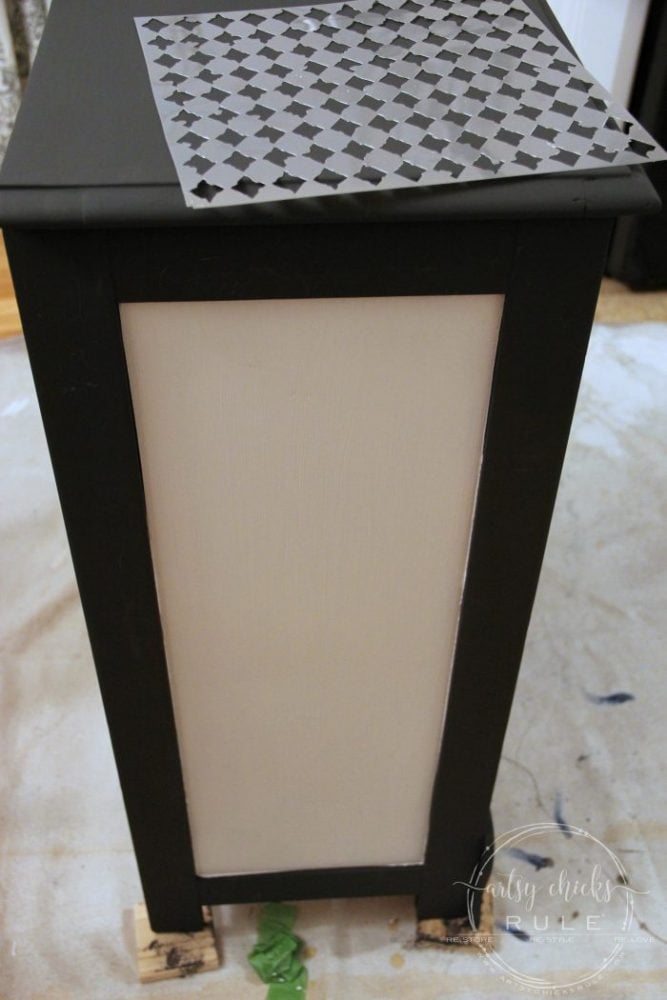
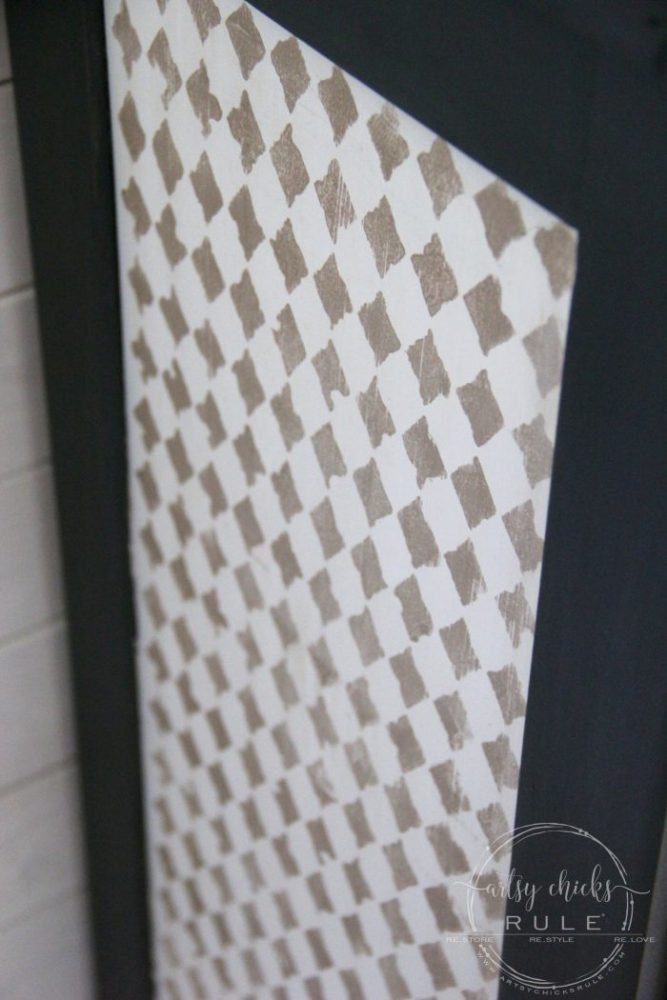
Stripes were considered here but I remembered this French stencil I had and thought it would be perfect.
I used this same stencil on this project too.
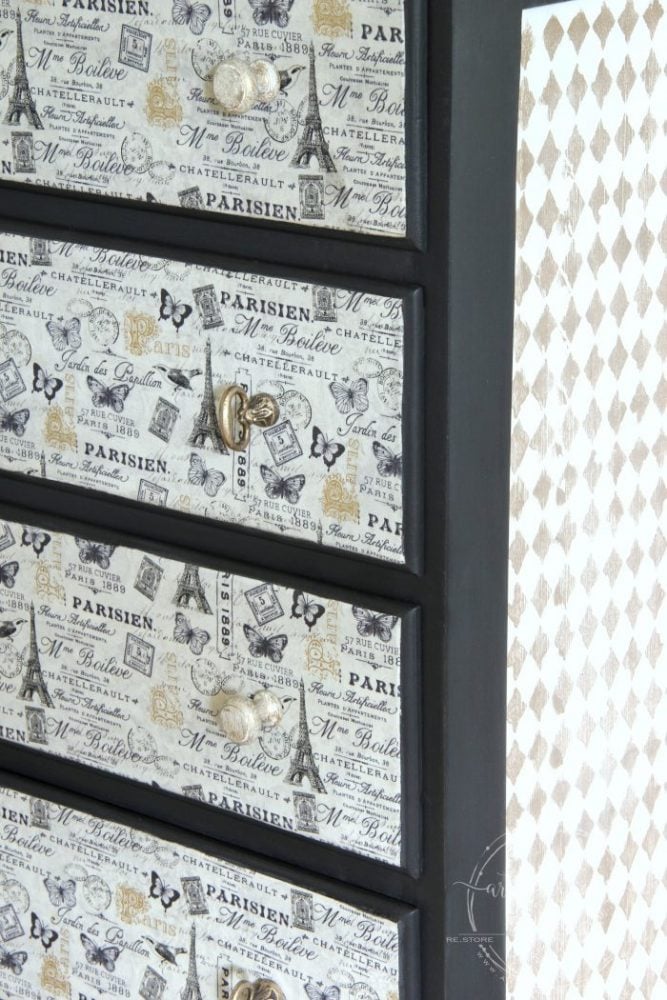
Since the fabric had bits of gold in it, I thought I’d bring some of that gold to the sides.
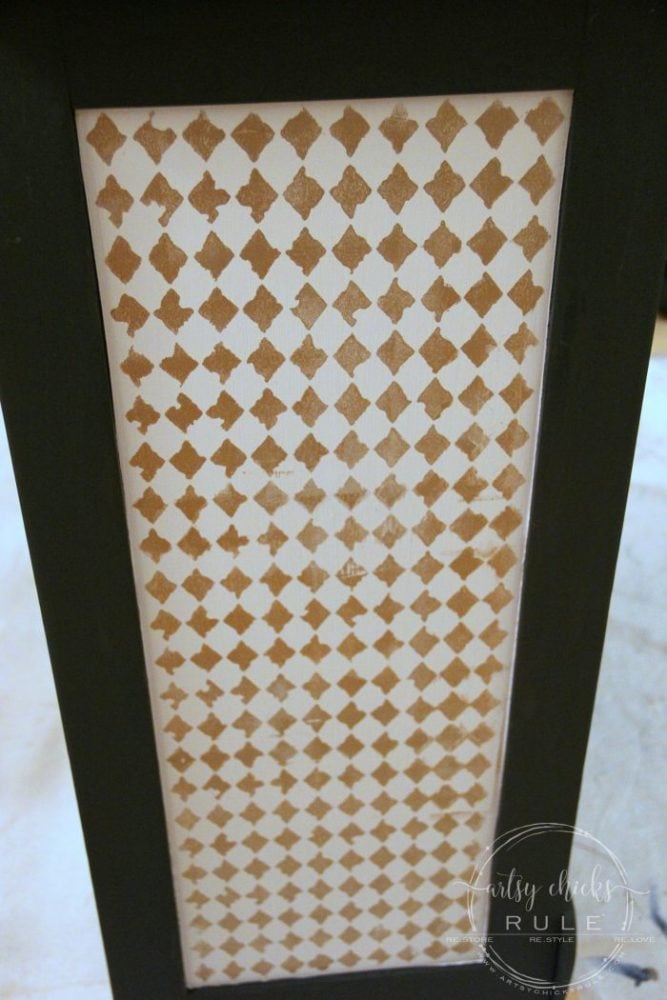
Sanding it to give it more of a blended and distressed look.
For the fabric front drawers, I was planning to use the same technique I did on these nightstand’s fabric decoupage tutorial project I did a couple of years ago.
But because of the edges of the drawers, I wasn’t going to be able to do it that way.
So I used an X-acto knife instead.

You can see how those turned out, and that method, here.
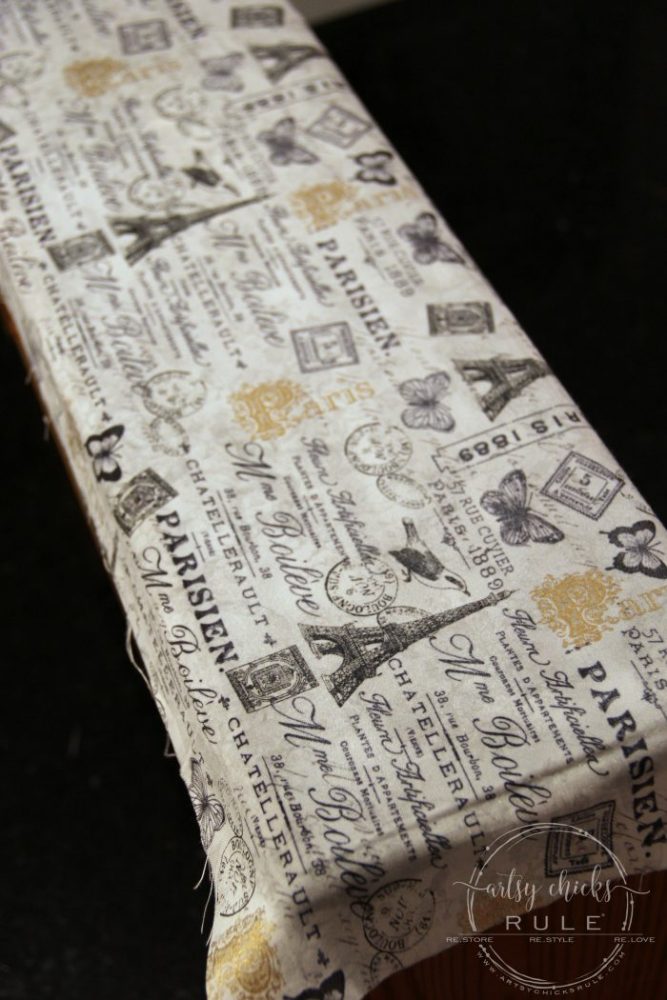
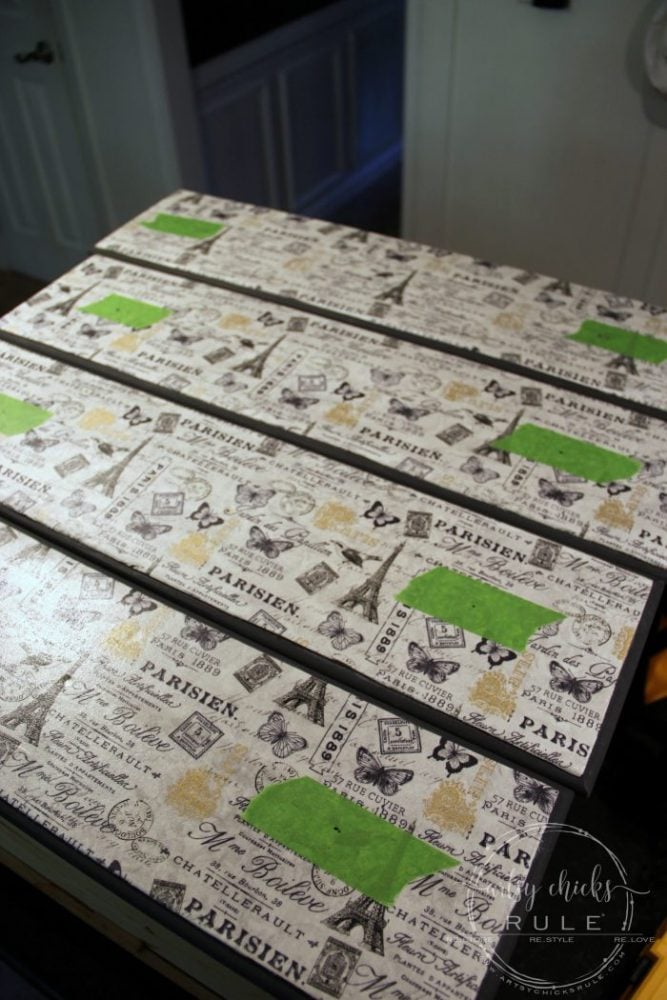
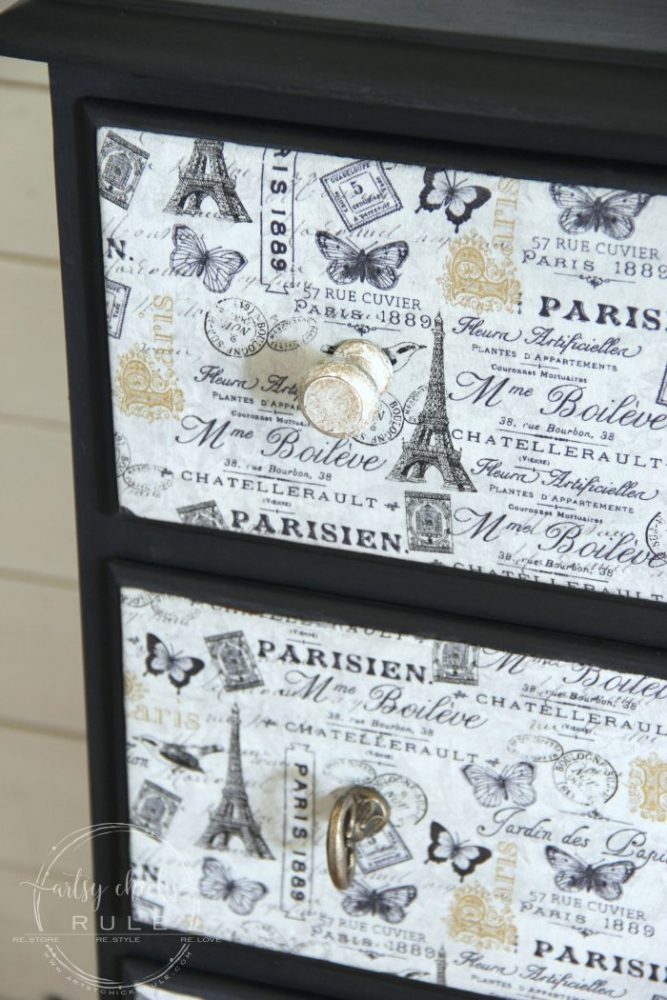
Begin by cutting out pieces of fabric for all 4 drawer fronts that were a little bigger than needed.
I removed the hardware from the drawers and filled the holes in the middle.
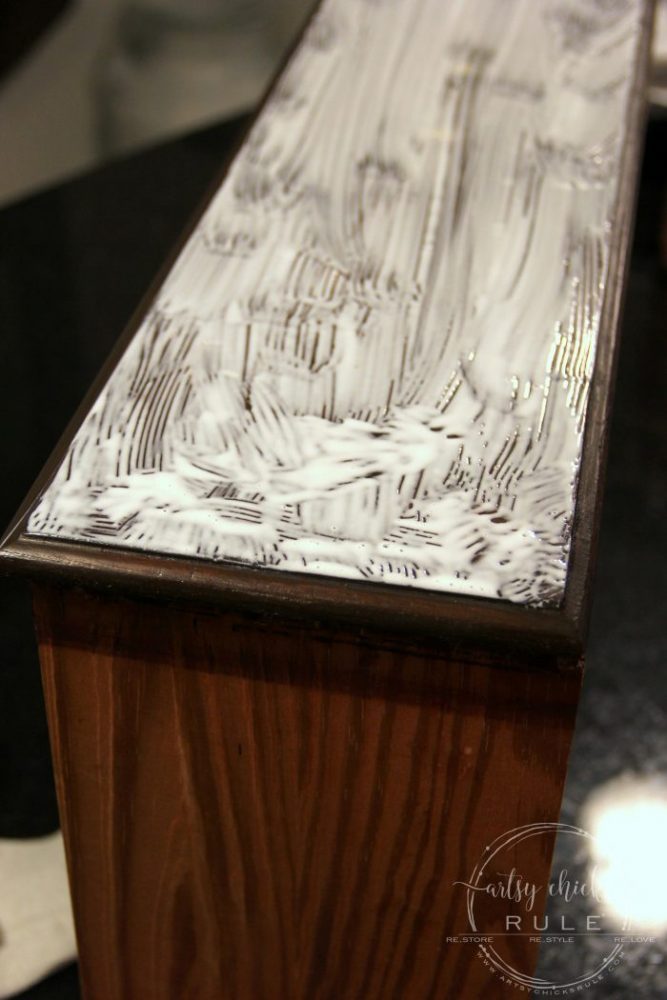
Once that was dry, I then used a chip brush to apply the decoupage gel.
You can see above that I decided to only cover the flat area of the drawer with fabric.
I thought it would look better, be neater, and be a bit easier to attach.
Be sure to line up the fabric and press firmly making sure there were no lumps or bumps.
Using the same chip brush, apply a bit of water on the top to wet the fabric so that the glue would soak in nicely.
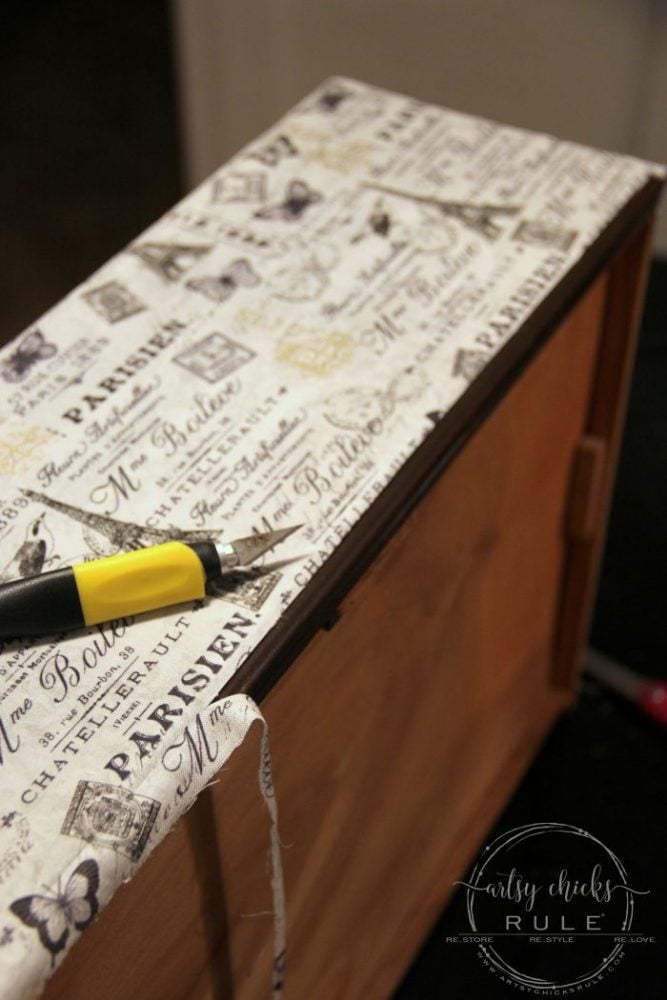
Go around and lift the fabric and wipe away any decoupage gel that may have gotten on the curved area of the drawer fronts.
I didn’t want the fabric to stick there.
Once it was dry, I pulled out the X-acto knife and very carefully cut along the line.
I did this on all 4 drawers and then applied 2 coats of Topcoat, drying in between.
Sanding lightly in between also as the fabric can raise a bit when it gets wet leaving it “bumpy”.
We don’t want bumpy, we want smooth.
I let that sit overnight to get good and dry before I drilled new holes for the new hardware I bought.
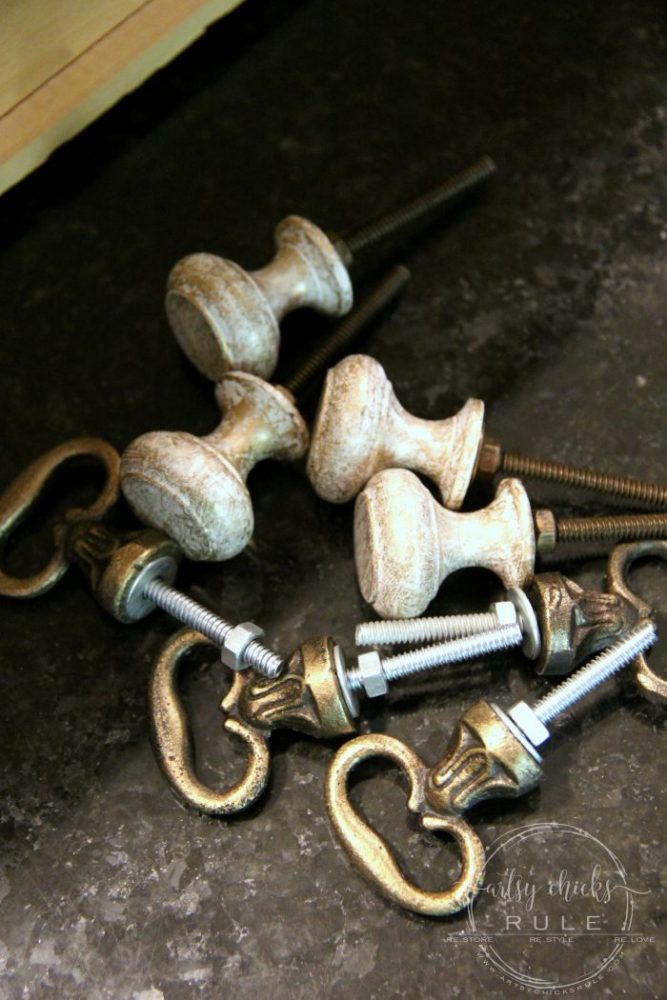
These came from Hobby Lobby. Was hoping to do all 8 in the white/gold knobs but they only had 7.
So then I was going to do them all in the gold loop knobs…but they only had 6, haha.
Soooo…I decided to do 4 of each instead!
But I happened to hit it on 50% off so I was happy!
The fabric was also 40% off when I bought it, so that was a plus, too.
I added a piece of tape to the areas on the front where the knobs were going.
And then measured and marked each drawer.
All drilled and knobs added.
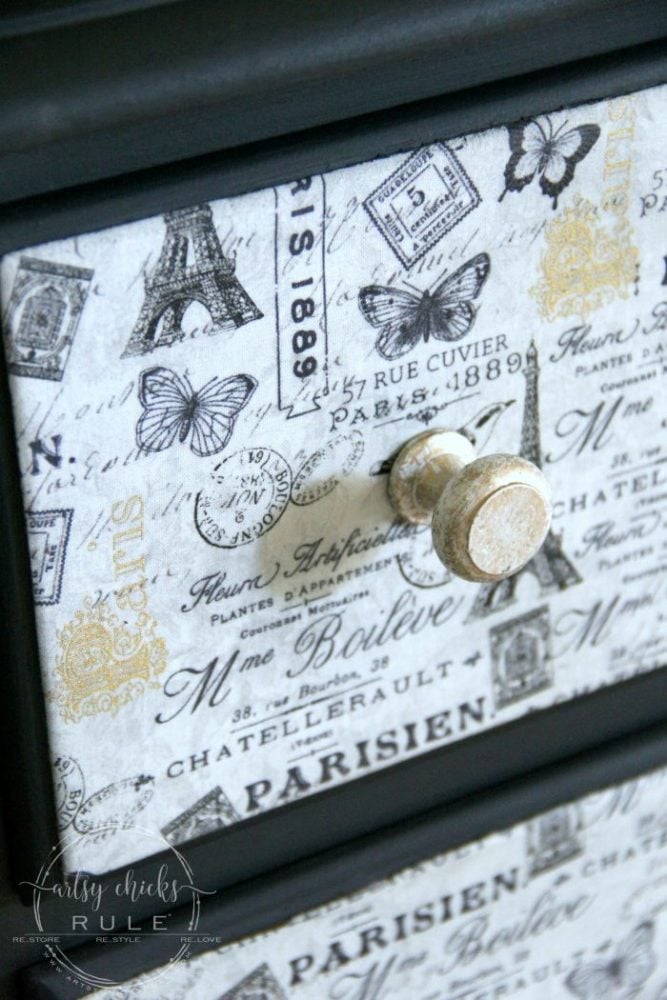
I kinda love the quirky look of different knobs on the same piece of furniture so this worked out okay for me.
The same thing was done to this pretty blue chest too.
It’s not often that I use wax for sealing up furniture anymore. But I did on this one.
I do love the luster of wax though.
The sides where the gold diamond/harlequin shapes were got a coat of wax.
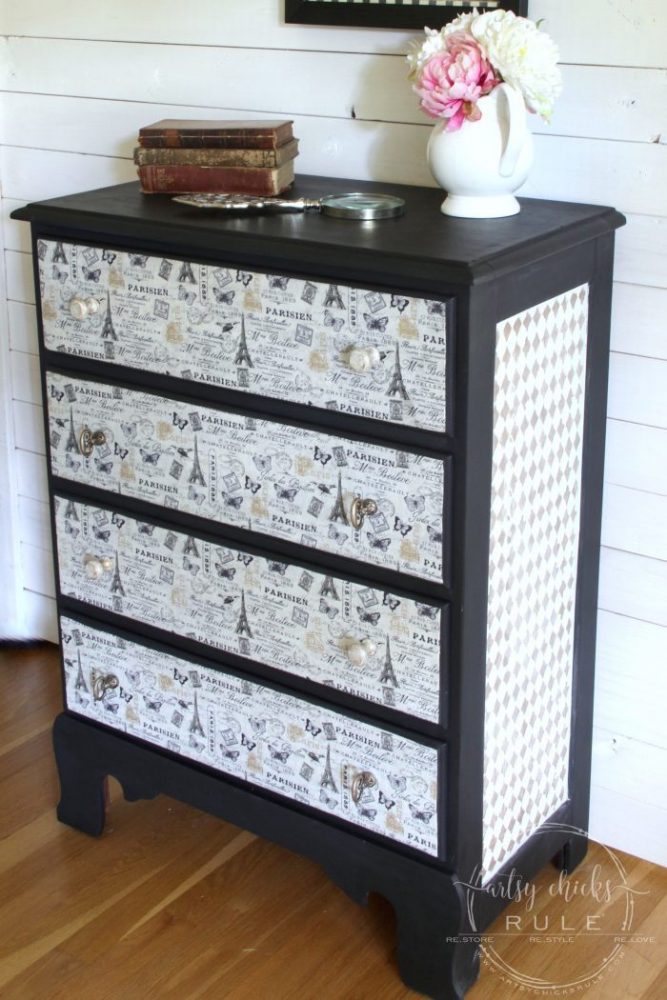
Quite a bit different than how it started, huh?
I staggered the print and knobs as you can see below.
Have you ever used fabric to decoupage? If you haven’t, you should give it a go!
There are SO many pretty fabrics out there. And if you are like me and can’t find something you had in mind, try sheets instead.
They can end up being cheaper too, depending on what you find.
I’d love to see or hear about your fabric decoupage projects too!
PIN this Fabric Decoupage Tutorial to save it for later!
Be sure to pop in next week to see what I did with this little table! (broken and sad…but not anymore!)
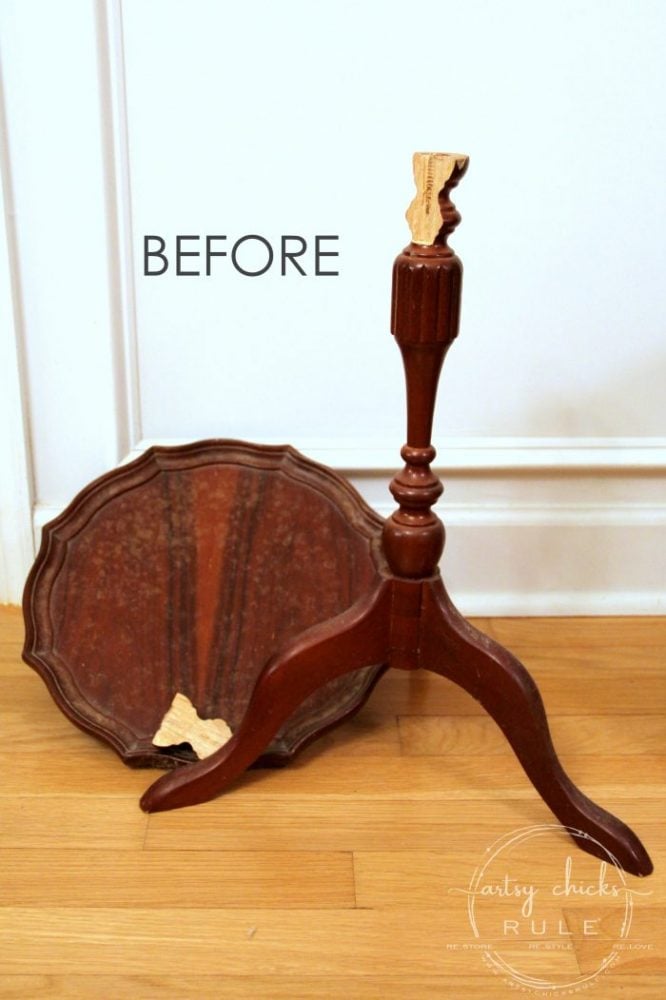
UPDATE!! See it now, here!!
Happy weekend to you!
xo


")


love this…that fabric is gorgeous! Thanks for sharing :)
Thanks Korinne! :) xo
hey girl- love the makeover! so cool!
Hey Shawnna!! Thanks so much! :) xo
Ooooo LaLa !!!
Thanks! :)
I am in love with the fabric and the idea of decoupage on furniture Thank you for sharing
Thanks Norma!! Isn’t that fabric just gorgeous?! I love it too!! xo
I tried decoupage once w a very similar fabric, something weird happened tho, some kind of bleed through plus the fabric frayed. Never tried again
Aw I’m sorry Chris! Yes, sometimes wood stain can bleed through but a sealer coat first would help that. I imagine even paint can too depending on what you are working with. If you have a really dark color and a light color fabric, painting it white first might help with that issue too. The fabric can fray so I try to handle it minimally as I do it. Maybe you could give it another go sometime?
REALLY nice, Nancy… love the gold/black/gray and how it all compliments each other so well.
Thank you Julie!! I am really happy with how this one turned out! :) xo
As for fabric fraying might use some clear fabric glue watered down a bit with a brush around the edges. Or use a product called Fray Check, also clear and will stop fraying
Oh, good tips! Thank you Jody! :) xo
where did you sand between coats to stop the fabric lifting? doesn’t this ruin the fabric/finish?
I sanded to smooth out the roughness. Only lightly with fine-grit, it doesn’t ruin the fabric at all. :)
WOW!!!!!!! That is so cool! What a difference, holy moly.
Love it. So clever!
Thanks, Michele!! I haven’t done any fabric drawer fronts in a while! I actually pulled out a new floral sheet set from my stash I bought years ago to use on a dresser (front) and never did. I might have to get to it! xo
I absolutely love the way this dresser turned out! Would like to know what you used as the Topcoat. You are a constant source of inspiration❣️
Thank you, Cat! I used a water based satin poly. Any water based poly (satin or gloss etc) will work fine. Here is the one I would recommend now. And thank you for that, I am so glad to be able to do that! :)
Love, love, LOVE!…This dresser!!!
Thank you so much, Marietta!! xo